

This can be a little difficult. Installation of the spice pull out shelf.
We have made this full guide after our client Chablis had such a hard time with our old Instructions. Thank you Chablis for pointing out or ineffective directions. We hope these help.
1) Assemble the cabinet as instructed in the standard cabinet assembly.
2) Start by laying spice rack shelf out and select which side is the front.

3) Take a glide. Locate it on the lowest shelf about half way. The metal extension goes flush to the front. Add a small screw here.

4) Measure to make the glide nice and level onto the side.

5) Screw In place. You can move teh glide to expose a new hole to use. Screws must be set but not stripped into the wood.

6) Your first part of the glide is on. Extend it in and out to check it does not hit your screws.

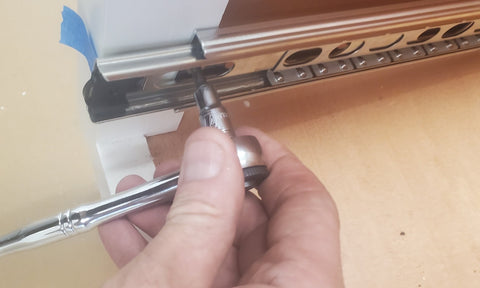
7) The glide is on. Add the metal boot. This can be a little difficult.

8) Flip it over.
9) Add the second glide to the side of the top shelf. Make it nice and level on the side.

10) Place the spice rack into the cabinet. Use non marking tape to proximate the location of the glide.

11) Remove the glides into two separate pieces. Find the black plastic pressure lock. Press it with your finger. Pull the glide away (Left in this picture)

It will pull away and expose the entire black clip.

12) Secure the left glide to the proximate location. Attach so all metal is on the rear piece of face frame.
13) Proper location.

14) Measure front height. Level glide to back and secure back position.

15) Your glide should look parallel to the cabinet wall.

16) Measure the inside of the glide. 3cm. We will use this in a minute.

17) Place the bottom glide back together by inserting it from the front. The upper glide will rest on the side and look very square.

18) The top boot is almost in place.

19) Measure the 3cm. Secure the top boot. You will need to extend the spice rack out to front.

20) Spice rack is secured into cabinet and should operate freely.

21) Place your door into the front hole. Push it up to the front of the spice rack. Add fillers/spacers to get ready to secure door to front.

22) Add one screw. 1" is best. A longer screw may penetrate through the front of the cabinet door.

23) Secure the front with a second screw in the top section without moving the spacers.

24) Open the door. Secure the bottom section.

25) Add top bumper and bottom bumper.

You are done.

