 833-377-8663

Avoiding Common Kitchen Cabinet Mistakes: A Complete Guide

Table of Contents
- Why Avoiding Common Kitchen Cabinet Mistakes Matters
- Inaccurate Measurements and Layout Planning
- Understanding Standard Kitchen Cabinet Dimensions
- Poor Workflow and Kitchen Triangle Efficiency
- Inadequate Circulation Space and Clearance
- Choosing Low-Quality Materials and Finishes
- How to Choose Kitchen Cabinet Hardware
- Ignoring Storage Needs and Organization
Last Updated: June 25, 2026
Kitchen renovations rank among the most expensive home improvement projects homeowners undertake, making cabinet mistakes critical to avoid before ordering. At RTA Wholesalers, we've worked with thousands of homeowners and contractors, and the same preventable errors appear repeatedly. Below, we walk through every major pitfall, from botched measurements to ignored storage needs, so you can plan with confidence and avoid costly rework.
Cabinet mistakes form a chain: a measurement error leads to a layout problem, which creates a workflow issue, leaving you with a kitchen that looks fine but functions poorly every day. Understanding that chain is key to getting this right.
Why Avoiding Common Kitchen Cabinet Mistakes Matters
Cabinet errors are among the most expensive renovation mistakes to fix after installation because cabinets are structural, not decorative. Correcting them means removing finished work, reordering custom pieces, and paying additional labor.
According to National Kitchen and Bath Association guidelines on kitchen planning, poor planning is the leading cause of kitchen renovation dissatisfaction. Most homeowners who report regret cite functional problems, not cosmetic ones. The cabinet that blocks the refrigerator door still frustrates them every morning.
Nearly every common mistake is avoidable with deliberate planning.
| Common Mistake | Root Cause | Fix |
|---|---|---|
| Inaccurate measurements | Rushing the planning phase | Measure twice, verify with a professional |
| Poor workflow layout | Ignoring the kitchen triangle | Map traffic flow before ordering |
| Insufficient clearance | Overlooking door/drawer swing | Apply NKBA minimum clearance standards |
| Low-quality materials | Prioritizing upfront cost | Evaluate construction, not just finish |
| Ignored storage needs | Focusing on cabinet count | Plan by item category, not box quantity |
| Poor installation alignment | DIY without experience | Use a level, shims, and proper anchoring |
| Inconsistent cabinet heights | Mixing stock sizes carelessly | Confirm heights across all runs before ordering |
| Skipping lighting integration | Treating lighting as an afterthought | Plan under-cabinet and interior lighting early |
Inaccurate Measurements and Layout Planning
Measurement errors are the single most common reason cabinet orders go wrong. A half-inch gap can mean a filler strip that looks patched, a cabinet that won't open fully, or an appliance that doesn't fit. These errors are usually discovered after delivery, when reversing course is expensive.
The most common mistake is measuring only obvious dimensions: wall length, ceiling height, and floor-to-ceiling distance. What most people skip is accounting for out-of-plumb walls, uneven floors, and existing obstructions like electrical panels, plumbing stubs, and HVAC vents.
How to Measure Correctly for Cabinet Installation
Accurate cabinet installation requires more than a tape measure:
- Measure wall width at three heights: floor level, counter height (roughly 36 inches), and upper cabinet height. The smallest measurement governs your layout.
- Check floor levelness: Use a 4-foot level across the entire floor run and note the highest point.
- Mark all obstructions: Locate every electrical outlet, switch, plumbing supply, drain, and vent.
- Measure ceiling height in multiple spots: Ceiling height varies, especially in older homes.
- Document window and door placements: Note rough opening widths and distances from corners.
- Verify appliance dimensions: Confirm the exact depth, width, and height of your refrigerator, range, and dishwasher.
Understanding Standard Kitchen Cabinet Dimensions
Base cabinets are typically 34.5 inches tall (reaching 36 inches with a standard countertop), 24 inches deep, and available in widths from 9 to 48 inches in 3-inch increments. Wall cabinets are typically 12 to 15 inches deep and range from 12 to 42 inches in height.
Understanding these standards matters because deviating from them creates gaps and mismatches difficult to resolve with stock filler pieces. However, standard dimensions are not universal constraints. Many kitchens require non-standard sizing, where custom cabinetry becomes worthwhile. RTA Wholesalers' custom order inset cabinets are available in custom sizes and colors, so you are not forced to fill awkward spaces with filler strips.
Key dimension rules:
- Toe kick height: Standard is 4.5 inches and affects ergonomics noticeably.
- Upper cabinet bottom height: Typically 54 inches from the floor, leaving 18 inches of backsplash space above the counter.
- Refrigerator surround clearance: Allow at least 1/4 inch on each side and 1 inch above for ventilation.
- Dishwasher opening: Standard dishwashers require a 24-inch-wide opening with specific plumbing and electrical rough-in locations.
Inconsistent cabinet heights across a run create an uneven countertop that is both visually jarring and functionally problematic.
Poor Workflow and Kitchen Triangle Efficiency
The kitchen triangle connects the three primary work zones: the refrigerator, the sink, and the cooking surface. When positioned so movement between them is natural and unobstructed, the kitchen functions efficiently. When poorly arranged, the kitchen feels exhausting to work in, regardless of how beautiful the cabinets look.
Many homeowners plan cabinet placement based on what fits visually, not what works functionally. They see a wall and fill it with cabinets without ever walking through the workflow.
According to Cornell University's ergonomics research on kitchen design and workflow efficiency, kitchen layout directly affects both physical strain and task completion time.
Practical fixes for workflow efficiency:
- Map your actual movement patterns before finalizing layout.
- Keep the triangle perimeter between 12 and 26 feet. Shorter creates congestion; longer creates unnecessary walking.
- Avoid placing the island directly in the triangle path.
- Position trash and recycling near the sink and prep zone.
- Plan landing zones next to every major appliance: 15 inches minimum beside the refrigerator, 12 inches on each side of the cooktop.
Inadequate Circulation Space and Clearance
Clearance mistakes are felt every day. A cabinet door that opens into a refrigerator handle, a drawer that cannot fully extend because the island is too close, or an aisle so narrow that two people cannot pass without turning sideways create low-grade daily frustrations.
The NKBA recommends a minimum of 42 inches of clearance in a one-cook kitchen and 48 inches in a multi-cook kitchen for the primary work aisle. Many designers push for 48 to 54 inches wherever possible.
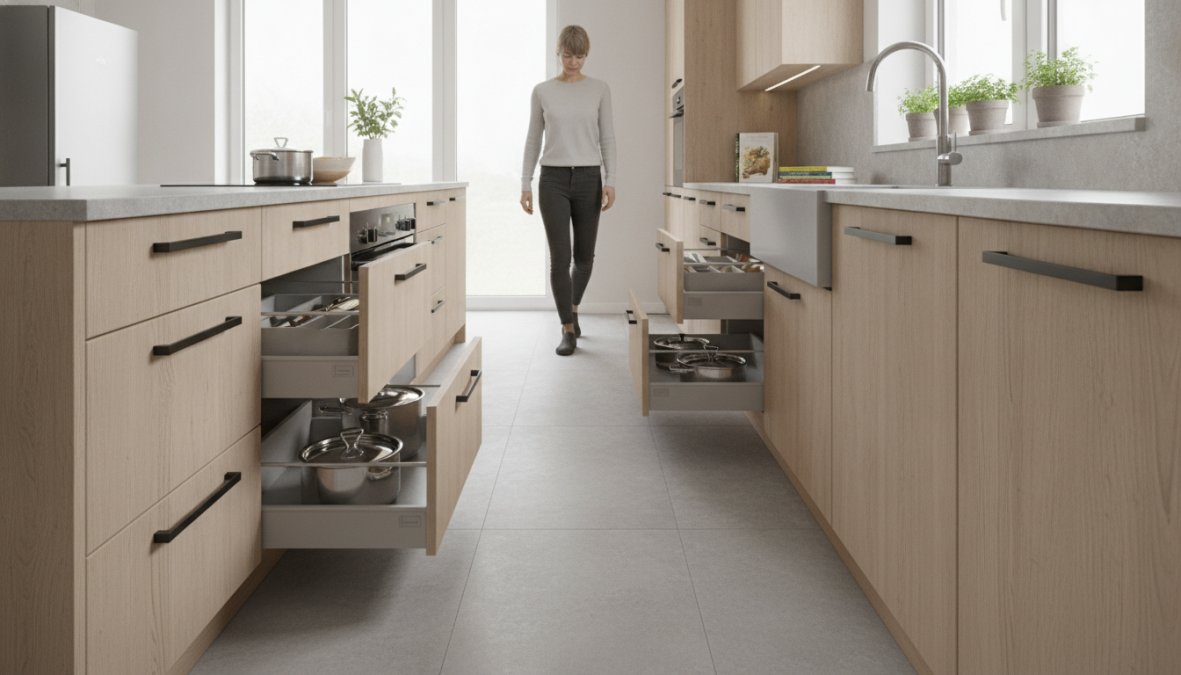
Beyond aisle width, clearance planning covers:
- Door swing radius: Every cabinet door and appliance door needs clear swing space.
- Drawer extension: Full-extension drawer slides require the full drawer depth of clear space in front of the cabinet.
- Dishwasher door: An open dishwasher door extends 24 inches into the kitchen.
- Corner cabinet access: Blind corner cabinets require specific clearance for the rotating mechanism to function properly.
Choosing Low-Quality Materials and Finishes
The biggest misconception in cabinet shopping is that finish quality equals overall quality. A beautiful door finish on weak box construction is a cabinet that looks good for two years and fails for the next twenty.
Cabinet quality is determined primarily by box construction, not door style. The box is the structural component that takes the weight of the countertop, stored items, and daily opening and closing stress.
Box construction to evaluate:
- Material: Plywood boxes are significantly more durable than particleboard. Plywood resists moisture, holds screws better, and does not sag under load.
- Joinery: Dovetail or dowel-joined drawers outlast stapled or glued-only construction.
- Drawer slides: Full-extension, soft-close drawer slides are the standard for quality cabinetry.
- Hinge quality: Six-way adjustable soft-close hinges allow for alignment correction after installation.
Material durability extends to finish. Thermofoil finishes are economical but can peel at edges near cooktops. Painted finishes on MDF or solid wood hold up well when properly applied. According to Forest Stewardship Council guidance on sustainable wood products and durability, harder wood species resist denting and scratching more effectively.
RTA Wholesalers' assembled cabinets are available in multiple wood species and stain colors, as well as unlimited Sherwin Williams paint colors, giving you finish durability without sacrificing design flexibility.
How to Choose Kitchen Cabinet Hardware
Choosing kitchen cabinet hardware correctly means balancing ergonomics, durability, and visual consistency with your design theme. Hardware is the most touched surface in your kitchen, often hundreds of times per day, so function must come before aesthetics.
The most common hardware mistake is selecting pulls and knobs based solely on appearance in a showroom, without testing them in context. A knob that looks elegant on a display door can be awkward to grip on a deep base cabinet drawer.
Practical hardware selection guidance:
- Pulls over knobs for drawers: Pulls provide better grip for heavy drawers.
- Finish consistency: Match hardware finish to your faucet and appliance handles.
- Scale to door size: Hardware should be proportional to the cabinet.
- Solid metal over zinc alloy: Solid brass or stainless steel hardware outlasts lightweight zinc alloy.
- Soft-close mechanisms: Add soft-close adapters if your cabinets do not include integrated soft-close hinges.
Ignoring Storage Needs and Organization
The most underestimated kitchen cabinet mistake is planning for cabinets instead of planning for storage. A kitchen can have abundant cabinet space and still feel chaotic if the interior organization does not match how the kitchen is actually used.
Most people plan by counting boxes: "I need upper cabinets here, base cabinets there." What they should plan is a storage inventory: pots, pans, baking sheets, small appliances, dry goods, cleaning supplies, and cutting boards.
Kitchen Cabinet Organization Hacks for Maximum Efficiency
Effective kitchen cabinet organization starts before the cabinets are ordered. Interior fittings are far easier and less expensive to specify upfront than to retrofit later.
High-impact organization features to plan in advance:
- Pull-out trays in base cabinets: Pull-out trays bring the entire depth into reach.
- Vertical storage dividers: Baking sheets and cutting boards store more efficiently on edge.
- Drawer organizers for utensils: Deep drawers with internal dividers replace the cluttered utensil drawer.
- Lazy susans in corner cabinets: A full-round or kidney-shaped lazy susan recovers the majority of corner space.
- Rollout shelves in the pantry cabinet: Rollout shelves at varying heights create accessible, organized vertical storage.
- Under-sink organization: Tension rod organizers, pull-out bins, and tiered shelving reclaim this space effectively.
According to University of Florida IFAS Extension guide on functional kitchen design and storage planning, organizing storage by frequency of use and proximity to the relevant work zone reduces prep time and physical strain significantly.
The other storage mistake: ignoring vertical space. Most kitchens have 12 to 24 inches of space between the top of upper cabinets and the ceiling. Extending upper cabinets to the ceiling eliminates that dust-collecting gap and adds meaningful storage.
Lighting Integration Mistakes
Cabinet lighting is not a luxury upgrade. It is a functional necessity that affects how well you can see what you are doing in your kitchen.
The most common lighting mistake is treating it as a finish decision rather than a planning decision. Under-cabinet lighting requires electrical rough-in during construction. Interior cabinet lighting for glass-front cabinets requires wiring through the cabinet box. If you wait until cabinets are installed to think about lighting, you face visible wire runs or expensive post-installation electrical work.
Lighting integration to plan before ordering:
- Under-cabinet task lighting: LED strip lights or puck lights mounted to the underside of upper cabinets illuminate the countertop work surface.
- Interior cabinet lighting: Glass-front cabinets with interior LED lighting require a power source routed through the cabinet.
- Toe kick lighting: Low-profile LED strips in the toe kick create ambient floor-level lighting that is both practical and visually striking.
- Accent lighting above upper cabinets: Uplighting softens the visual transition between cabinets and ceiling and makes the kitchen feel larger.
The throughline connecting all these mistakes is the same: they are planning failures, not execution failures. The kitchen that functions poorly was designed poorly. The kitchen that functions well was thought through carefully before a single cabinet was ordered.
Planning a kitchen renovation without a clear process for avoiding common kitchen cabinet mistakes is the fastest route to a project that costs more than it should and delivers less than you hoped. RTA Wholesalers offers inset and overlay cabinet options in custom sizes and colors at wholesale pricing, along with a free kitchen design service to help you get the layout, dimensions, and storage plan right before you order. Get started with RTA Wholesalers and build a kitchen that works as well as it looks.
Frequently Asked Questions
What are the most common kitchen cabinet mistakes people make?
The most frequent errors include inaccurate measurements, poor workflow layout that ignores the kitchen triangle, inadequate circulation space, choosing low-quality materials, and inconsistent cabinet heights. Many homeowners also overlook storage organization needs and skip professional installation when complexity demands it. Avoiding these common kitchen cabinet mistakes starts with careful planning, precise measurements, and understanding your space's functional requirements before ordering or installing cabinets.
How do I avoid mistakes with standard kitchen cabinet dimensions?
Verify standard kitchen cabinet dimensions before ordering: base cabinets are typically 34.5 inches tall and 24 inches deep, while wall cabinets are usually 12, 15, or 18 inches deep. Measure your space multiple times at different heights, as walls are rarely perfectly square. Account for appliance dimensions, door swing clearance, and drawer pull-out space. Consider custom sizing if your kitchen layout doesn't align with standard dimensions, custom options are available in most any size to fit your exact space.
What should I know about kitchen cabinet installation tips to avoid costly errors?
Proper kitchen cabinet installation tips include ensuring cabinets are level and plumb before securing, using appropriate fasteners for your wall type, and leaving adequate gaps for appliances and clearance. Poor installation and alignment cause doors to stick, drawers to misalign, and structural failure over time. Whether you choose DIY or professional installation, verify that all cabinets are secured to wall studs, not just drywall. Professional contractors catch alignment issues early, preventing expensive corrections later.
How can kitchen cabinet organization hacks improve my storage efficiency?
Kitchen cabinet organization hacks include installing pull-out trays, lazy susans, and vertical dividers to maximize space and accessibility. Drawer slides with soft-close features reduce wear and improve functionality. Plan storage by frequency of use, everyday items at eye level, seasonal items higher or lower. Incorporate adjustable shelving to adapt as needs change. Proper organization prevents wasted space, makes items easier to find, and extends cabinet lifespan by reducing strain on hardware and structures.


