 833-377-8663

Can You Paint RTA Cabinets? A Complete Painting Guide

Table of Contents
- Can You Paint RTA Cabinets? Yes, Here's What You Need to Know
- How to Prepare RTA Cabinets for Painting
- Best Paint for RTA Cabinets: Acrylic vs. Oil-Based Options
- RTA Cabinet Painting Process: Step-by-Step Instructions
- Pros and Cons of Painting Ready-to-Assemble Cabinets
- RTA Cabinet Painting Cost: DIY vs. Professional Considerations
- Common Mistakes to Avoid When Painting RTA Cabinets
- Warranty and Durability: What You Should Know
Last Updated: July 30, 2026
Can You Paint RTA Cabinets? Yes, Here's What You Need to Know
Yes, you absolutely can paint RTA cabinets, and many homeowners and contractors do it successfully every year. Painting ready-to-assemble cabinets works well when you follow proper preparation steps, choose the right paint type, and understand the material you're working with. The success of your project depends almost entirely on surface preparation, not on the paint itself. Spend 70% of your effort on prep, and the final 30% on application.
Below, we'll walk you through exactly how to assess your cabinets, prepare them for painting, select the best paint for your specific material, and apply it like a professional.
How to Prepare RTA Cabinets for Painting
Preparation is where most cabinet painting projects succeed or fail. A common mistake is rushing through this phase because it feels tedious. Don't.
Assessing Material Type and Factory Finish
Before you buy paint, you need to know what you're working with. RTA cabinets come in several material types, each requiring slightly different handling.
Solid wood cabinets (oak, maple, cherry, hickory) have visible grain patterns and are straightforward to paint. Sand lightly with 120-150 grit sandpaper to dull the finish and improve paint adhesion.
MDF (medium-density fiberboard) and particleboard are engineered materials used in budget-friendly RTA options. These are easier to paint than solid wood because they have no grain to worry about. However, they're more prone to absorbing moisture, so you'll need a primer that seals the material.
Veneer cabinets have a thin layer of real wood glued to an MDF or particleboard base. These can be painted, but you must sand carefully to avoid sanding through the veneer layer. Use 120-grit sandpaper and light pressure.
Run your hand across the cabinet surface. If it feels smooth and glossy, it has a factory finish that needs to be dulled. Either way, you're sanding to create mechanical adhesion, giving the paint something to grip.
Cleaning, Degreasing, and Sanding Steps
Step 1: Clean with a degreaser. Use a TSP (trisodium phosphate) solution or a commercial cabinet degreaser. Wipe down every surface, cabinet doors, drawer fronts, frames, and interiors. Pay special attention to the tops of cabinets where dust and kitchen grease accumulate. Let the cabinets dry completely (at least 4 hours, ideally overnight).
Step 2: Sand the entire surface. Use 120-150 grit sandpaper. Sand in the direction of the wood grain if visible. The goal is to dull the finish enough that primer and paint can grip. You should see a uniform, slightly matte appearance across the surface.
Step 3: Fill gaps and imperfections. Use paintable caulk or wood filler to seal gaps between cabinet panels, around hardware holes, or where panels meet frames. Sand these smooth once dry.
Step 4: Final wipe-down. Use a tack cloth to remove all sanding dust. Wipe with a slightly damp cloth and let dry completely.
The entire prep process typically takes 8-16 hours depending on your cabinet size. Budget 2-3 days for prep alone.
Best Paint for RTA Cabinets: Acrylic vs. Oil-Based Options
Choosing the right paint matters more than most people realize. The wrong paint will chip, peel, or fail to adhere properly no matter how well you prepped.
Acrylic latex paint (water-based) is the most popular choice for cabinet painting today. It dries quickly (2-4 hours between coats), has low odor, and cleans up with water. Quality acrylic paints designed for cabinets offer good durability and can handle moisture and daily wear.
Oil-based paint (alkyd) dries more slowly (8-24 hours between coats) but creates a harder, more durable finish. It flows smoothly and levels beautifully, which is why professional painters often prefer it. The trade-off is strong odor, longer drying times, and cleanup requires mineral spirits.
For RTA cabinets specifically, acrylic latex paint designed for kitchen and bath applications is the practical choice for most DIY projects. Look for paints labeled "cabinet paint," "trim paint," or "semi-gloss interior." Avoid cheap interior latex paint; it won't hold up to cabinet use.
Primer is non-negotiable. Use a bonding primer designed for glossy surfaces, especially if your cabinets have a factory finish. For MDF or particleboard, use a primer that seals the material and prevents moisture absorption. Primer creates the foundation for paint adhesion; skipping this step is where most DIY projects run into problems.
RTA Cabinet Painting Process: Step-by-Step Instructions
Step 1: Set up your workspace. Remove cabinet doors and drawer fronts if possible; this makes painting dramatically easier. Label each piece so you know where it goes back. Lay them flat on sawhorses or a work table covered with plastic sheeting. Ensure good ventilation and protect the surrounding area from overspray.
Step 2: Apply primer. Use a quality brush or foam roller designed for smooth finishes. Primer should be applied thin and even; thick coats lead to drips and uneven drying. Allow primer to dry per manufacturer instructions (typically 2-4 hours for acrylic, longer for oil-based).
Priming for Better Adhesion and Durability
Primer seals the substrate (especially important for MDF), provides a surface that paint adheres to, and blocks stains or discoloration from showing through. Skipping primer on glossy factory-finished cabinets almost always results in paint peeling within 6-12 months.
Apply primer in thin, even coats. Two coats over a glossy factory finish ensures complete coverage and sealing. For MDF or particleboard, primer is even more critical because these materials absorb moisture readily.
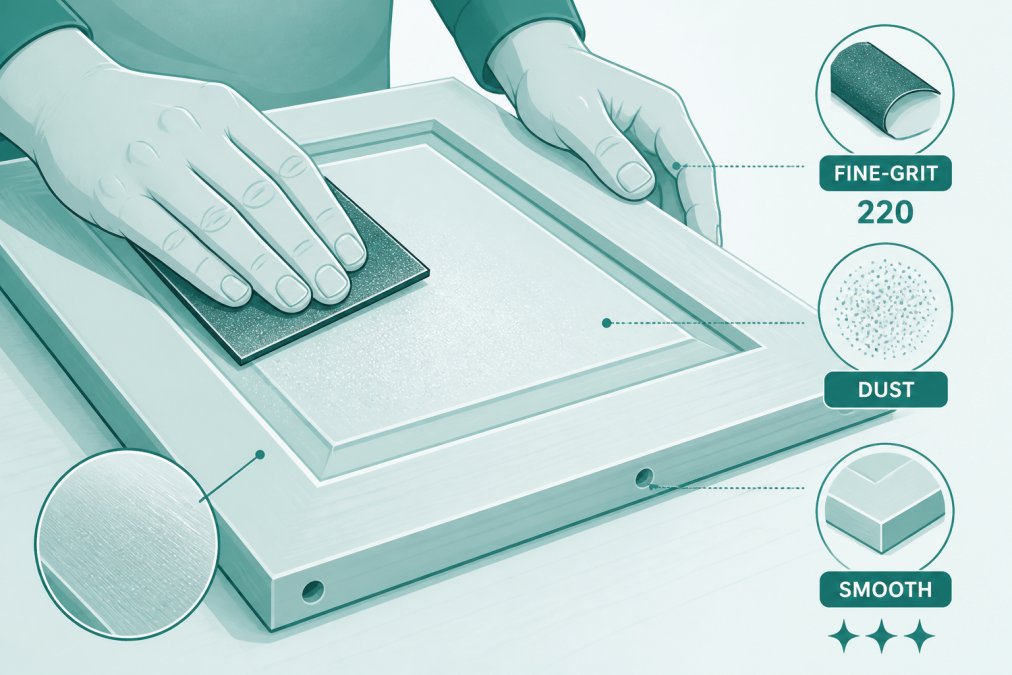
After primer dries, do a light sanding with 220-grit sandpaper. This removes any dust particles or slight brush marks and provides tooth for the paint to grip. Wipe with a tack cloth again.
Applying Top Coats and Achieving Professional Results
Paint application is where technique becomes visible. The difference between a DIY-looking job and a professional finish often comes down to brush technique and coat thickness.
Apply paint in thin, even coats. Plan on 2-3 thin coats rather than 1-2 thick coats. Thin coats dry evenly and build a smooth surface. Each coat should take 30-45 minutes to apply across all cabinet doors and frames.
Use the right tools. For smooth finishes on doors, a foam roller or high-quality brush creates better results than a cheap brush. Invest in a quality brush; the difference is noticeable.
Paint technique matters. Apply paint in the direction of any wood grain. Use smooth, overlapping strokes. Avoid going over wet paint repeatedly, as this causes brush marks and uneven finish. Let each coat dry completely before sanding lightly and applying the next coat.
The entire painting process (primer + 2-3 coats of paint) typically takes 5-7 days from start to finish when accounting for drying time.
Pros and Cons of Painting Ready-to-Assemble Cabinets
Pros:
- Cost-effective transformation. Painting is significantly cheaper than replacing cabinets entirely.
- Customization options. You can choose any color, giving you design flexibility that off-the-shelf options don't always provide.
- Reversible. If you change your mind about the color in five years, you can paint again.
- Faster than replacement. A painting project takes days to weeks; cabinet replacement takes weeks to months.
- Works on most materials. Whether your RTA cabinets are solid wood, MDF, or veneer, painting is feasible with proper preparation.
Cons:
- Labor-intensive prep work. The preparation phase is the longest and least enjoyable part. Budget 8-16 hours just for cleaning, degreasing, and sanding.
- Durability depends on maintenance. Painted cabinets need care. Avoid excessive moisture and direct heat. Painted finishes can chip or wear in high-traffic areas.
- Material limitations. If your cabinet material is already damaged (peeling veneer, water-damaged MDF), painting won't solve the underlying problem.
- Not ideal for glossy factory finishes on low-quality materials. Some budget RTA cabinets have finishes that resist paint adhesion even with proper prep.
| Situation | Painting Works Well | Painting May Struggle |
|---|---|---|
| Solid wood cabinets with stain finish | Yes | , |
| Quality MDF with factory finish | Yes | , |
| Veneer over MDF | Yes (with care) | , |
| Cheap laminate veneer | Maybe | Peeling risk |
| Water-damaged particleboard | No | High failure rate |
| Custom color requirement | Yes | , |
| Budget constraints | Yes | , |
RTA Cabinet Painting Cost: DIY vs. Professional Considerations
The financial calculus of painting versus hiring a professional depends on your time, skill level, and the size of your project.
DIY approach requires an investment in materials: primer, paint, sandpaper, brushes, rollers, degreaser, and potentially caulk or wood filler. The real cost is your time, 40-60 hours of labor if you're doing it yourself.
Professional painting costs more upfront but saves time and often delivers a more polished result. Professionals have industrial equipment, spray systems, and experience with problem materials.
The decision comes down to: Do you have the time, do you enjoy the work, and do you have the skill to execute it well? A practical middle ground: hire professionals for the most visible cabinets (kitchen island, upper cabinets at eye level) and DIY the less visible ones.
Common Mistakes to Avoid When Painting RTA Cabinets
Mistake 1: Skipping primer or using cheap primer. This is the single most common failure point. Primer isn't optional; it's the foundation. Use a bonding primer designed for glossy surfaces.
Mistake 2: Inadequate surface preparation. Rushing through sanding and degreasing leads to paint adhesion failure. Spend the time here.
Mistake 3: Applying paint too thick. Thick coats look glossy, drip, and take forever to dry. Multiple thin coats produce a better finish.
Mistake 4: Not allowing adequate drying time between coats. Humidity affects drying times significantly. In humid conditions, allow extra time.
Mistake 5: Painting without removing hardware. Painting around hinges, handles, and knobs produces sloppy results. Remove hardware before painting and reinstall after.
Mistake 6: Using the wrong paint type for the material. MDF and particleboard need primer that seals the material. Using standard paint directly on unsealed MDF leads to absorption and poor finish.
Mistake 7: Not protecting the surrounding area. Overspray happens. Protect floors, countertops, and walls with plastic sheeting.
Mistake 8: Ignoring ventilation. Paint fumes are unpleasant and potentially harmful. Ensure good air circulation, open windows, or use fans.
Cabinet painting is a 1-2 week project when you account for drying time, and it requires patience and attention to detail. Rushing any phase compounds problems that appear weeks later.
Warranty and Durability: What You Should Know
Painted cabinets are durable when done correctly, but durability is conditional on a few factors.
Painted finish durability. A well-executed painted finish on quality cabinets lasts 5-10 years in normal kitchen use. High-traffic areas may show wear sooner. Moisture exposure accelerates deterioration, so painted cabinets in humid kitchens or bathrooms need extra care.
Maintenance matters. Painted cabinets need gentle care. Avoid harsh scrubbing, excessive moisture, and direct heat. Wipe spills promptly. Use soft cloths and mild soap.
Touch-ups and repairs. Keep leftover paint for future touch-ups. Small chips and nicks are inevitable; having the exact paint color allows you to repair them before they become larger problems.
Warranty implications. If your RTA cabinets came with a manufacturer warranty, painting may void it. Check your warranty documentation. Most warranties don't cover cosmetic finishes applied after purchase, only structural defects. Custom color inset cabinetry from RTA Wholesalers, available in custom sizes and finished at the factory, comes with the manufacturer's warranty intact because the finish is applied under controlled conditions.
The durability question often comes down to material quality. Painting quality MDF or solid wood cabinets produces durable results. Painting cheap particleboard or damaged veneer produces mediocre results that deteriorate faster.
Painting RTA cabinets is entirely feasible and delivers real results when you invest in proper preparation, quality materials, and patience. If you're considering a cabinet refresh and want the flexibility of custom colors without the cost of replacement, painting is a practical solution. For those who prefer factory-finished cabinets with guaranteed durability and unlimited color customization, RTA Wholesalers offers Inset cabinets that are top quality and available in Custom sizes and Custom colors at great Wholesale pricing. Explore your options and find the solution that fits your timeline and budget.
Frequently Asked Questions
Can you paint pre-finished RTA cabinets without sanding?
Sanding is highly recommended before painting RTA cabinets, especially pre-finished ones. The factory finish creates a slick surface that prevents paint adhesion. Light sanding with 120-150 grit sandpaper roughens the surface and helps primer and paint bond properly. Skipping this step often leads to peeling, chipping, and poor durability. Even if you use a primer designed for glossy surfaces, sanding still improves results significantly.
What is the best primer for RTA cabinets?
An oil-based primer or a bonding primer designed for slick surfaces works best for RTA cabinets. Oil-based primers offer superior adhesion on MDF, particleboard, and pre-finished wood. If you prefer water-based options, choose an acrylic latex primer labeled for cabinet use or glossy surfaces. Ensure the primer is compatible with your chosen topcoat paint. Proper priming prevents nicks, chips, and finish failure over time.
How long does it take to paint RTA cabinets?
The timeline depends on the scope and method. Preparation (cleaning, sanding, priming) typically takes 1-3 days. Primer application and drying adds 24-48 hours. Applying two coats of paint and allowing proper cure time between coats adds another 2-4 days. Total project duration: 5-10 days if done methodically with adequate drying time. Professional spray application can reduce this, but DIY brush application requires patience for best results.
What paint do you use on RTA cabinets?
Acrylic latex paint or oil-based paint both work, but choice depends on your priorities. Acrylic latex paint is low-odor, easy to clean, and dries quickly, ideal for DIY projects. Oil-based paint offers superior durability, smoother finish, and better adhesion, but requires solvents for cleanup and longer drying times. Cabinet-specific or trim paint (higher sheen and durability than wall paint) is recommended over standard interior latex. Polyurethane topcoats can seal the finish for added protection.


