 833-377-8663

DIY Cabinet Installation Guide for Beginners

Table of Contents
- DIY Cabinet Installation Guide for Beginners: What You Need to Know
- Essential Tools for Cabinet Installation
- Measuring and Planning Your Cabinet Layout
- How to Level Kitchen Cabinets on Uneven Surfaces
- Step-by-Step Cabinet Installation Process
- Common Cabinet Installation Mistakes to Avoid
- How Long Does It Take to Install Kitchen Cabinets
- Post-Installation Maintenance and Cabinet Repair
DIY Cabinet Installation Guide for Beginners
Last Updated: July 14, 2026
Installing kitchen cabinets yourself is one of the most rewarding home improvement projects you can tackle. A DIY cabinet installation guide for beginners breaks down what seems intimidating into manageable steps. At RTA Wholesalers, we've helped countless customers complete their own cabinet installations by providing quality ready-to-assemble options and clear guidance. The difference between a cabinet installation that lasts decades and one that fails within months comes down to three things: proper planning, correct leveling, and secure fastening to wall studs.
Essential Tools for Cabinet Installation
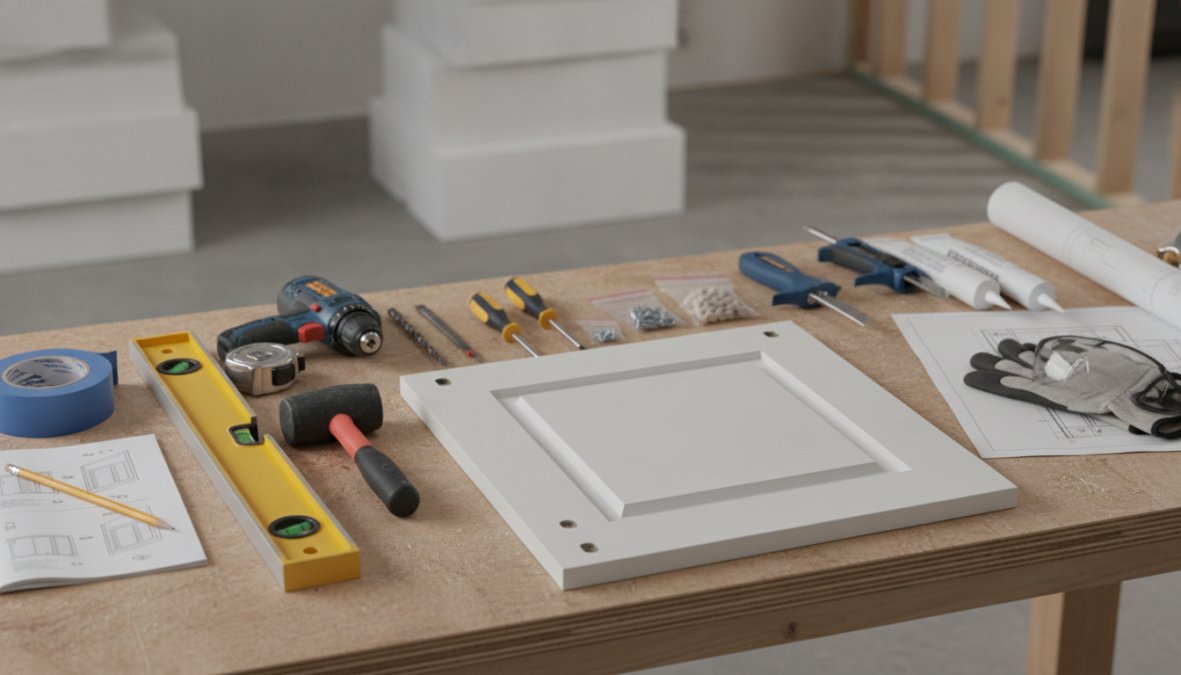
You don't need an expensive workshop to install cabinets successfully. A cordless drill drives screws faster than manual screwdrivers and gives better control over fastener depth. A 24-inch level provides the accuracy you need for checking cabinet alignment. A stud finder eliminates guesswork when locating wall studs, which is critical for secure fastening. A tape measure, pencil, and carpenter's square handle layout and marking tasks.
Where you shouldn't compromise: a quality tape measure and a straight level. These two tools are non-negotiable for cabinet installation. A 25-foot tape measure costs under $15 and lasts for years. A 24-inch level under $20 gives you the accuracy that everything else depends on.
Measuring and Planning Your Cabinet Layout
Accurate measurements determine whether your cabinets fit the space and whether doors and drawers operate smoothly. Start by measuring the height of your wall space in at least three places: left side, center, and right side. Measure the width at the top, middle, and bottom of the wall. Record every measurement in writing or take photos with dimensions marked.
Mark the height where wall cabinets will sit. Standard kitchen wall cabinets hang 18 inches above the countertop, which means they typically sit 54 inches above the finished floor. Use a level to draw a light pencil line marking the top of the wall cabinet boxes. This line guides your installation and ensures all cabinets align perfectly.
Locating Wall Studs and Marking Measurements
Wall studs are the vertical wooden framing members behind drywall, typically spaced 16 inches apart. Cabinets must be fastened directly to studs with appropriate fasteners; drywall alone cannot support the weight of filled cabinets. A stud finder makes locating them simple.
Mark stud locations with light pencil marks at the height where cabinet fasteners will go. Draw a level line at the installation height, then mark every stud location along that line. Take a photo of this marked wall as your reference if pencil marks fade during installation.
Handling Out-of-Square Walls and Floors
Most homes have walls that aren't perfectly vertical or floors that aren't perfectly level. Check whether your walls are plumb using a long level. If the bubble shows the wall is out of plumb, note the direction and amount of deviation. The solution is shimming, which fills gaps between the cabinet and wall, allowing you to keep the cabinet level and plumb even when the wall isn't.
How to Level Kitchen Cabinets on Uneven Surfaces
Leveling is the most critical step in cabinet installation. A cabinet that's level from front to back and left to right will hang straight, doors will operate smoothly, and drawers will slide without binding.
Begin by checking the floor where the base cabinets will sit. Use a level to identify the high and low points. Mark the highest point; this becomes your reference for leveling all base cabinets. For wall cabinets, install temporary support cleats, horizontal boards fastened to the wall at the installation height, to hold cabinets while you level and fasten them.
Shimming Techniques for Perfect Alignment
Shims are thin wooden wedges that fill gaps between cabinets and walls or floors. Insert shims from the back of the cabinet, pushing them between the cabinet frame and the wall. Use your level to monitor the cabinet position as you insert shims. Once the cabinet reads level, tap the shims gently with a hammer to lock them in place.
For base cabinets on uneven floors, place shims under the cabinet bottom at points where the floor is low. Insert shims at each stud location where fasteners will go. Use the minimum number of shims necessary to achieve level and plumb, typically one or two per stud location.
| Shimming Scenario | Problem | Solution | Result |
|---|---|---|---|
| Uneven floor | Cabinet rocks side-to-side | Shims under base at low points | Cabinet stable and level |
| Out-of-plumb wall | Cabinet tilts away from wall | Shims behind cabinet frame | Cabinet plumb and tight to wall |
| Sagging floor | Cabinet settles unevenly | Shims at each stud fastener point | Even weight distribution |
| Twisted cabinet | Doors bind, drawers stick | Remove fasteners and re-shim | Smooth operation |
Step-by-Step Cabinet Installation Process
The order matters. Install wall cabinets first, then base cabinets. This prevents base cabinets from interfering with your access to wall cabinet fasteners. Connect cabinets face-to-face using clamping and fasteners to create a unified structure that resists racking and twisting.
Installing Wall Cabinets First
Find the highest point along your installation line using a level. This becomes your reference; all wall cabinets will align to this point. Draw a level line at this height using a laser level or a 4-foot level and pencil.
Install temporary support cleats along this line. These are 1x4 or 2x6 boards fastened to studs with fasteners long enough to support cabinet weight. Position the first wall cabinet on the cleat and check for level front-to-back and left-to-right. Insert shims behind the cabinet frame where it doesn't contact the wall. Once level, drive fasteners through the cabinet frame into wall studs, typically 2.5-inch wood screws for 3/4-inch cabinet frames.
Position the next cabinet adjacent to the first with no gap between cabinet frames. Check that both cabinets are level and plumb, then clamp the face frames together. Drive fasteners through one face frame into the other, creating a rigid connection. Repeat for all wall cabinets. Remove cleats after all fasteners are driven.
Installing Base Cabinets and Securing to Studs
Base cabinets sit on the floor and support countertops, so they must be perfectly level and securely fastened. Locate the high point of the floor in your installation area. Position the first base cabinet and check for level in all directions. Insert shims under the cabinet bottom where the floor is low. Once level, drive fasteners through the cabinet frame into wall studs.
Position the next cabinet adjacent to the first and clamp the face frames together. Check level again, as positioning a new cabinet sometimes shifts the first one slightly. Adjust shims if needed. Drive fasteners through the clamped face frames, then fasten to wall studs. Continue for all base cabinets. After all cabinets are fastened to the wall, trim excess shim material with a utility knife.
Connecting Cabinet Faces and Clamping
Face frame connections prevent cabinets from racking and twisting out of square. Use bar clamps or C-clamps to pull cabinet faces tight together. Tighten clamps gradually, checking that cabinets remain level as you tighten. Drive fasteners through the overlapping face frame into the adjacent cabinet frame. Typically, two fasteners per connection point (top and bottom) are sufficient. After fastening, release clamps and check that cabinets remain aligned.
Common Cabinet Installation Mistakes to Avoid
Fastening to drywall instead of studs is the most common critical error. Drywall provides almost no holding power for cabinet fasteners. Cabinets fastened only to drywall will sag, shift, and eventually fail. Always locate studs and fasten directly into them.
Installing cabinets without checking level causes doors to swing open or closed on their own and drawers to bind. Check level multiple times during installation.
Using insufficient shims or placing them unevenly causes cabinet frames to twist, stressing hinges and drawer slides. Use shims at every stud fastener location and insert them evenly.
Connecting cabinets with fasteners only, without clamping first creates weak connections that allow racking. Always clamp face frames tight before driving fasteners.
Skipping the measurement phase or measuring only once leads to cabinets that don't fit or don't align. Measure multiple times at different heights and widths.
Installing base cabinets before wall cabinets makes it difficult to reach fastener locations on wall cabinets. Install wall cabinets first when you have clear access to the wall.
How Long Does It Take to Install Kitchen Cabinets
Installation time varies based on the number of cabinets, wall and floor condition, and installer experience. A single wall cabinet takes 30-45 minutes from positioning to final fastening. A complete kitchen with 12-15 cabinets typically takes 8-16 hours spread across 2-3 days.
The measurement and planning phase takes 1-2 hours and shouldn't be rushed. Actual fastening and leveling takes 45 minutes to 1 hour per cabinet once you understand the process. Connecting cabinets face-to-face adds 15-20 minutes per connection. The most common delay is shimming and re-checking level. If your walls are significantly out of plumb or your floor slopes noticeably, expect to spend extra time adjusting shims and verifying level repeatedly.
Post-Installation Maintenance and Cabinet Repair
Cabinet care begins after installation. Check cabinet alignment every 6 months for the first year. Seasonal humidity changes cause wood to expand and contract, which can shift cabinet position slightly. If you notice doors that don't close smoothly or drawers that bind, check the cabinet level and adjust shims if needed.
Clean cabinet frames and face frames regularly to prevent dirt buildup. For wood cabinets, use furniture polish or wood conditioner annually to maintain finish and prevent drying. Inspect fasteners periodically; vibration from door slamming and drawer closing can loosen fasteners over time. Check fastener tightness annually and tighten any that have loosened.
Cabinet repair often involves addressing hardware issues. Hinges wear over time and may need adjustment or replacement. Drawer slides accumulate dust and may bind. Clean slides with a soft brush and apply a dry lubricant like PTFE spray. If cabinet doors sag, tighten hinge fasteners first. If sagging persists, check the cabinet for level and re-shim if necessary.
RTA Wholesalers offers custom color inset cabinets and custom size options designed for straightforward installation. Their ready-to-assemble approach means you're starting with quality cabinet boxes that fit together precisely, which simplifies the installation process considerably.
Cabinet installation is a manageable project when you understand the fundamentals of measurement, leveling, and fastening. The key difference between a professional-looking installation and an amateur one is attention to detail during the planning and setup phases. By taking time to measure accurately, locate studs, check for level and plumb, and shim properly, you'll end up with cabinets that operate smoothly and look professionally installed for decades.
Frequently Asked Questions
Is it hard to install kitchen cabinets yourself?
Cabinet installation is manageable for beginners with proper planning and tools. The key is taking time to measure accurately, locate wall studs with a stud finder, and level each cabinet carefully. Most DIY success comes from preparation, understanding your layout, gathering the right tools, and following a systematic process. Many homeowners complete their own cabinet installation successfully by working methodically through each phase.
What essential tools do I need for cabinet installation?
Core tools include a tape measure, level, stud finder, drill with pilot hole bits, screws, and a saw for trimming. A power drill speeds up fastening, while a circular saw handles any cuts needed. Safety gear, gloves and eye protection, is essential. Budget-friendly alternatives exist: a basic hand drill works instead of a power drill, and a bubble level substitutes for a laser level. Having these essential tools for cabinet installation ensures you can complete the job safely and accurately.
Do you install wall cabinets or base cabinets first?
Install wall cabinets first. This prevents your body and tools from interfering with base cabinet installation later. Start by locating wall studs and securing an installation rail at the correct height. Wall cabinets need to be level and plumb before you add base cabinets below. Once wall cabinets are secure, move to base cabinets, which sit on the floor and connect to the wall studs. This sequence ensures proper alignment and easier access throughout the process.
How do you level cabinets on an uneven floor?
Use shims, thin wedges of wood or composite material, under the cabinet base to compensate for floor unevenness. Place your level on top of the cabinet and adjust shims until the cabinet reads perfectly level in both directions. Insert shims from underneath until the cabinet sits firmly without rocking. Once level, secure the cabinet to wall studs with fasteners. This shimming technique ensures your cabinets are plumb and level despite imperfect floors, which is critical for proper door and drawer alignment.
Can one person install kitchen cabinets alone?
Yes, though a helper makes the job easier and safer. A single person can manage cabinet installation by using temporary support clamps or a helper board to hold wall cabinets in place while fastening. Work methodically, install one cabinet fully before moving to the next. Take breaks to avoid fatigue, which leads to mistakes. Having an assistant to hold cabinets level while you drill and secure fasteners significantly reduces strain and improves accuracy, but solo installation is achievable with patience and proper planning.


