 833-377-8663

DIY Kitchen Cabinet Installation Guide: Step-by-Step

Table of Contents
- Understanding Your DIY Kitchen Cabinet Installation Guide
- Essential Kitchen Cabinet Installation Tools and Materials
- Kitchen Cabinet Layout Planning and Wall Preparation
- Upper Cabinet Installation: Techniques and Best Practices
- Base Cabinet Installation: From Layout to Securing
- Common Installation Mistakes and One-Person Installation Hacks
- Post-Installation Maintenance and Cabinet Care
- Conclusion: Your DIY Kitchen Cabinet Installation Success
DIY Kitchen Cabinet Installation Guide: Step-by-Step
Last Updated: July 31, 2026
Installing kitchen cabinets yourself is entirely achievable when you follow a structured approach and understand the fundamentals. This guide from RTA Wholesalers covers everything you need to know about the installation process, from planning your layout to securing the final piece. Below, we'll walk you through the exact methods that contractors use, the tools you'll actually need, and the common pitfalls that trip up most homeowners attempting this project alone.
Understanding Your DIY Kitchen Cabinet Installation Guide
Before you pick up a drill, you need to understand the fundamental difference between cabinet styles and how they affect your installation process. The cabinet type you choose determines how they mount, how they align, and what fastening methods work best.
Inset cabinets sit flush with the face frame, meaning the cabinet door closes completely within the frame opening. This style demands precision during installation because any deviation in plumb or level becomes immediately visible.
Overlay cabinets mount on top of the face frame, so the doors partially cover the frame itself. This design is more forgiving during installation because small gaps and imperfections get hidden by the door overlay. Most modern kitchens use overlay cabinets because they're faster to install and provide a contemporary appearance.
The cabinet carcass arrives either fully assembled or ready-to-assemble depending on your supplier. Ready-to-assemble (RTA) cabinets require assembly but offer significant cost savings and easier shipping.
Essential Kitchen Cabinet Installation Tools and Materials
You cannot install cabinets properly without the right equipment. The specific tools listed below exist because cabinet installation creates precise demands that generic tools cannot meet.
Power Tools and Hand Tools You'll Need
A cordless drill-driver is your primary power tool for pilot holes, fastening screws, and adjusting hardware. An impact driver complements the drill-driver for driving screws into studs without the bit slipping.
A laser level shows you a straight line across an entire wall section, making leveling dramatically faster and more accurate than traditional levels. You'll also need a stud finder to locate wall studs before fastening anything. A tape measure, square, and pencil form your layout foundation. A clamp or cabinet jack holds cabinets in position while you fasten them, freeing your hands for micro-adjustments.
Safety glasses protect your eyes from falling fasteners and debris. Work gloves prevent splinters and protect your hands when moving heavy cabinet boxes.
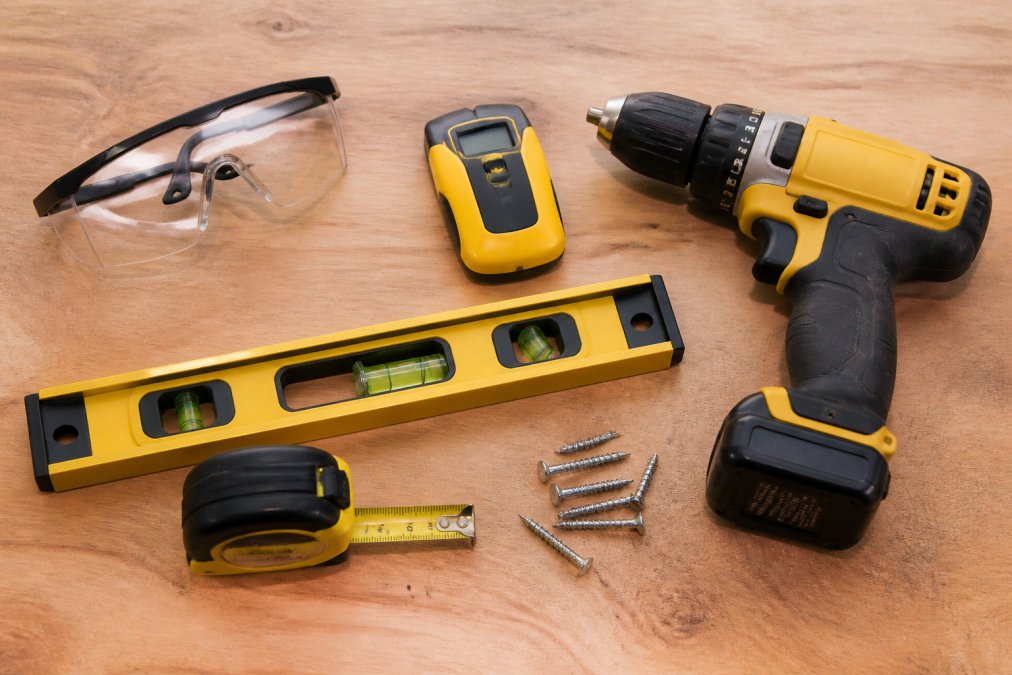
Measuring and Safety Equipment
A 25-foot or longer tape measure gives you the reach to measure across your entire kitchen in one shot. A level at least 24 inches long provides enough reference surface to detect whether a wall or cabinet is truly plumb.
Shims are wooden wedges you'll use constantly to adjust cabinet position without removing fasteners. Keep several bundles on hand. Toggle bolts or heavy-duty anchors become necessary if you're fastening cabinets to drywall without studs behind them. Mounting screws should be 2.5 inches long minimum for fastening into studs.
Kitchen Cabinet Layout Planning and Wall Preparation
The installation sequence matters more than most guides acknowledge. The correct order is: measure everything, locate studs, install the ledger board, install upper cabinets, then install base cabinets.
Measuring Your Space and Locating Wall Studs
Start by measuring the full width of your kitchen wall in multiple locations. Walls that appear straight often aren't, measuring at the top, middle, and bottom reveals whether the wall leans or bows.
Locate every wall stud in the installation area and mark their positions with a pencil line. Standard framing places studs 16 inches apart, but older homes sometimes have 24-inch spacing. Find the highest point along the wall where your base cabinets will sit. This becomes your reference line. If the floor is uneven, the base cabinets will sit higher on one end than the other unless you account for this during planning.
Measure up from this high point to determine your upper cabinet height. Standard practice places the bottom of upper cabinets 54 inches above the finished floor, leaving 18 inches of space above base cabinets for a countertop and backsplash.
Preparing Walls and Installing a Ledger Board
Remove any baseboard, trim, or obstacles in your installation area. Patch large holes in drywall and sand the surface smooth.
A ledger board is a horizontal 1x4 or 2x4 board that you fasten to wall studs at the height where your upper cabinets will sit. This board supports the weight of upper cabinets while you're fastening them and provides a perfectly level reference line. Fasten the ledger board with 2.5-inch screws driven into studs, using at least two fasteners per stud. Verify it's perfectly level using your laser level.
Upper Cabinet Installation: Techniques and Best Practices
Upper cabinets are heavier and more awkward than they appear. A typical upper cabinet weighs 50-80 pounds and requires two people to position safely. A cabinet jack holds the cabinet at the correct height while you fasten it, preventing arm strain and accidents.
Leveling and Shimming Your Upper Cabinets
Position the first upper cabinet against the wall and rest it on the ledger board. Use your laser level to check whether the cabinet is perfectly level side-to-side. If it's not, slip shims behind the cabinet at the top and bottom until the cabinet sits level.
Check plumb by positioning your level against the cabinet's face frame. Adjust shims until the cabinet is both level and plumb. Once the cabinet sits correctly, drill pilot holes through the cabinet's mounting rail into the studs behind it. Drive mounting screws through the pilot holes, fastening the cabinet to at least two studs.
Securing Cabinets to Wall Studs
After fastening the first cabinet, position the second cabinet next to it. Check that the face frames align perfectly with no step between them. Once both cabinets are positioned correctly, fasten them together through their face frames using pocket hole screws or cabinet screws. Then fasten the second cabinet to the wall studs.
Continue this pattern across the wall, always checking alignment between adjacent cabinets before fastening. A cabinet that's slightly out of alignment creates a domino effect.
Base Cabinet Installation: From Layout to Securing
Base cabinets sit on the floor, which means they're subject to any unevenness in the floor itself. You'll use shims to bring each cabinet up to the correct height, creating a level surface for your countertop.
Positioning and Aligning Base Cabinets
Position the first base cabinet against the wall and check its level. Slip shims under the cabinet feet until it sits perfectly level. Once level, check plumb the same way you did with upper cabinets.
Fasten the first base cabinet to the wall studs using 2.5-inch screws driven through the cabinet's back mounting rail. Use at least two fasteners per stud. Position the second base cabinet next to the first and verify face frame alignment. Shim this cabinet until it's level and plumb, then fasten it to the wall. Connect the two cabinets through their face frames using pocket hole screws.
The space between base cabinets and upper cabinets should be consistent across the entire kitchen. Measure from the top of the base cabinets to the bottom of the upper cabinets in multiple locations.
Installing the Toe Kick and Final Adjustments
The toe kick is the recessed space at the bottom of base cabinets where your feet go when you stand at the counter. Standard toe kick height is 4.5 inches, and the recess extends 3-4 inches back from the face of the cabinet.
Install a toe kick board across the front of all base cabinets, sitting about 0.5 inches above the floor. Fasten the toe kick board to the cabinet frame using screws or nails.
After all cabinets are installed and fastened, do a final check of the entire installation. Verify that all cabinets are level and plumb. Check that adjacent cabinet face frames align perfectly. Open and close doors and drawers to ensure they operate smoothly without binding.
Common Installation Mistakes and One-Person Installation Hacks
The most common mistake is rushing the leveling and shimming process. Cabinets that aren't perfectly level create problems throughout the entire installation. Doors won't close properly, drawers will bind, and the visual misalignment becomes obvious.
Another frequent error is underestimating the importance of wall studs. Fastening cabinets to drywall alone without stud support causes cabinets to pull away from the wall over time.
One-person installations are possible but require different techniques. A cabinet jack becomes essential rather than optional. Work methodically through each cabinet without rushing. A single person working carefully will produce a better result than two people rushing through the process.
| Common Mistake | What Goes Wrong | How to Prevent It |
|---|---|---|
| Skipping the ledger board | Upper cabinets sag and misalign | Install ledger board fastened to studs |
| Not checking wall studs | Cabinets pull away from wall | Use stud finder and mark every stud |
| Rushing shimming process | Cabinets sit uneven and doors bind | Check level and plumb multiple times |
| Fastening to drywall only | Cabinet weight causes wall failure | Fasten only to studs with 2.5" screws |
| Not aligning adjacent cabinets | Visible gaps and steps appear | Check alignment before fastening each cabinet |
Post-Installation Maintenance and Cabinet Care
After installation, your cabinets require basic maintenance to preserve their appearance and function.
Wipe cabinet exteriors regularly with a soft cloth and mild soap solution. Avoid harsh chemicals that damage finishes. For wood cabinets, occasional application of furniture polish maintains the finish and protects against moisture. For painted cabinets, use only gentle cleaners.
Check hinges and drawer slides periodically. Tighten any loose fasteners you find. Inspect the area where cabinets meet the wall for any gaps that develop over time. Caulk small gaps with paintable caulk that matches your cabinet finish.
Conclusion: Your DIY Kitchen Cabinet Installation Success
Installing kitchen cabinets yourself is achievable when you understand the sequence, use proper tools, and take time with leveling and alignment. The difference between a successful installation and a frustrating one often comes down to patience during the shimming and fastening process.
RTA Wholesalers offers ready-to-assemble cabinet options that simplify the installation process. We have inset cabinets that are top quality and available in custom sizes and custom colors at great wholesale pricing. Our free kitchen design service helps ensure your cabinet selection and layout are perfect before you order, catching potential issues before they become expensive mistakes during installation.
Frequently Asked Questions
What tools do I need for kitchen cabinet installation?
Essential kitchen cabinet installation tools include a power drill, impact driver, laser level or carpenter's level, stud finder, tape measure, circular saw, and a cabinet jack or adjustable jack. You'll also need a socket set, screwdrivers, clamps, and safety glasses. A miter saw helps with scribing and custom cuts. Having the right tools prevents damage to your cabinets and ensures proper alignment and secure fastening to wall studs.
Do you install upper or lower cabinets first in a DIY kitchen cabinet installation guide?
Install upper cabinets first. This prevents you from damaging upper cabinets while positioning base cabinets below. Upper cabinets are typically lighter and easier to manage with proper support. Use a ledger board to support them during installation, then secure them to wall studs. Once upper cabinets are level and shimmed, you can install base cabinets without risk of collision or misalignment.
How do you secure kitchen cabinets to the wall properly?
Secure cabinets to wall studs using mounting screws (typically 2.5 to 3 inches long) through the cabinet's mounting rails into studs. Locate studs with a stud finder and use pilot holes to prevent splitting. For areas without studs, use toggle bolts or heavy-duty anchors. Countersink screws slightly so they don't protrude. Check that cabinets are plumb and level before final tightening, and ensure all mounting hardware is tight after installation.
Can I install kitchen cabinets myself without hiring a professional?
Yes, DIY kitchen cabinet installation is achievable for homeowners with basic carpentry skills and the right tools. Success depends on careful planning, accurate measurements, and patience. Pre-assembled or ready-to-assemble cabinets simplify the process significantly. Take time to locate wall studs, ensure proper leveling and shimming, and follow manufacturer instructions carefully. Many DIYers find that using a cabinet jack and enlisting a helper makes the work safer and faster, though one-person installation hacks exist for solo installers.
The cabinet installation process becomes significantly easier when you start with quality cabinetry designed for DIY assembly. RTA Wholesalers provides the materials and support to help your project succeed, from initial design consultation through final installation. Visit RTA Wholesalers to explore custom cabinet options and get started on your kitchen transformation today.


