 833-377-8663

Ease of Installation for Home Renovation: 2026 Guide

Table of Contents
- Assessing Renovation Needs and Goals
- Essential Tools for Cabinet Installation
- How Long Does It Take to Install RTA Cabinets?
- Cabinet Installation Tips for Beginners
- Ease of Installation for Home Renovation: Energy Efficiency Upgrades
- Material Selection and Design for Easy Installation
- Frequently Asked Questions
Last Updated: September 16, 2026
Assessing Renovation Needs and Goals
Ease of installation for home renovation starts with an honest assessment of what your space actually needs before you buy a single cabinet or open a single can of paint. This guide from RTA Wholesalers walks through the decisions that determine whether a project moves quickly or stalls for weeks.
Most renovation delays trace back to skipped planning, not lack of skill. A common approach among contractors and DIY homeowners alike is to measure the room, photograph every wall, and list what stays versus what goes before ordering materials. That single step prevents the most expensive mistake in any remodel: buying cabinets or finishes that do not fit the actual dimensions of the space.
Start by answering four questions:
- What is the room's current layout, and does it work with how you actually move through it?
- Which fixtures, cabinets, or finishes are structurally sound and worth keeping?
- What is your realistic budget allocation for materials versus labor?
- How much of the work can you complete yourself without specialized tools?
Traffic patterns and space use drive nearly every other decision. A kitchen with a narrow work triangle will feel cramped no matter how nice the cabinets are, while a bathroom with poor layout optimization wastes square footage you already paid for. Sketch the room to scale, mark door swings, and note where appliances or plumbing must stay.
Essential Tools for Cabinet Installation
The essential tools for cabinet installation fall into four categories: measuring, leveling, fastening, and finishing. You do not need a full contractor's trailer, but cutting corners on the basics is the fastest way to end up with doors that rub or a run of cabinets that is visibly out of level.
A practical starter kit includes:
- Measuring and marking: tape measure, framing square, pencil, stud finder
- Leveling: 4-foot and 2-foot levels, shims in mixed thicknesses
- Fastening: cordless drill, impact driver, cabinet screws, clamps
- Cutting and finishing: circular saw or jigsaw, sanding block, caulk and caulking gun
- Safety: safety glasses, hearing protection, work gloves
Tool requirements for DIY cabinet installation are modest compared to other renovation tasks. What matters more is having the right fasteners and enough shims. Cabinet boxes must attach to studs, not just drywall, and every run needs shimming at the floor and wall to sit level and plumb.
How Long Does It Take to Install RTA Cabinets?
Most homeowners can install a full set of ready-to-assemble kitchen cabinets in a weekend, with assembly and mounting split across two days. A single wall or base cabinet typically takes 30 to 60 minutes to assemble and 20 to 40 minutes to mount, depending on wall condition and how many helpers you have.
Time-to-completion estimates vary by project size. Here is a realistic breakdown:
| Task | Typical Time | Notes |
|---|---|---|
| Assemble one RTA cabinet box | 20-40 minutes | Faster with two people |
| Mount one wall cabinet | 20-40 minutes | Depends on stud placement |
| Mount one base cabinet | 15-30 minutes | Leveling takes longest |
| Install doors and drawer fronts | 10-15 minutes per cabinet | Adjust hinges after mounting |
| Full small kitchen (10-12 cabinets) | 1-2 days | With one helper |
Assembly is the part most people underestimate.
30" Wide Bridge Taupe Shaker 1-1/4" →
Cabinet Installation Tips for Beginners
Cabinet installation tips for beginners almost always come back to one principle: work from a level reference line and never trust the floor or ceiling to be square. Older homes settle, and a floor that looks flat can be off by half an inch across a ten-foot run. Establishing this precise horizontal baseline is just as critical when you transition to exterior projects like DIY fence installation where shifting ground levels can compromise the structural integrity of your perimeter.
Follow this sequence for a clean install:
- Mark a level line around the room at the height where the top of your base cabinets will sit.
- Locate and mark every stud along the wall.
- Start with a corner cabinet and work outward in both directions.
- Clamp each cabinet to the previous one before driving screws, so the face frames stay flush.
- Shim at the floor and wall as needed, then check level before final tightening.
- Install doors and drawer fronts last, and adjust hinges after everything is mounted.
Ease of Installation for Home Renovation: Energy Efficiency Upgrades
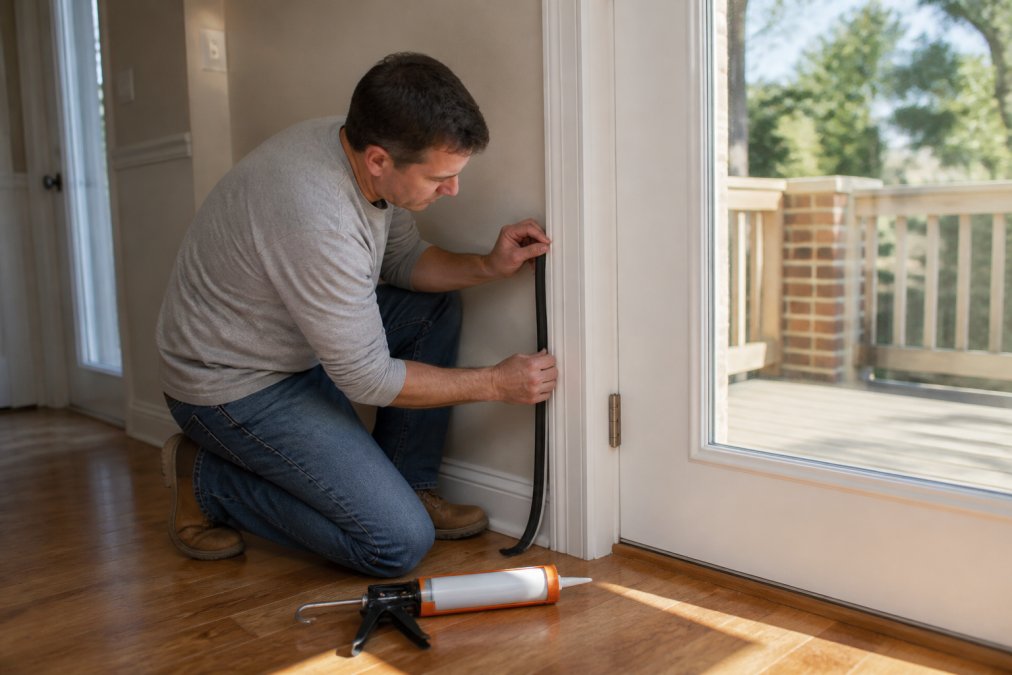
Ease of installation for home renovation is easiest to judge when you rank tasks on a difficulty scale instead of treating every upgrade as equally hard. Energy efficiency work is a good test case, because it spans the full range, from an afternoon of caulking to a full insulation retrofit that needs a contractor and a permit.
| Upgrade | Difficulty (1-5) | Typical Time | Tools Required | Permit Likely? |
|---|---|---|---|---|
| Caulk and weatherstrip doors and windows | 1 | 2-4 hours for a whole house | Caulking gun, utility knife, scissors | No |
| Seal rim joists and sill plates in a basement | 2 | 3-6 hours | Caulk, foam sealant, flashlight | No |
| Add outlet and switch plate gaskets | 1 | 30-60 minutes | Screwdriver | No |
| Install a smart thermostat | 2 | 30-90 minutes | Screwdriver, drill | No |
| Blow-in attic insulation | 3 | 1-2 days | Insulation blower (rentable), respirator | Sometimes |
| Replace a water heater with a high-efficiency unit | 4 | 4-8 hours | Pipe wrenches, soldering or press tools | Yes |
| Add a ductless mini-split | 5 | 1-2 days | Vacuum pump, gauges, line-set tools | Yes |
Material Selection and Design for Easy Installation
Material selection and design determine how difficult a renovation will be long before installation day. Material durability, weight, and how the product arrives all shape both installation complexity and the tools you need. The fastest way to compare materials is a tool-to-task complexity matrix, matching each material to the tools and skill level it actually demands.
| Material / Task | Tools Required | Skill Level | Difficulty (1-5) | Typical Time |
|---|---|---|---|---|
| Peel-and-stick vinyl plank flooring | Utility knife, straightedge, roller | Beginner | 1 | 4-8 hours per room |
| Luxury vinyl tile (click-lock) | Utility knife, tapping block, spacers | Beginner | 2 | 1 day per room |
| Laminate flooring | Saw, tapping block, spacers, underlayment | Beginner-Intermediate | 2 | 1-2 days per room |
| Ceramic or porcelain tile | Wet saw, trowel, spacers, grout float | Intermediate | 4 | 2-4 days per room |
| Peel-and-stick backsplash tile | Utility knife, roller, level | Beginner | 1 | 3-6 hours |
| Mosaic tile backsplash | Wet saw, trowel, grout float | Intermediate | 3 | 1-2 days |
| Surface-mount ceiling light | Screwdriver, wire strippers, voltage tester | Beginner-Intermediate | 2 | 30-60 minutes |
| Recessed lighting (new cut-in) | Hole saw, drywall saw, wire strippers | Intermediate | 4 | 1-2 hours per fixture |
| Ready-to-assemble cabinet box | Drill, impact driver, clamps, level | Beginner-Intermediate | 2 | 20-40 minutes |
| Inset cabinet door alignment | Screwdriver, shims, level | Intermediate-Advanced | 4 | 15-30 minutes per door |
Design choices that reduce installation difficulty:
- Standard cabinet widths minimize the need for filler strips and custom cuts
- Overlay doors are more forgiving to align than inset doors
- Consistent cabinet depth across a run simplifies leveling and trim
- Choosing finishes and colors from a single supplier keeps replacement parts available
Frequently Asked Questions
What are the easiest kitchen cabinets to install for DIYers?
Ready-to-assemble (RTA) cabinets are generally the easiest for DIYers because they arrive flat-packed with pre-drilled holes and clear instructions. RTA Wholesalers offers 1-1/4" full overlay shaker cabinets that install with basic tools and soft-close hinges already included. The main tasks are assembling the box, mounting it level to the wall, and attaching doors. Most DIYers with moderate experience can handle a full kitchen in a weekend or two with a helper.
How much time should I budget for a kitchen cabinet installation?
For a typical 10x10 kitchen with 15 to 20 cabinets, budget 16 to 24 hours of active work for RTA cabinets. That breaks down to about 30 to 45 minutes per cabinet for assembly and 20 to 30 minutes for mounting. Add extra time for plumbing adjustments if you are replacing a sink base. Working alone, spread this over two to three weekends. With a helper, you can finish in one long weekend.
What tools are essential for installing ready-to-assemble cabinets?
You need a drill with driver bits, a stud finder, a 4-foot level, a tape measure, a rubber mallet, and a screwdriver set. For wall cabinets, a dead-blow hammer helps tap shims into place. A pencil and painter's tape mark stud locations and cabinet heights. If you are cutting filler strips or toe kicks, add a miter saw or circular saw. RTA Wholesalers cabinets arrive with assembly hardware included, so you only need standard hand tools.
Are RTA cabinets worth the effort for a home renovation?
RTA cabinets save money on labor because you assemble them yourself, and they ship faster than custom orders. RTA Wholesalers offers inset and overlay options in custom sizes and colors, so you get a custom look without the custom lead time. For flippers and DIYers watching both budget and timeline, RTA cabinets deliver professional results at a fraction of the installed cost. The trade-off is your time, not quality.


