 833-377-8663

How to Install Soft Close Drawer Slides for Beginners

Table of Contents
- What You'll Need Before You Start
- How to Measure for Drawer Slides
- Best Tools for Drawer Slide Installation
- Step-by-Step: How to Install Soft Close Drawer Slides
- Troubleshooting Soft Close Drawer Slides
- Common Mistakes Beginners Make With Soft Close Drawer Slides
- Frequently Asked Questions
Last Updated: September 17, 2026
What You'll Need Before You Start
Installing soft close drawer slides is one of the most satisfying beginner upgrades in a kitchen. The hardware does the hard work. You just need the right layout, the right drill bits, and a little patience.
At RTA Wholesalers, we supply ready-to-assemble cabinets and soft-close hardware for homeowners and remodelers who want a pro result without a pro invoice. This guide walks you through how to install soft close drawer slides for beginners, step by step.
Soft close drawer slides are drawer runners with a built-in dampener that pulls the drawer shut for the last few inches. That means no slam, no rattle, and no worn-out cabinet fronts.
Gather these before you touch a drill:
- A cordless drill with a #6 and #8 countersink bit
- A tape measure and a pencil
- A small framing square
- A screwdriver or driver bit set
- A level (a 6-inch one is fine)
- The slides themselves, plus any mounting brackets
- Painter's tape for marking
How to Measure for Drawer Slides
Getting the measurement right decides whether your drawer glides or grinds. Measure twice, drill once. Budget 5-8 minutes for measuring per drawer, it is the cheapest time you will spend on the whole job.
Measuring Cabinet Opening Width and Depth
Measure the clear opening between the cabinet sides, not the outside of the cabinet box. Write that number down.
Then measure the depth from the front face frame back to the rear panel. That depth tells you the longest slide that will fit.
Check that the opening is square. Measure the width at the top and at the bottom. If the two numbers differ by more than about 1/16 inch, note it. A racked cabinet needs shimming before slides go in.
Calculating Slide Length and Clearance
Slide length must match your cabinet depth, not the drawer depth. A slide that is too long will not seat against the back panel. A slide that is too short leaves the drawer front proud of the frame.
Rule of thumb: pick the slide length that is equal to or just under your measured cabinet depth.
| Measurement | What to Measure | Why It Matters |
|---|---|---|
| Opening width | Clear space between cabinet sides | Sets slide pair spacing |
| Cabinet depth | Front frame to rear panel | Sets maximum slide length |
| Drawer box width | Outside face to outside face | Confirms side clearance |
| Drawer box height | Top to bottom of box side | Confirms screw line height |
Side-Mount vs. Undermount: Which Measurement Path You're On
This is the fork most beginner guides skip, and it changes every number above.
- Side-mount slides mount to the cabinet side and the drawer box side. You control the clearance, and you can adjust it after the fact.
- Undermount slides mount under the drawer box and clip to brackets at the cabinet bottom. The drawer box width is dictated by the slide, and there is far less room to fudge it.
Best Tools for Drawer Slide Installation
The best tools for drawer slide installation are a cordless drill, a set of countersink bits, a tape measure, a small square, and a level. You do not need a shop full of equipment. What most guides skip is matching each tool to the specific task it solves, and how hard that task is for a first-timer.
Tool-to-Task Complexity Matrix
Use this to see exactly which tool does what, and how forgiving each task is if you get it slightly wrong.
50qt Fits 15" Overlay (12" Opening) →
| Task | Tool Required | Difficulty (Beginner) | Time per Drawer | If You Get It Wrong |
|---|---|---|---|---|
| Measure opening width and depth | Tape measure, pencil | Easy | 3-5 min | Slide won't seat; drawer binds |
| Check cabinet for square | Framing square, level | Easy | 2-3 min | Slides sit racked; drawer rubs one side |
| Mark screw hole heights | Tape measure, pencil, painter's tape | Easy | 3-4 min | Both slides sit at different heights |
| Drill pilot holes | Cordless drill, #6/#8 countersink bit, awl | Moderate | 5-8 min | Crooked hole pulls slide out of line |
| Mount cabinet member | Drill, driver bit | Moderate | 5-7 min | Slide runs downhill; drawer drifts open |
| Attach drawer member | Screwdriver or driver bit | Easy | 3-5 min | Drawer member won't clip into cabinet member |
| Test and adjust | Screwdriver, level | Easy | 3-5 min | Soft close never engages |
Difficulty Scale for the Whole Job
- Easy (under 10 min): measuring, squaring, marking
- Moderate (10-20 min): drilling pilot holes, mounting the cabinet member
- Tricky (needs a redo if rushed): getting both slides at identical height and depth
The tricky part is not the drilling, it is the alignment. That is where beginners lose time, and it is why the matrix above flags mounting as moderate rather than easy.
Two Extras That Earn Their Keep
- A self-centering drill bit keeps pilot holes straight in face frames
- A short brad-point bit reaches tight corners where a full-size bit will not fit
Skip the impact driver for this job. It drives too hard for cabinet work and strips screw heads fast. A drill with a clutch setting is the better call, the clutch stops the driver before you strip a screw head or split a thin cabinet side.
Step-by-Step: How to Install Soft Close Drawer Slides
Here is the full process, from first mark to final test. Budget about 20 to 30 minutes per drawer on your first attempt.
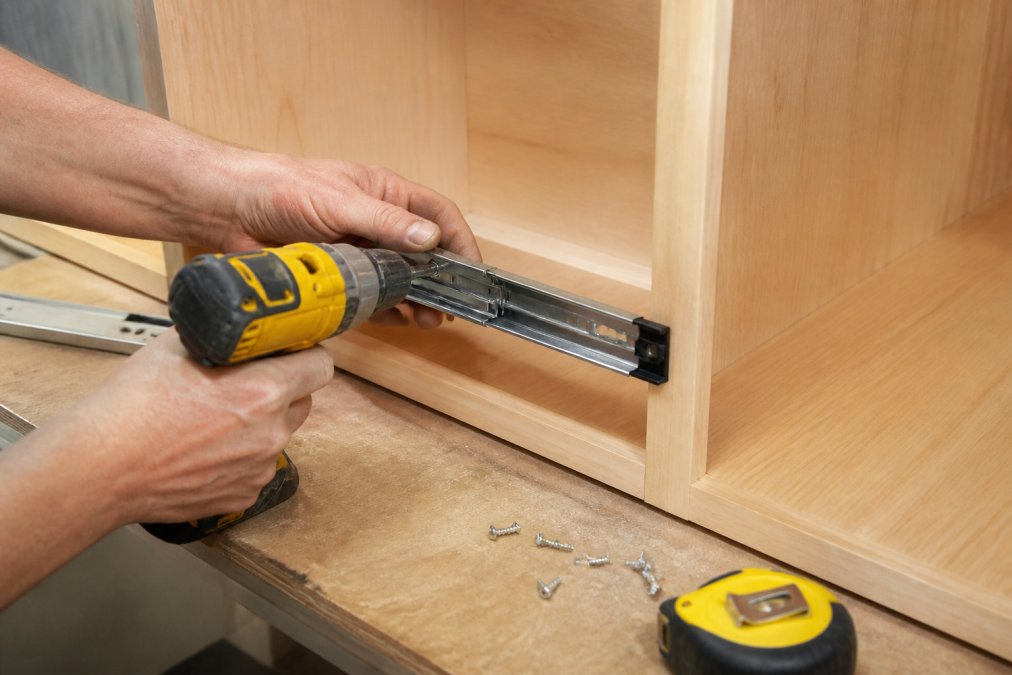
Step 1: Mark and Drill Pilot Holes
Set the cabinet member against the cabinet side at the height you want. Hold it level, then mark the screw holes with a pencil.
Step 2: Mount the Cabinet Member
Drive the screws in loosely at first. Snug them down only after you confirm the slide is level and square.
Step 3: Attach the Drawer Member and Test
Clip or screw the drawer member to the drawer box side. Follow the template or marks that came with your slides.
Troubleshooting Soft Close Drawer Slides
Troubleshooting soft close drawer slides usually comes down to alignment, engagement, or screw tension. Most problems have a simple fix.
| Problem | Likely Cause | Fix |
|---|---|---|
| Drawer slams shut | Slide not fully engaged | Re-seat the drawer member |
| Drawer sticks partway | Slides out of level | Loosen screws, re-level, retighten |
| Drawer rubs one side | Uneven side clearance | Adjust slide spacing |
| Soft close feels weak | Dampener not triggered | Push drawer from further out |
| Drawer drifts open | Slide tilted downhill | Shim the rear of the slide |
Common Mistakes Beginners Make With Soft Close Drawer Slides
The biggest mistake is measuring the drawer instead of the cabinet opening. Slide length follows cabinet depth, and beginners often reverse the two.
Other repeat offenders:
- Over-tightening screws and crushing the slide track
- Skipping pilot holes and splitting the cabinet side
- Mounting the two slides at different heights
- Forgetting to check the cabinet for square before drilling
- Mixing slide halves from two different sets
Frequently Asked Questions
What are the most common mistakes when installing soft close drawer slides?
The biggest mistake is failing to ensure the cabinet members are perfectly level and parallel before attaching the drawer. Even a 1/16-inch difference can cause the soft close mechanism to bind or fail. Another common error is using the wrong screw length, which can poke through the cabinet face. Always drill pilot holes and double-check your measurements before driving screws.
Do I need special tools to install soft close drawer slides?
No special tools are required. A cordless drill, a #2 Phillips bit, a tape measure, a pencil, and a small level are enough for most installations. A combination square helps confirm right angles, and a center punch prevents the drill bit from wandering on melamine or painted surfaces. If you are retrofitting, a screwdriver and a pry bar may be needed to remove old slides.
Can I retrofit soft close slides onto existing cabinets?
Yes, you can retrofit soft close slides onto most existing cabinets as long as the opening dimensions match the new slide length. Measure the cabinet opening width and depth, then choose slides that fit. You may need to fill old screw holes with wood filler or use slightly larger screws. Undermount slides often require a specific drawer bottom clearance, so check the manufacturer's template before ordering.
How much gap do you leave for drawer slides?
For side-mount slides, leave about 1/2 inch of clearance on each side of the drawer box. For undermount slides, the drawer bottom typically needs a 1/2-inch setback from the front edge. Always follow the slide manufacturer's specification sheet, because required gaps vary by model. Measuring twice and test-fitting the drawer before final tightening saves time and prevents rework.


