 833-377-8663

How to Plan a Functional Kitchen Work Triangle

Table of Contents
- What Is a Kitchen Work Triangle and Why It Still Matters
- Ideal Kitchen Triangle Dimensions and Standard Measurements
- Kitchen Layout Design Rules for Every Floor Plan
- Kitchen Island Work Triangle Placement Done Right
- How to Apply the Work Triangle Step by Step
- Common Kitchen Layout Mistakes to Avoid
- Accessibility, Small Kitchens, and the Work Zone Evolution
- Frequently Asked Questions
Last Updated: October 2, 2026
What Is a Kitchen Work Triangle and Why It Still Matters
The kitchen work triangle is a design rule that connects the three main workstations in a kitchen: the sink, the refrigerator, and the stove.
This guide from RTA Wholesalers breaks down how to plan a functional kitchen work triangle, even in today's open-plan layouts.
The concept dates back to the 1940s, when researchers studied how home cooks moved through their kitchens.
That logic still holds. The National Kitchen & Bath Association treats the work triangle as a core layout principle, and the U.S. Department of Housing and Urban Development publishes guidance on functional kitchen design for residential projects.
The triangle matters because it shapes how you use the room every day.
The Three Main Workstations: Sink, Refrigerator, Stove
Each point on the triangle does a specific job. The sink handles cleaning and prep. The refrigerator stores food. The stove handles cooking.
Think of them as three zones:
- Cleaning zone: the sink and dishwasher
- Storage zone: the refrigerator and pantry
- Cooking zone: the stove and oven
Good kitchen layout design rules keep these zones close but not crowded. A common mistake is putting the refrigerator too far from the sink. You end up walking back and forth every time you prep a meal.
Benefits of an Efficient Kitchen Layout
A well-planned triangle saves steps, time, and energy, and cuts down on collisions when two people cook at once.
- Fewer trips between stations
- Less fatigue during long prep sessions
- Better traffic flow around the room
- More usable counter space near each station
For remodelers and flippers, an efficient layout is a selling point: buyers notice a kitchen that feels easy to move through.
Ideal Kitchen Triangle Dimensions and Standard Measurements
The classic rule sets each side of the triangle between 4 and 9 feet, with a total perimeter between 13 and 26 feet. These numbers come from decades of kitchen design practice and balance reach with walking distance.
Recommended Triangle Side and Perimeter Guidelines
Use these as your starting targets:
| Measurement | Recommended Range |
|---|---|
| Each side of the triangle | 4 to 9 feet |
| Total perimeter of triangle | 13 to 26 feet |
| Walkway clearance | At least 42 inches |
| Counter space beside sink | 24 inches minimum |
Below 4 feet a side feels cramped; above 9 feet you walk too much. The perimeter cap keeps the whole layout tight.
Kitchen Layout Design Rules for Every Floor Plan
The triangle adapts to any floor plan. What changes is how you position the three stations.
Galley, L-Shaped, and U-Shaped Kitchens
Galley kitchens line up the stations on two parallel walls, forming a tight, efficient loop. Keep the walkway at least 42 inches wide so two people can pass.
U-shaped kitchens give you the most counter space, with the three stations on three walls and the sink often centered under a window.
- Galley: best for narrow spaces
- L-shaped: best for open floor plans
- U-shaped: best for maximum counter space
One more rule: don't let a walkway cut through the triangle. Foot traffic should pass behind the cook, not between stations.
Kitchen Island Work Triangle Placement Done Right
An island can help or hurt your triangle, depending on placement.
Kitchen island work triangle placement works best when the island adds a fourth surface without blocking the path between sink, fridge, and stove. Keep at least 42 inches of clearance between the island and the surrounding cabinets.
A common mistake is dropping an island into the middle of the triangle, forcing you to walk around it every trip. Better options:
- Place the island beside the triangle, not inside it
- Use the island as extra prep area near the sink
- Keep the main work path clear on one side
For corner storage that supports this layout, a Lazy Susan base cabinet keeps deep corners usable without adding clutter to the work path.
How to Apply the Work Triangle Step by Step
Total time: about 1 hour with a tape measure and graph paper.
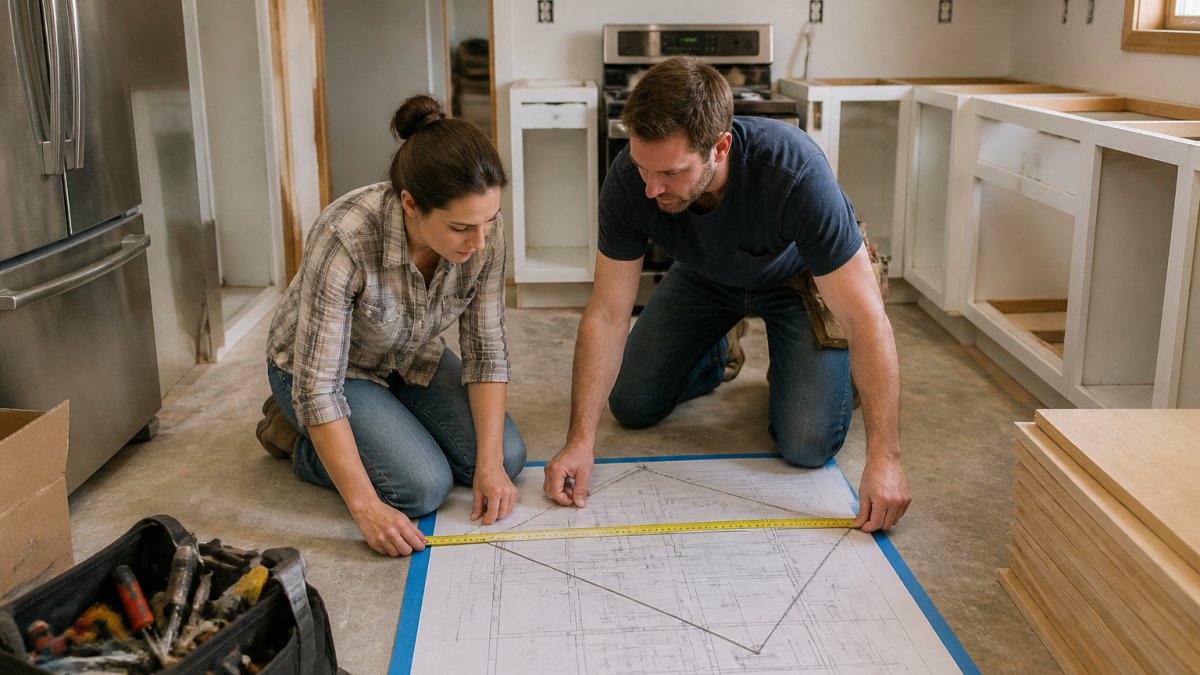
What you'll need:
Lazy Susan Base Cabinet | 33" & 36" Corner | Honey Glaze Shaker →
- Tape measure (25-foot is plenty)
- Graph paper or layout software
- Pencil and eraser
- Appliance dimensions (fridge depth, range width, sink base width)
- Painter's tape to mark station centers on the floor
Step 3: Measure each side. Every side should fall between 4 and 9 feet.
Step 4: Add up the perimeter. Aim for 13 to 26 feet total.
Step 7: Adjust. Move a station if a side is too long or short.
Quick self-check before you commit:
- Each side: 4-9 feet
- Perimeter: 13-26 feet
- Walkway clearance: 42 inches minimum
- Counter beside sink: 24 inches minimum
- Counter beside stove: 15 inches minimum
- Fridge landing space: 15 inches minimum
- No walkway cuts through the triangle
- No appliance door swings into the work path
If any line fails, adjust before you order cabinets.
Common Kitchen Layout Mistakes to Avoid
Most bad layouts share the same few errors:
- Placing the refrigerator outside the triangle
- Blocking the triangle with a walkway
- Skipping counter space next to the sink and stove
- Making one side longer than 9 feet
- Ignoring door swing and appliance clearance
What most guides miss is door swing. A fridge or oven door that opens into the work path breaks the triangle even when the measurements look right on paper.
Accessibility, Small Kitchens, and the Work Zone Evolution
The classic triangle assumes a single cook with full mobility in a roomy footprint, which leaves out a lot of real kitchens. Here's how it adapts when it doesn't fit the textbook case.
Accessibility and Universal Design
When mobility is limited, the triangle shifts from a walking path to a reach-and-roll path, with fewer transfers and clear turning space rather than just shorter distances.
Key adjustments most practitioners apply:
- Clear floor space: a 60-inch turning circle for a wheelchair, or a T-shaped turn where a full circle won't fit.
- Walkway width: 42 inches minimum becomes 60 inches for a wheelchair user to pass behind a seated cook.
- Counter height: 28 to 34 inches for seated work, with knee clearance underneath. Standard 36-inch counters don't work for a seated user.
- Reach range: keep the most-used items between 15 and 48 inches off the floor. Anything above 48 inches or below 15 inches is a stretch or a bend.
- Pull-out shelves and drawers: full-extension drawers beat deep base cabinets with fixed shelves, because nothing gets lost in the back.
- Side-opening ovens and French-door fridges: they reduce reach and swing into the work path less than a standard door.
A Whole Building Design Guide resource covers accessible kitchen planning in detail, and the U.S. Department of Housing and Urban Development publishes guidance on functional kitchen design for residential projects.
Small Kitchen and Apartment Solutions
In a galley or studio kitchen, the triangle shrinks but the rules hold. The trick is knowing which numbers flex.
- Galley kitchens: keep the walkway at 42 inches minimum, 48 inches if two people cook. Stations go on opposite walls, with the sink and stove on one side and the fridge on the other when possible.
- Studio and apartment kitchens: a one-wall kitchen can't form a true triangle. Treat the sink and stove as the two anchor points and put the fridge at the end of the run, ideally within 4 to 9 feet of the stove.
- Compact L-shapes: put the sink in the corner and the stove and fridge on opposite legs, keeping each side short without crowding.
- Island-free layouts: a rolling cart or pull-out prep surface can act as a temporary fourth station without blocking the path.
For tight corners, a blind corner base cabinet turns dead space into usable storage without widening the triangle.
The Work Zone Evolution
Modern kitchens rarely run on one triangle. They run on five or more zones, with the triangle as the core of the busiest ones.
A common multi-zone breakdown:
- Prep zone: counter space near the sink, plus a cutting board and trash pull-out
- Cleaning zone: sink, dishwasher, and a place for dirty dishes to land
- Cooking zone: stove, oven, and landing space on both sides
- Storage zone: fridge, pantry, and dry goods
- Beverage or coffee zone: often separate from the main triangle, near a water line
The triangle still matters because it connects the three busiest zones. In a modern open-plan kitchen, think of the triangle as the spine and the other zones as satellites: keep the satellites close and foot traffic out of the spine entirely.
Visual Planning Tools
Test the layout before you buy. Graph paper works; free layout apps work better. Either way, sketch the triangle first, then layer the zones on top.
A simple five-minute self-check:
- Draw the room to scale on graph paper (one square = one foot).
- Mark the sink, fridge, and stove centers.
- Draw the triangle and measure each side.
- Mark every walkway and check for 42 inches.
- Mark the five zones and see if any overlap the walkway.
If a zone overlaps the walkway, move the zone, not the triangle. The triangle is the priority.
RTA Wholesalers offers a free kitchen design service to help catch layout mistakes before you order. Our custom color inset cabinetry comes in most any size, which helps when your kitchen has odd dimensions.
Frequently Asked Questions
What are the three main points of the kitchen work triangle?
The three points are the sink, the refrigerator, and the stove or cooktop. Each one anchors a workstation: the cleaning zone at the sink, the storage zone at the refrigerator, and the cooking zone at the stove. The triangle is the triangular path a cook travels between these three points during meal prep. Keeping the sides of that triangle within recommended distances limits unnecessary steps and keeps traffic flow out of the prep area.
How much space should be between kitchen work triangle points?
Each leg of the triangle should measure between 4 and 9 feet, and the total of all three legs should stay between 13 and 26 feet. No single leg should cross a major traffic path or an obstruction like an island. If one leg runs longer than 9 feet, add a prep sink or a landing counter to break up the distance and keep the workflow efficient.
How does the work triangle change for open-concept kitchens?
In open-concept layouts, the triangle still governs the cooking area, but it now competes with living and dining traffic. Keep the three points close enough that a walkway stays clear between the kitchen and adjacent rooms, and avoid placing the refrigerator or stove where family traffic crosses the cook's path. Many designers treat the kitchen as one zone within a larger plan rather than the whole floor plan.
Can you have a functional kitchen without a work triangle?
Yes. Small apartments and single-wall kitchens often cannot form a true triangle, so designers use work zones instead. Group the sink, prep counter, and stove along one run with landing space on both sides of each appliance. The goal stays the same: reduce steps between cleaning, prepping, and cooking. A well-organized single-wall kitchen can be just as efficient as a full triangle layout.


