 833-377-8663

Is It Hard to Assemble RTA Cabinets? A Practical Guide

Table of Contents
- Is It Hard to Assemble RTA Cabinets? The Honest Answer
- Tools for RTA Cabinet Assembly You'll Actually Need
- How Long Does It Take to Assemble RTA Cabinets
- RTA Cabinet Assembly Tips for Success
- RTA Cabinet Installation Mistakes to Avoid
- RTA Cabinets vs. Pre-Assembled: Which Is Right for You
- Conclusion: Making RTA Cabinet Assembly Work for Your Project
Is It Hard to Assemble RTA Cabinets? A Practical Guide
Last Updated: July 25, 2026
The question of whether is it hard to assemble RTA cabinets is something most homeowners ask before committing to a kitchen renovation. At RTA Wholesalers, we've guided thousands of DIY enthusiasts through this exact concern, and the honest answer is: it depends on your skill level, the cabinet quality, and how well you prepare. Most homeowners with basic tool experience can successfully assemble ready-to-assemble cabinetry, though it requires patience, attention to detail, and the right approach.
Is It Hard to Assemble RTA Cabinets? The Honest Answer
Assembling ready-to-assemble cabinets is moderately difficult for most homeowners, challenging but not impossible. According to DIY home improvement guides from Better Homes & Gardens, the success rate for homeowners tackling RTA cabinet assembly without professional help hovers around 70-80% when proper preparation is involved.
The real challenge is the precision required. Cabinet boxes must be perfectly square, drawers must slide smoothly, and doors must align flush with the frame. One misaligned cam lock compounds into problems downstream. What makes assemble RTA cabinets manageable is that manufacturers design these systems for residential installation with pre-drilled holes, cam locks, and dowel joints that eliminate complex joinery.
The difficulty depends heavily on cabinet quality. Higher-quality plywood construction with precision-drilled holes makes assembly straightforward. Cheaper particle board with loose tolerances creates frustration.
Difficulty Level for DIY Homeowners
For someone with basic DIY experience, someone who's hung shelves, assembled furniture, or tackled simple home repairs, RTA cabinet assembly falls into the "doable" category. You don't need contractor-level skills, but you do need to be methodical and willing to spend time getting things right.
Beginners often underestimate assembly time and overestimate how forgiving the process is. A single cabinet might take 45 minutes to 2 hours depending on complexity. A full kitchen of 10-15 cabinets stretches across several weekends.
The most common difficulty isn't the physical assembly, it's understanding instructions and visualizing how pieces fit together. Modern RTA cabinet instructions use diagrams rather than detailed written steps. Study the layout before starting, identify all hardware, and understand the sequence.
Physical strength plays a smaller role than many expect. Most cabinet boxes weigh 40-80 pounds, manageable for most adults. The challenge is holding pieces in perfect alignment while fastening them. A second person becomes invaluable, not for extra strength, but to hold pieces steady while another drives fasteners.
One-Person vs. Two-Person Assembly
One person can absolutely assemble cabinets, but two people make the process significantly faster and less frustrating.
With one person, the bottleneck is holding pieces in alignment while fastening. You'll use clamps extensively to hold cabinet sides square, keep drawers aligned, and hold doors in position. A one-person job that takes a team 4 hours might take 6-7 hours solo.
With two people, one holds components while the other fastens. You work through a cabinet in 60-75% of the solo time. More importantly, you catch mistakes immediately. If a side panel is twisted, your partner notices before you've drilled three holes.
For solo assembly, budget extra time and invest in quality clamps. A set of four to six bar clamps becomes your second set of hands. You'll also want a sturdy work surface, a table or sawhorses, where you can lay out components before assembly.
Tools for RTA Cabinet Assembly You'll Actually Need
You don't need a professional workshop to assemble RTA cabinets, but you do need specific tools. The difference between having the right tools and improvising is often the difference between smooth assembly and frustration.
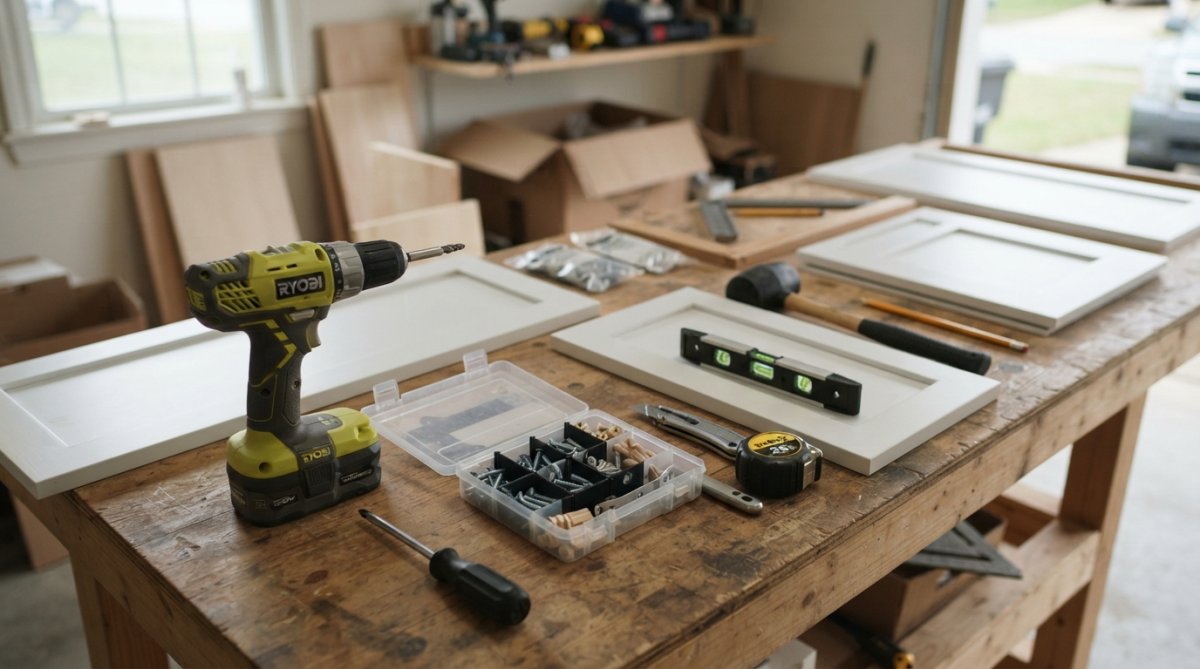
Essential Tools to Have on Hand
A cordless drill driver is non-negotiable. You'll drive hundreds of fasteners, screws into pre-drilled holes, bolts into cam locks, hinges into mounting plates. An 18-20 volt drill is sufficient.
A level is critical. Cabinet boxes must be perfectly vertical, and base cabinets must be perfectly level. A 24-inch or 30-inch level gives you adequate accuracy.
A rubber mallet helps you seat dowels and cam locks without splitting wood. Clamps hold components in alignment while you fasten them. You'll need at least four clamps, bar clamps or pipe clamps work equally well.
A measuring tape (25-foot minimum) helps you verify dimensions as you build. A Phillips head screwdriver (manual) is useful for final adjustments, and an Allen wrench set handles bolts that secure hinges and mounting hardware.
Nice-to-Have Tools That Speed Up the Process
A power impact driver drives fasteners faster and with less hand fatigue. A stud finder helps you locate wall studs for securing wall cabinets during installation. A pneumatic brad nailer can speed up back panel installation, though you can also drive finish nails by hand.
How Long Does It Take to Assemble RTA Cabinets?
The time required varies significantly based on cabinet type, your experience level, and whether you're working alone or with a partner.
Time Breakdown by Cabinet Type
Base cabinets typically take 1.5 to 2.5 hours per cabinet when working with a partner. Wall cabinets assemble faster, typically 45 minutes to 1.5 hours per cabinet. Specialty cabinets, corner cabinets, tall pantry cabinets, or cabinets with specialized hardware, take significantly longer, often 2-3 hours.
The first cabinet always takes longer than subsequent ones. By the fifth cabinet, you've typically reduced time per unit by 20-30%.
Factors That Affect Assembly Duration
Your experience level is the biggest variable. Cabinet quality dramatically affects assembly time. High-quality plywood with precision-drilled holes assembles smoothly. Your workspace matters, assembling on a large, clean table is faster than assembling on a kitchen floor. The complexity of hardware affects timing. Whether you're working alone or with a partner changes the timeline significantly.
| Cabinet Type | Solo Assembly Time | Two-Person Time | Complexity |
|---|---|---|---|
| Simple wall cabinet | 60-90 minutes | 45-60 minutes | Low |
| Standard base cabinet | 120-150 minutes | 75-90 minutes | Medium |
| Cabinet with soft-close hardware | 150-180 minutes | 90-120 minutes | High |
| Corner or specialty cabinet | 180-240 minutes | 120-150 minutes | Very High |
RTA Cabinet Assembly Tips for Success
Success comes from preparation, methodical execution, and understanding common pitfalls.
Pre-Assembly Preparation and Space Planning
Before opening any boxes, verify that everything arrived undamaged. Inspect cabinet panels for dents, cracks, or warping. Check hardware for missing pieces or defects.
Create a dedicated workspace where you can lay out all components. Organize hardware by type before you start. Read the entire instruction manual before opening any boxes. Understand the sequence, identify all components, and visualize how pieces fit together.
Measure your installation space before assembly. Verify that cabinet dimensions match your space. Check for obstacles like electrical outlets, pipes, or uneven walls. Custom sizing is available through RTA Wholesalers Custom Order Inset cabinetry, which can accommodate unusual dimensions.
Step-by-Step Assembly Best Practices
Start with the cabinet carcass (the main box structure). Lay out the sides, top, bottom, and back panel. Insert dowels into pre-drilled holes in the sides. Align the top and bottom pieces with the dowels. Use clamps to hold everything square while you drive fasteners.
Install the back panel last, not first. The back panel locks in any misalignment that already exists. Build the front structure square first, then install the back panel to confirm squareness.
Use a level frequently during assembly. Check that the cabinet box is square before fully tightening fasteners. Install cam locks firmly but don't over-tighten. Hand-tighten the bolt, then give it a quarter turn with the Allen wrench.
Install drawer slides carefully and precisely. Drawer slides must be perfectly parallel and at the exact same height on both sides. Install doors last, after the cabinet is fully assembled and installed in its final location.
RTA Cabinet Installation Mistakes to Avoid
Most assembly problems stem from a handful of common mistakes.
Common Assembly Errors and How to Prevent Them
Building the cabinet box out of square is the most common mistake. A box that's slightly out of square doesn't reveal itself until you install doors and drawers. Check squareness frequently during assembly before fully tightening fasteners.
Installing cam locks incorrectly, either too tight or too loose, creates problems. Over-tightened cam locks crack wood or strip the bolt. Under-tightened cam locks loosen over time. Hand-tighten the bolt, then give it a quarter turn with the Allen wrench.
Misaligning drawer slides is another common error. Slides must be perfectly parallel and at exactly the same height on both sides. Forcing pieces together that don't fit is tempting when tired or frustrated. If a piece doesn't fit smoothly, stop and check alignment.
Installing the back panel too early locks in any misalignment that already exists. Skipping the hardware organization step leads to wasted time searching for the right bolt mid-assembly.
Post-Assembly Adjustment and Troubleshooting
After assembly, doors rarely hang perfectly aligned on the first try. Most cabinet hinges have adjustment screws that let you fine-tune door position. Adjust doors after the cabinet is installed in its final location.
Drawers that stick or bind often need adjustment. Check that the drawer is fully inserted and that the slides are parallel. Doors that swing shut on their own indicate the cabinet is tilted. Check the base with a level and shim as needed.
Gaps between doors and the cabinet frame usually indicate misalignment during assembly. Small gaps (1/16-inch) are acceptable. Hardware that loosens over time is normal. Check fasteners monthly during the first few months after assembly.
RTA Cabinets vs. Pre-Assembled: Which Is Right for You?
The choice between RTA cabinets and pre-assembled cabinets depends on your budget, timeline, and willingness to invest effort in assembly.
Ready-to-assemble cabinets offer significant cost savings compared to pre-assembled alternatives. That savings comes from you providing the labor. Pre-assembled cabinets arrive ready to install, which takes a fraction of the assembly time.
Quality varies significantly in both categories. High-quality RTA cabinets from reputable manufacturers assemble smoothly and perform well for decades. The real decision comes down to this: Are you comfortable spending 20-40 hours assembling cabinets to save on cost? If yes, RTA cabinets make sense. If you'd rather pay more to avoid assembly, pre-assembled cabinets are worth the investment.
RTA Wholesalers offers Inset cabinets that are top quality and available in Custom sizes and Custom colors at great Wholesale pricing. Our assembled cabinets are available in just 5 weeks in a multitude of wood species and stain colors or an unlimited choice of Sherwin Williams paint colors. Whether you choose RTA or pre-assembled, the key is selecting cabinets that match your quality standards and your project timeline.
For homeowners who want the cost advantage of RTA with some assembly support, many retailers now offer assembly services for an additional fee. This hybrid approach lets you save on the product while outsourcing the labor-intensive assembly.
Is assembling RTA cabinets hard? For most homeowners with basic DIY experience and proper preparation, the answer is no, it's challenging but absolutely doable. The key is understanding the process, having the right tools, and taking time to build correctly rather than quickly. If you're considering RTA cabinets but worried about assembly, start with one cabinet to build confidence. Most homeowners find that the second and third cabinets go significantly faster as they develop the workflow. Whether you assemble yourself or choose our assembled options, quality cabinetry and proper planning ensure your kitchen renovation succeeds.
Frequently Asked Questions
Is it hard to assemble RTA cabinets if you've never done it before?
Most DIY homeowners find assembling RTA cabinets manageable with proper preparation and the right tools. The difficulty depends on your comfort level with basic tools and ability to follow detailed assembly instructions. Ready-to-assemble cabinets are designed with pre-drilled holes and hardware kits included, making the process more accessible than building from scratch. Taking time to organize parts, prepare your workspace, and read instructions thoroughly significantly reduces complications.
What tools do you need to assemble RTA cabinets?
Essential tools include a drill driver, rubber mallet, level, tape measure, and clamps. You'll also need a screwdriver set and possibly a stud finder for wall installation. Most RTA cabinets come with a hardware kit containing fasteners and cam locks. Having a work surface large enough to lay out cabinet box components and drawer slides helps tremendously. Optional but helpful tools include a pneumatic nailer, power drill with adjustable torque, and a cabinet assembly jig for ensuring squareness.
Can one person assemble RTA cabinets, or do you need two people?
One person can assemble RTA cabinets, though two people make the process faster and easier, especially for larger units like base cabinets. Solo assembly requires more clamping to hold pieces steady while fastening. Wall cabinets are lighter and more manageable for single-person assembly. Two-person teams can hold the cabinet carcass square while one person fastens components. If assembling alone, plan extra time and consider temporary support structures or additional clamps to prevent frustration.
What are the most common mistakes when assembling RTA cabinets?
Frequent mistakes include skipping the assembly instructions or not reading them fully before starting, failing to check cabinet squareness before tightening all fasteners, and over-tightening cam locks which can crack wood. Many people assemble without proper workspace, leading to bent components or lost hardware. Not checking hinge adjustment after installation often results in misaligned doors. Using incorrect fasteners or forgetting to apply wood glue to dovetail joints weakens the structure. Taking time to verify measurements and assembly steps prevents most common errors.
How long does it really take to assemble RTA cabinets?
Base cabinets typically require 1.5 to 2.5 hours per unit, while wall cabinets take 1 to 2 hours. Drawer assembly adds 15-30 minutes per drawer. Your experience level, available workspace, and tool familiarity significantly affect timing. First-time builders should add 25-50% extra time for reading instructions and problem-solving. Having all tools ready and a clean workspace before starting reduces assembly time by 20-30%. Rushing increases errors, so allowing adequate time prevents costly mistakes.


