 833-377-8663

How to Measure a Kitchen for Countertops: 2026 Guide

Table of Contents
- Tools and Prep for Measuring Kitchen Countertops
- How to Draw a Kitchen Countertop Template
- Measuring Countertop Length, Depth and Square Footage
- Using a Countertop Square Footage Calculator
- Kitchen Countertop Overhang Standards You Need to Know
- Template vs. Measurement: When Each Method Wins
- Material-Specific Considerations for Countertop Measuring
- Common Measuring Mistakes That Cost You a Remake
- Frequently Asked Questions
Last Updated: September 28, 2026
Tools and Prep for Measuring Kitchen Countertops
Getting the numbers right starts before you ever pick up a tape measure. Measuring kitchen countertops is the step that decides whether your slabs, seams, and sink cutouts land where they should, and mistakes here are expensive to undo.
The good news: this isn't complicated. It just has to be done in order.
What to Gather Before You Start
You need four things, and none of them are fancy:
- A steel tape measure at least 25 feet long, with a locking tab
- Graph paper and a pencil, plus a second colored pencil for notes
- A straightedge or framing square for checking corners
- A small level to spot high and low spots along the cabinet base
Skip the phone app for now. Paper lets you mark changes without deleting anything, and you'll want those notes later.
How to Draw a Kitchen Countertop Template
A kitchen countertop template is a scale drawing of your counter layout, showing every run, corner, and cutout. It's not a physical template, just a careful sketch on graph paper that captures the shape of your space.
Start by drawing the room outline. Then add each cabinet run, wall to wall.
Marking Sinks, Cooktops and Appliance Clearance
This is where most sketches fall apart. You need three things marked clearly:
- Sink opening centerline and rough width
- Cooktop cutout dimensions from the manufacturer's spec sheet
- Appliance clearance around the range, fridge, and dishwasher doors
Leave at least the clearance your appliance manual lists. A fridge door that can't open past a counter edge is a daily annoyance you'll never stop noticing.
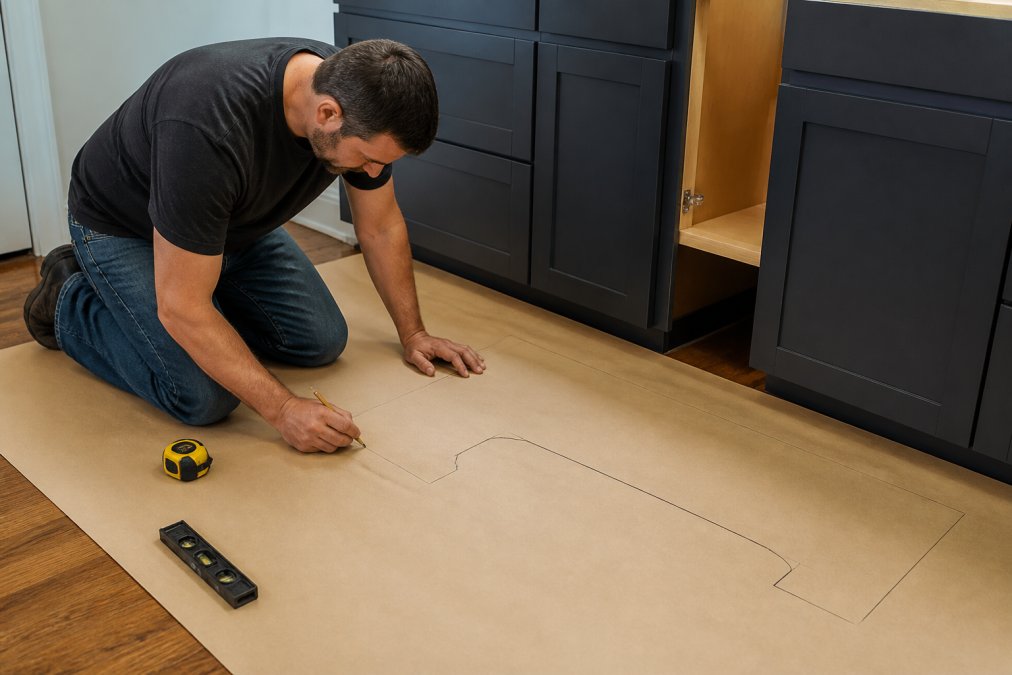
Measuring Countertop Length, Depth and Square Footage
Measure each run in linear inches, wall to wall, at the back edge of the cabinet where it meets the wall, not at the top of the backsplash. Standard base cabinet depth is 24 inches, and most countertops add a 1 to 1.5 inch front overhang, so the finished depth you order is usually 25 to 25.5 inches. Write each run as its own line. Do not total anything yet.
| Measurement | Where to Take It | Why It Matters |
|---|---|---|
| Length | Along the back wall edge, at counter height | Sets slab and seam layout |
| Depth | Front to back of cabinet carcass | Confirms overhang and appliance fit |
| Square footage | Length x depth, summed per run | Drives material ordering |
| Corner angle | Across the inside corner | Prevents gaps at the miter |
| Scribe allowance | Gap between wall and cabinet back | Tells the fabricator how much to trim |
Worked Example: A Straight Run
A 10 foot run at 25.5 inches deep is 120 inches x 25.5 inches, or 3,060 square inches. Divide by 144 and you get about 21.25 square feet. That is the finished surface area, not the slab you buy.
Worked Example: An L-Shape
For an L-shape, measure each leg to the outside corner of the cabinet run, then subtract the depth of the return leg once so you do not double-count the corner. A 10 foot leg plus an 8 foot leg at 25.5 inches deep is not 18 feet of counter, it is 18 feet minus 25.5 inches, or roughly 15.9 linear feet, which is about 33.7 square feet before waste.
Waste, Seams and Slab Size
Add 10 percent for waste on a simple layout and 15 percent on an L or U with a sink and a cooktop. Fabricators cut around sink openings, seam joints, and appliance cutouts, and offcuts rarely fit anywhere else.
Seam placement is the part most DIY guides skip. A typical quartz or granite slab is about 55 to 65 square feet, so a run longer than roughly 9 feet at 25.5 inches deep will need a seam. Seams should land at a natural break, the edge of a sink, the inside corner of an L, or the midpoint between two cabinet doors, never in the middle of a visible run or across a dishwasher opening. Mark your preferred seam locations on the sketch and let the fabricator confirm them.
Why Square Footage Alone Is Not Enough
Square footage tells you how much material to buy. It does not tell the fabricator how to cut it. Two kitchens with identical square footage can need very different slab counts depending on seam placement, grain direction on veined stone, and whether the sink is undermount or drop-in. Send the sketch, the seam notes, and the appliance spec sheets together, not just the total.
Using a Countertop Square Footage Calculator
A countertop square footage calculator turns your linear measurements into the total area you need to order. The math is simple: multiply length by depth for each run, convert to square feet, then add every run together.
For a 10 foot run at 25.5 inches deep, that's 120 inches x 25.5 inches, or 3,060 square inches. Divide by 144 and you get about 21.25 square feet.
Sink Base 30", 33", 36" & 42" Coffee →
Do this for every run, then add 10 percent for waste and cuts. Fabricators cut around sink openings and seams, and offcuts rarely fit anywhere else.
Kitchen Countertop Overhang Standards You Need to Know
Kitchen countertop overhang standards keep drawers, doors, and knees happy. The common baseline for base cabinets is a 1 to 1.5 inch front overhang.
Other spots have their own rules:
- Seating overhang: 12 inches for stools, 15 inches for comfortable legroom
- Side overhang: keep it under 1.5 inches unless you're bracing it
- Back overhang: typically zero against a wall, since the backsplash covers the gap
Check the National Kitchen & Bath Association guidelines for current recommendations before you finalize a seating island.
Template vs. Measurement: When Each Method Wins
Most guides pick one method and ignore the other. That's a mistake.
Measurement wins for simple, straight runs. You can do it yourself with a tape and graph paper, and it's fast.
Template wins for anything with an inside corner, an angled wall, or a farm sink. A physical template captures the actual shape of the space, including the wobble you can't see on a tape.
For a straight 8 foot run, measure. For an L-shaped kitchen with a bowed wall, get a template. The cost of a template is small next to the cost of a remake.
Material-Specific Considerations for Countertop Measuring
Different materials change how you measure, and this is the part most guides skip.
- Granite and quartz: seams need to land at natural breaks, so measure with seam placement in mind
- Laminate: finished edge profiles like bullnose and miter joints affect the front dimension
- Butcher block: expansion and contraction means you leave a small gap at the wall
- Solid surface: often fabricated with an integrated sink, so the cutout is built in, not cut on site
If you're ordering cabinets first, the U.S. Department of Energy's remodeling guidance is a solid starting point for planning the whole project sequence.
At RTA Wholesalers, our free kitchen design service reviews your layout before you order.
Common Measuring Mistakes That Cost You a Remake
- Measuring at the backsplash instead of counter height
- Forgetting the overhang when calculating depth
- Assuming corners are square
- Skipping appliance clearance checks
- Not marking which way the sink faces
If your kitchen has odd dimensions, RTA Wholesalers offers Custom Order Inset and Custom Color Inset cabinetry built to your measurements, along with Sherwin Williams paint color options for a finish that matches the rest of the room. Assembled cabinets ship in about five weeks.
Frequently Asked Questions
Should I measure for countertops before or after installing new cabinets?
Always measure after the base cabinets are set, shimmed and fastened to the wall. Cabinet boxes shift slightly during leveling, and those small changes affect countertop length, depth and seam placement. If you measure first, your numbers may be off by a quarter inch or more, which is enough to force a remake. Set the cabinets, confirm they are level, then measure for your kitchen countertops.
How do you calculate square footage for countertops?
Break the layout into rectangles, multiply length by depth in inches for each section, then divide the total by 144 to get square feet. A 96-inch run at 25-1/2 inches deep equals 2,448 square inches, or 17 square feet. Add each run, then add 10 percent for waste and cutouts. A countertop square footage calculator does the same math and helps you order the right slab quantity.
What is the standard depth for a kitchen countertop?
Standard base cabinets are 24 inches deep, and the countertop above them is typically 25 to 25-1/2 inches deep, giving a 1 to 1-1/2 inch front overhang past the cabinet face. That overhang keeps drips off the doors and gives your legs room while standing at the counter. Peninsula and island tops run the same depth on exposed sides unless you add seating overhang.
How far should a countertop overhang on the end?
On a finished end where the countertop stops against a wall or a panel, keep the overhang to about 1/4 to 1/2 inch so the edge looks intentional. On an exposed end with no cabinet beside it, match the front overhang, roughly 1 to 1-1/2 inches. For seating, plan 12 inches of clear knee space for standard stools and 15 inches for deeper seats, per common kitchen countertop overhang standards.
Measuring a kitchen for countertops is the one step where slowing down saves real money. Get the prep right, sketch carefully, and let someone check your numbers before you commit. RTA Wholesalers can help with custom size inset cabinets, custom colors, and a free design review that catches layout problems early. Get started with RTA Wholesalers and order cabinets that fit the first time.


