 833-377-8663

Professional Look With RTA Cabinets: A Complete Guide

Table of Contents
- What Are RTA Cabinets and Why They Deliver a Professional Look
- Pros and Cons of RTA Cabinets for Achieving a Professional Aesthetic
- Quality Materials That Support a Professional Finish
- How to Make RTA Cabinets Look Custom: Design and Style Strategies
- RTA Cabinet Hardware Upgrades for a High-End Look
- Kitchen Cabinet Crown Molding Ideas and Professional Finishing
- Cabinet Assembly and Installation Best Practices
- Maintenance and Repair: Keeping Your RTA Cabinets Looking Professional
Last Updated: July 12, 2026
What Are RTA Cabinets and Why They Deliver a Professional Look
Ready-to-assemble cabinets have transformed kitchen renovations by delivering professional results without custom manufacturing timelines. These cabinets arrive partially assembled with all components included, allowing you to complete assembly on-site. Quality RTA cabinetry with proper finishing techniques creates kitchens that rival high-end custom installations. What separates professional-looking installations from amateur ones is attention to details: soft-close hinges, dovetailed drawer construction, premium hardware, and careful finishing work elevate the entire aesthetic. When combined with crown molding and thoughtful face frame selection, a professional look with RTA cabinets becomes expected rather than exceptional.
Pros and Cons of RTA Cabinets for Achieving a Professional Aesthetic
Key Advantages
RTA cabinetry offers speed without sacrificing quality. Most assembled options ship within 5 weeks in multiple wood species, stain colors, and unlimited Sherwin Williams paint selections. Plywood construction, dovetailed drawers, and full-overlay designs create a foundation supporting professional appearance when properly installed.
Flexibility stands out as a major strength. Custom color inset cabinetry available in most any size means you're not locked into standard dimensions or limited palettes. This adaptability lets you match existing layouts or design around architectural quirks that would require expensive custom solutions. You gain design options at wholesale pricing without compromising materials or hardware quality.
Quality RTA cabinets use precise hardware and construction methods that produce tight, stable installations. Assembly becomes straightforward with clear instructions and components that fit precisely, unlike flat-pack furniture from general retailers.
Important Limitations
RTA cabinets demand more from the installer than delivery and placement. Assembly requires time, attention to detail, and proper tools. Mistakes during assembly are harder to correct than ordering replacements from custom shops.
Finishing techniques require knowledge that custom cabinet shops handle automatically. Painting, staining, and sealing demand expertise; unfamiliar techniques undermine professional appearance. Crown molding installation, hardware alignment, and door adjustment all require precision, these details separate polished kitchens from unfinished ones.
Storage limitations exist compared to fully custom solutions. While custom color inset options offer flexibility, you're still working within RTA design parameters. Complex layouts or unusual spatial requirements sometimes demand custom solutions that RTA options can't accommodate.
| Aspect | Advantage | Limitation |
|---|---|---|
| Timeline | 5 weeks for assembly | Requires proper scheduling |
| Customization | Custom colors, inset options available | Limited to RTA design parameters |
| Cost | Wholesale pricing | Installation demands skill |
| Materials | Plywood, dovetailed drawers | Finishing requires expertise |
| Control | Design flexibility | Assembly responsibility on you |
Quality Materials That Support a Professional Finish
Plywood vs. Particle Board Construction
Material foundation determines whether cabinets look professional years after installation or show wear within months. Plywood construction uses multiple thin wood layers bonded together, creating stability and resistance to warping. Particle board, compressed wood particles bound with resin, costs less but performs differently. It's more susceptible to moisture damage, warping under humidity changes, and sagging under sustained weight. In kitchens where humidity fluctuates seasonally, particle board cabinets develop visible gaps between doors and frames within years. Plywood maintains dimensional stability, keeping everything aligned and flush.
Quality RTA cabinets prioritize plywood for cabinet boxes and structural components. This choice supports the professional aesthetic you're building. When you invest time in assembly and finishing, you want materials that won't betray that effort with warping or misalignment.
Dovetailed Drawers and Hardware Durability
Dovetail joinery represents the visible difference between cabinets that look handcrafted and those that look assembled. Interlocking wooden joints replace simple butt joints or staples, distributing stress across multiple connection points. Drawers slide smoothly for years without loosening or sagging.
Hardware quality amplifies this foundation. Soft-close hinges and drawer glides with ball-bearing mechanisms feel substantial and move smoothly, closing quietly while maintaining precision alignment. Cheap hardware wears audibly and visibly within months. The combination of dovetailed drawers paired with quality hardware creates an experience that reinforces professional aesthetic, every drawer glides smoothly and every door closes with a soft click.
How to Make RTA Cabinets Look Custom: Design and Style Strategies
Shaker Style and Flat-Panel Design Choices
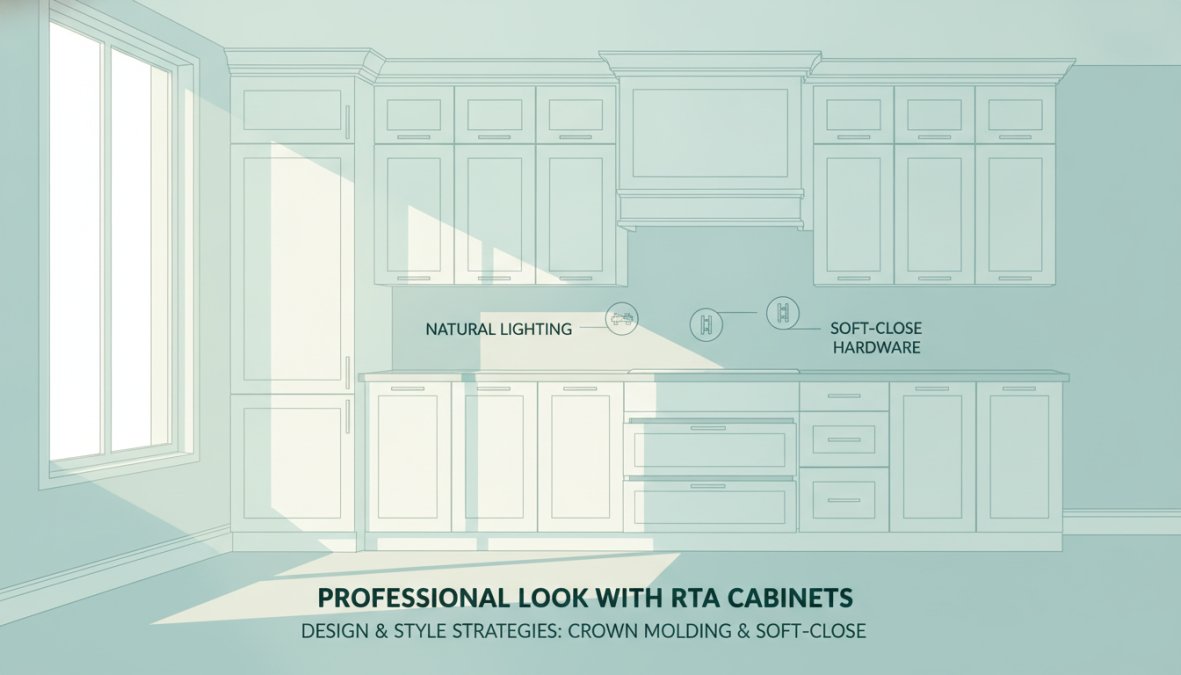
Design language communicates quality immediately. Shaker-style cabinetry, with its recessed panel and visible frame, reads as intentional and timeless. Flat-panel designs project minimalism and contemporary sophistication. Both styles support a professional look when executed with attention to proportions and material quality.
White shaker cabinets represent the most versatile option for achieving a professional look across diverse design preferences. They accept custom colors easily, coordinate with virtually any countertop material, and work equally well in transitional, farmhouse, or contemporary settings. The neutral foundation lets other kitchen elements establish the design direction.
Full Overlay and Face Frame Options
Full overlay cabinets, where doors cover the entire cabinet frame, create seamless, contemporary lines. The continuous surface feels intentional and polished. Full overlay demands precision during assembly and installation, any misalignment becomes immediately visible. The payoff is a simplified appearance that reads as high-end and intentional.
Face frame cabinets show the frame structure, creating visual separation between doors and reinforcing a structured aesthetic. The key is ensuring frames are straight, doors align perfectly, and hardware placement is symmetrical.
Premium Finishes and Custom Color Selection
Custom color inset cabinetry lets you move beyond standard wood tones and basic whites. Soft greens, muted blues, warm grays, and bold blacks have become mainstream kitchen choices. The professional look emerges when color selection considers lighting conditions, countertop materials, and overall kitchen proportions.
Sherwin Williams paint offers unlimited color options, letting you match existing architectural trim or coordinate with tile selections. Matte finishes hide dust and fingerprints better than gloss, supporting a cleaner appearance over time. Semi-gloss finishes reflect light and work well in smaller kitchens where brightness helps spatial perception.
RTA Cabinet Hardware Upgrades for a High-End Look
Soft-Close Hinges and Drawer Glides
Hardware represents the most visible quality indicator after doors and finishes. Soft-close hinges use hydraulic mechanisms to decelerate door closure, eliminating the slam that cheap hinges produce. This single upgrade transforms the tactile experience of using cabinets. Soft-close drawer glides operate on the same principle, allowing smooth gliding with hydraulic dampers that slow closure in the final inches.
The cost difference between standard and soft-close hardware is modest relative to the impact on perceived quality. When every cabinet door and drawer closes with controlled precision, the entire kitchen feels more expensive and carefully designed.
Premium Hardware Selection and Installation
Hardware style communicates design intent. Modern kitchens suit sleek, minimalist pulls in brushed nickel or matte black. Traditional kitchens benefit from cup pulls or decorative knobs in oil-rubbed bronze. Transitional designs often use simple bar pulls that work across multiple styles.
Installation precision determines whether hardware elevates or undermines your design. Handles and pulls must be perfectly aligned vertically and horizontally. Using a template or jig ensures consistent placement across dozens of cabinet doors and drawers.
Kitchen Cabinet Crown Molding Ideas and Professional Finishing
Crown Molding Installation Techniques
Crown molding transforms cabinets from utilitarian storage into architectural elements. The molding creates visual weight at the ceiling line, making the kitchen feel more intentional and designed. Without crown molding, RTA cabinets can read as temporary or incomplete.
Installation requires precision cutting and fitting. Crown molding sits at an angle, typically 45 degrees, requiring compound miter cuts where pieces meet walls and inside corners. Many installers use coping techniques for inside corners, which creates seamless joints that look custom-made. The molding profile you select should coordinate with other kitchen details, simple profiles suit modern kitchens while ornate profiles work well with traditional designs.
Professional Finishing and Paint Application
Paint application quality separates professional installations from DIY attempts. This includes surface preparation, filling gaps, sanding between coats, and ensuring smooth surfaces. Brush marks, drips, and uneven coverage immediately signal amateur work. Professional results require quality brushes, proper paint consistency, and patience between coats.
Primer application matters as much as topcoat. Quality primer seals wood grain, ensures even topcoat adhesion, and often requires only one finish coat if applied correctly. Stain application for wood-tone finishes demands even more precision. Professional stain work requires consistent pressure, overlapping strokes, and attention to grain direction.
Cabinet Assembly and Installation Best Practices
Step-by-Step Assembly for a Polished Result
Assembly begins with inventory verification. Confirm that all components match your order before beginning work. Lay out components systematically, all boxes in one area, doors in another, hardware in labeled containers.
Cabinet box assembly requires careful attention to square and level. Measure diagonals to confirm boxes are square before fastening. Use quality fasteners and ensure all connections are tight without over-tightening. Test drawer glides before full assembly to confirm they operate smoothly.
Door hanging comes after box installation. Doors must be perfectly aligned with frames, no gaps, no binding, no misalignment. Many professionals hang doors, adjust them fully, then remove them for finishing before final installation. This approach prevents damage during painting or staining.
Common Mistakes to Avoid During Assembly
Rushing assembly is the most common mistake. Assembly requires concentration and precision. Forcing components together, skipping alignment checks, or proceeding with crooked boxes creates cascading problems. Each mistake compounds, a box that's not square makes door alignment impossible.
Over-tightening fasteners damages wood and strips threads. Fasteners should be snug but not forced. Neglecting finishing work before final installation is another common error. Painting or staining cabinet boxes after installation is messy and difficult. Professional installers finish components before final assembly whenever possible.
| Assembly Phase | Critical Step | Common Mistake | Impact |
|---|---|---|---|
| Inventory | Verify all components present | Missing hardware discovered mid-assembly | Delays and frustration |
| Box Assembly | Confirm square with diagonal measurements | Skipping square check | Impossible door alignment |
| Hardware Installation | Use drilling template for consistency | Inconsistent hole placement | Misaligned doors and drawers |
| Door Hanging | Adjust hinges for perfect alignment | Rushing adjustment process | Visible gaps and binding |
| Finishing | Complete before final installation | Painting after installation | Drips and uneven coverage |
Maintenance and Repair: Keeping Your RTA Cabinets Looking Professional
A professional look requires ongoing attention. Kitchen cabinets endure constant use, humidity fluctuations, and exposure to cooking vapors. Regular maintenance preserves the finish and prevents problems that undermine the polished appearance.
Dust cabinets weekly with a soft cloth. Kitchen dust contains grease particles that accumulate on surfaces and dull finishes. For painted cabinets, use a slightly damp microfiber cloth to lift dust without scratching the finish. Address spills immediately, water, cooking oils, and acidic substances can damage paint or stain finishes if left sitting.
Hinges and drawer glides require periodic maintenance. Inspect hardware regularly and tighten loose fasteners. If soft-close function diminishes, the hydraulic mechanism may need replacement, this is normal wear. Wood-tone finishes benefit from occasional conditioning. Food-safe wood conditioner applied annually maintains finish depth and prevents cracking.
For chips or scratches in painted finishes, touch-up paint from the original manufacturer matches better than hardware store alternatives. Keep a small container of your cabinet paint for repairs. Professional look with RTA cabinets depends on consistent maintenance. The investment you made in quality materials, hardware, and finishing deserves protection through regular care.
Achieving a professional look with RTA cabinets isn't about choosing expensive materials or hiring specialists, it's about understanding which details matter and executing them with precision. From plywood construction and dovetailed drawers to soft-close hardware and crown molding, each element compounds to create kitchens that rival custom installations. RTA Wholesalers offers custom color inset cabinetry in most any size at wholesale pricing, with assembled options available in 5 weeks across multiple wood species and unlimited Sherwin Williams paint colors. The professional appearance you're building deserves materials and support that match your effort.
Frequently Asked Questions
Can RTA cabinets look as good as custom cabinets?
Yes, RTA cabinets can achieve a professional look comparable to custom options when you select quality materials like plywood construction, upgrade hardware with soft-close hinges and premium drawer glides, and apply professional finishing techniques. The key is choosing the right style, shaker or flat-panel designs, and adding details like crown molding. Many homeowners achieve a high-end aesthetic with RTA cabinets by focusing on material quality and thoughtful design choices rather than assembly complexity.
What are the best ways to make RTA cabinets look expensive?
To elevate RTA cabinets, invest in premium hardware upgrades, select rich wood species or unlimited Sherwin Williams paint color options, and add architectural details like crown molding. Full overlay configurations and dovetailed drawers also enhance perceived quality. Professional installation, careful attention to alignment during assembly, and proper finishing techniques, including quality paint application, make a significant difference in the final appearance. Custom sizing options allow you to maximize kitchen layout efficiency, further enhancing the professional look.
How do you hide seams on RTA cabinets?
Seams become less visible when you use full overlay cabinet configurations and ensure precise alignment during assembly. Crown molding at the top conceals gaps between cabinets and ceiling. Using consistent stain colors or paint finishes across all cabinet boxes minimizes visual breaks. Professional finishing with quality paint or stain applied to all visible edges and surfaces creates a seamless appearance. Proper installation instructions followed carefully during assembly help achieve tight joints that require minimal finishing work.
Are RTA cabinets durable enough for a professional-looking kitchen?
Quality RTA cabinets with plywood construction, dovetailed drawers, and premium hardware are highly durable for residential kitchens. The durability depends on material selection, plywood boxes outlast particle board significantly. Soft-close hinges and high-quality drawer glides reduce wear over time. Proper assembly following installation instructions and regular maintenance preserve the professional appearance long-term. Many homeowners find that RTA cabinets from quality manufacturers offer durability comparable to semi-custom options at a fraction of the cost.


