 833-377-8663

Under Cabinet Lighting Installation Guide for Beginners

Table of Contents
- What You'll Need Before You Start Your Under Cabinet Lighting Installation
- Hardwired vs Plug-In Under Cabinet Lighting: Which Is Right for Your Kitchen?
- Under Cabinet Lighting Placement Guide: Where to Position Lights for Best Results
- Best Tools for Installing Kitchen Cabinet Lights
- Step-by-Step Installation: Mounting, Wiring, and Connecting to Power
- Smart Home Integration and Troubleshooting Common Installation Issues
- Finishing Touches: Hiding Wires and Concealing Hardware
- Frequently Asked Questions
Last Updated: October 3, 2026
What You'll Need Before You Start Your Under Cabinet Lighting Installation
Under cabinet lighting installation means adding low-voltage fixtures beneath wall cabinets to light the countertop.
This guide from RTA Wholesalers walks you through the whole job, from picking LED strip lights to hiding the last wire, without the jargon.
Most guides start with wiring. That's why we stock light rail molding that hides the fixture and wiring in one pass.
Types of Under Cabinet Lighting: LED Strips, Pucks, and Linear Fixtures
Three fixture types cover nearly every kitchen.
- LED strip lights run in a continuous tape. Best for even, seamless light along a full cabinet run.
- Puck lights are small round discs. Best for tight spots or a single cabinet.
- Linear fixtures are rigid bars. Best for a clean, built-in look.
Tools and Materials Checklist
Gather these before you start:
- LED strip lights or puck lights
- Power supply or LED driver
- Voltage tester
Hardwired vs Plug-In Under Cabinet Lighting: Which Is Right for Your Kitchen?
Hardwired under cabinet lighting connects to your home's wiring inside a junction box; plug-in lighting runs a cord to a nearby outlet. Hardwired looks cleaner and adds resale value.
Choose hardwired if you're already opening walls or adding a circuit. Choose plug-in if you rent or want light this weekend. A common mistake is running a plug-in cord across the backsplash, plan the outlet location first.
Under Cabinet Lighting Placement Guide: Where to Position Lights for Best Results
Placement decides whether your under cabinet lighting looks custom or looks like a strip of tape. The right position depends on your countertop material, backsplash, and the fixture's beam angle.
The general rule: mount the fixture so its light-emitting face sits roughly one-third of the way back from the front edge of the cabinet. On a standard 12-inch-deep upper, that's about 4 inches back, pushing light down onto the work surface instead of into your eyes.
Placement by Countertop Material
Polished granite, quartz, and marble. These near-mirror finishes reflect a front-third strip straight into your eyes.
Matte quartz, honed stone, and solid surface. These diffuse light, so the front-third rule works well.
Butcher block and wood. Uneven finishes show hot spots badly.
Dark countertops (black granite, dark quartz). Dark surfaces absorb light, so push the fixture slightly forward (about 3 inches from the front edge) and consider a higher-output strip.
Beam Angle and Overlap
Beam angle determines how wide a pool of light a fixture throws. A narrow 60-degree beam creates a bright circle and dark gaps between cabinets; a wide 120-degree beam spreads light across the full counter depth.
For a continuous run, overlap the beams by about 20 to 30 percent. Puck lights should sit no more than 24 to 30 inches apart; a continuous LED strip has no spacing issue because the source is unbroken.
Backsplash and Wall Wash
Mount the fixture too far back and light washes up the backsplash, leaving the counter in shadow, fine for a decorative wall-wash, wrong for task lighting. For both, use a two-row setup: one row at the front third for task light, one at the back for accent. Make sure your driver handles the combined wattage.
Retrofitting vs New Construction Considerations
Retrofitting means adding lights to finished cabinets, often by fishing wire through cabinets or using a plug-in kit, stuck with the depth you have. In new construction you can plan wiring before the drywall goes up, specify a deeper upper (13 or 14 inches instead of 12) for more room, and install a switched outlet inside a cabinet, eliminating the cord-across-the-backsplash problem entirely.
Best Tools for Installing Kitchen Cabinet Lights
The best tools for installing kitchen cabinet lights are a voltage tester, wire strippers, a compact drill, and a stud finder, no full electrician's kit needed.
- Voltage tester confirms power is off before you touch a wire
- Wire strippers make clean cuts on low-voltage cable
- Compact drill fits inside a cabinet
Add a level and a tape measure. Uneven strips are the number one giveaway of a DIY job.
Light Rail Molding Elegant Oak Craftsman Shaker Trim Pieces →
Step-by-Step Installation: Mounting, Wiring, and Connecting to Power
Budget a weekend for a hardwired job and a few hours for plug-in.
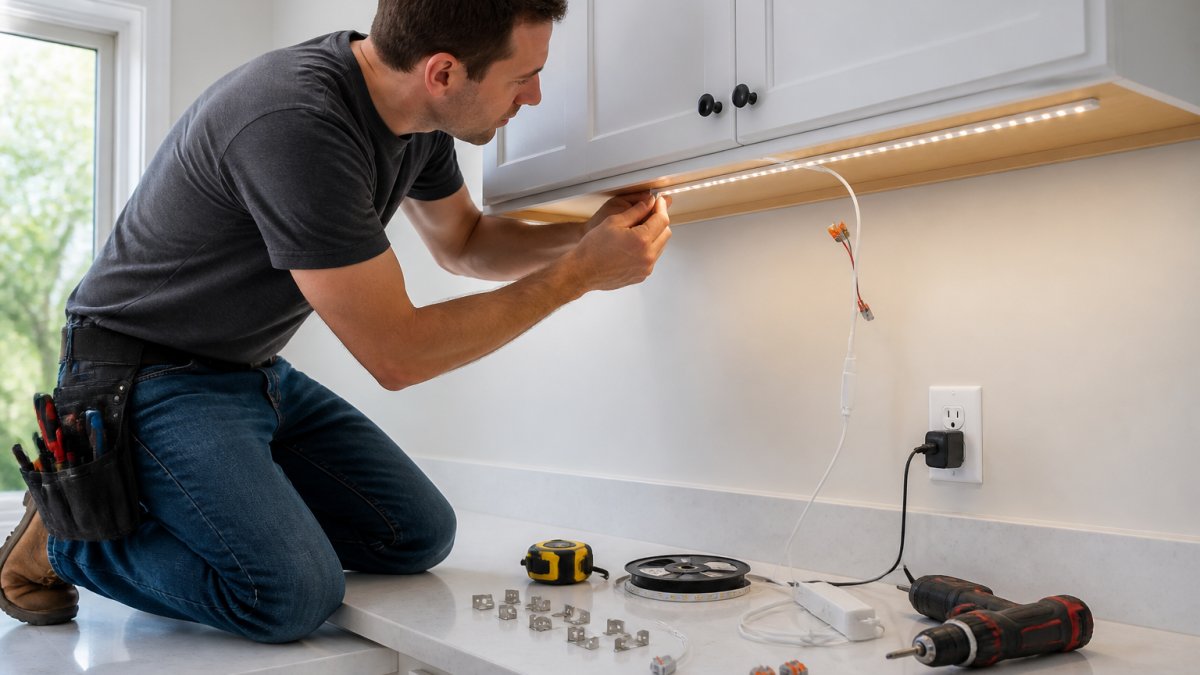
Measuring Cabinet Dimensions and Planning Your Layout
Measure each cabinet run end to end, note every cabinet width and gap, then sketch your layout.
- Mark where each fixture starts and stops
- Plan where the power supply will sit
- Check that runs stay under the driver's wattage limit
Mounting Methods and Attachment Options
Most strips attach with adhesive backing, but adhesive alone fails over time in a warm kitchen, use mounting clips every 12 to 18 inches. Surface mount fixtures screw to the cabinet bottom; recessed mount fixtures sit flush inside a routed channel.
Wiring Connections and Power Sources
Connect fixtures with wire connectors, keep runs on the low voltage side of the driver, and plug the power supply into a switched outlet or a junction box. Add a dimmer switch for control. For daisy-chaining, run one fixture to the next in a single line, watching total length so the far end stays bright.
Smart Home Integration and Troubleshooting Common Installation Issues
Smart integration is the easiest upgrade you can make: a smart dimmer or Wi-Fi controller adds schedules, scenes, and voice control. But it introduces its own failure modes, so it belongs with troubleshooting.
Smart Control Options That Actually Work With LED Strips
Not every smart switch plays nice with low-voltage LED drivers. What to look for:
- Smart dimmer switches (in-wall). These replace your wall switch and control the circuit feeding the driver. They work best with a dimmable driver rated for the dimmer's minimum load, many LED drivers draw so little power that a smart dimmer flickers or buzzes below that minimum. Check the rating before you buy.
- Wi-Fi or Zigbee controllers (inline). These sit between the driver and the strip and suit plug-in setups since you don't open a wall. Match the controller to your strip's voltage (commonly 12V or 24V DC) and total wattage.
- Smart plugs. The simplest option: plug the driver into a smart plug and control it by app or voice. You lose dimming unless the driver is dimmable, but gain scheduling and voice control with zero wiring.
A common pattern: a smart dimmer for the main circuit and a smart plug for a separate accent run, so task and accent lighting are controlled independently.
Troubleshooting: A Diagnostic Sequence, Not a Guess
When something goes wrong, work through the system in order: power source, driver, connection, fixture. Most problems are in the first two steps.
| Problem | Likely Cause | Diagnostic Step | Fix |
|---|---|---|---|
| Nothing turns on | No power at the outlet or breaker | Test the outlet with a voltage tester | Reset the breaker or move to a live outlet |
| Nothing turns on, outlet is live | Driver failure or wrong driver voltage | Check driver output with a multimeter | Replace with a driver matching the strip's voltage and wattage |
| Flickering | Loose wire connector or undersized driver | Wiggle each connector while the light is on | Re-seat and tighten; if it persists, upsize the driver |
| Flickering only when dimmed | Wrong dimmer type or load below minimum | Check dimmer's minimum load rating | Switch to an LED-rated dimmer with a lower minimum |
| Dim light at the far end of a run | Voltage drop | Measure voltage at the far end with a multimeter | Shorten the run, use a thicker gauge wire, or add a second driver |
| Adhesive fails | Warm cabinet, dusty surface, or cheap backing | Press the strip; if it lifts, it's the adhesive | Clean with isopropyl alcohol and switch to mounting clips every 12 to 18 inches |
| Buzzing dimmer | Wrong dimmer type | Listen at the switch, not the strip | Use an LED-rated dimmer |
| Smart control won't respond | Controller not paired or hub offline | Check the app for device status | Re-pair the controller or restart the hub |
Voltage Drop: The Math You Actually Need
Voltage drop happens when a wire run is long enough that resistance eats voltage before it reaches the far end of the strip, bright at the driver end, dim at the far end.
The fix depends on the cause: shorten or split an overlong run into two runs fed by separate drivers, or replace thin wire with a heavier gauge.
When to Call an Electrician
If you're hardwiring a new circuit, opening a junction box, or working inside a panel and you're not comfortable with line voltage, call a licensed electrician. Low-voltage work on the output side of a driver is beginner-friendly; line-voltage work on the input side is not.
Finishing Touches: Hiding Wires and Concealing Hardware
The job isn't done until you can't see the hardware, this separates a pro look from a weekend hack.
- Tuck wire into an aluminum channel or run it along the cabinet bottom
- Use light rail molding to cover the strip and the wiring
- Add a skin panel to finish the bare cabinet underside
This is where RTA Wholesalers earns its keep. Our Snow White Shaker light rail and Elegant Oak Craftsman light rail both mount under wall cabinets to conceal lighting and wiring; pair either with a skin panel and the underside reads as finished cabinetry. For a warmer tone, the Mocha Craftsman light rail matches that line.
For a custom look, our Custom Order Inset and Custom Color Inset cabinets let you match your uppers to the trim, and our Special Order Oak Inset Kitchen Cabinets are a natural fit if you're planning a wood-tone kitchen.
Under cabinet lighting changes how a kitchen feels every day. The hard part isn't the wiring, it's making the finished job look built-in, not bolted on.
That's where we come in. RTA Wholesalers offers inset and overlay cabinets, custom sizes, custom colors, and trim pieces made to hide the hardware.
Frequently Asked Questions
How do I choose between hardwired and plug-in under cabinet lights?
Hardwired systems connect directly to your home's electrical circuit, offering a clean look with no visible cords but requiring a junction box and possibly an electrician. Plug-in options are simpler for beginners, plugging into an existing outlet and using adhesive or clips to secure wires. If you're comfortable with basic electrical work and want a permanent solution, hardwired is ideal. For renters or quick upgrades, plug-in is the practical choice.
My hardwired under cabinet lighting isn't working. What should I do?
First, check the circuit breaker to ensure power is reaching the outlet. Use a voltage tester to confirm the transformer or LED driver is receiving power. If the lights still don't turn on, inspect wire connectors for loose connections and verify the dimmer switch is compatible with your LED fixtures. A common issue is voltage drop over long runs; ensure your power supply matches the total wattage of all connected lights.
Where is the best place to position lights under kitchen cabinets?
Mount lights toward the front edge of the cabinet, about 1 to 2 inches back from the front face. This placement reduces glare on the countertop and minimizes shadows. For even illumination, space puck lights every 8 to 12 inches. LED strips should run the full length of the cabinet. Avoid placing lights directly above reflective surfaces to prevent harsh reflections.
Can I install LED strip lights on my own?
Yes, LED strip lights are beginner-friendly. Most kits include adhesive backing and mounting clips. Clean the cabinet underside, peel and stick the strip, then secure with clips for extra hold. Connect the strips to a transformer or LED driver, and plug into a nearby outlet or hardwire to a junction box. Always follow the manufacturer's instructions and use wire connectors for safe electrical connections.


