 833-377-8663

Best Kitchen Cabinet Lighting Ideas for Functionality

Table of Contents
- Why Kitchen Cabinet Lighting Matters for Workspace Efficiency
- Puck Lights vs. Linear LED Strips: Which Works Best
- Best Color Temperature for Kitchen Task Lighting
- Hardwired vs Plug-In Cabinet Lighting: Comparing Installation and Performance
- Interior Cabinet Lighting for Glass-Front Doors
- Under Cabinet LED Lighting Installation: A DIY-Friendly Approach
- Finishing Touches: Concealing Wiring and Hardware
- Frequently Asked Questions
Last Updated: September 19, 2026
Why Kitchen Cabinet Lighting Matters for Workspace Efficiency
Proper kitchen cabinet lighting transforms how you work. It eliminates shadows where you're prepping food, makes it easier to find items in drawers, and creates a more inviting space overall. But here's what most homeowners miss: the right lighting setup also protects your cabinets and countertops from premature wear.
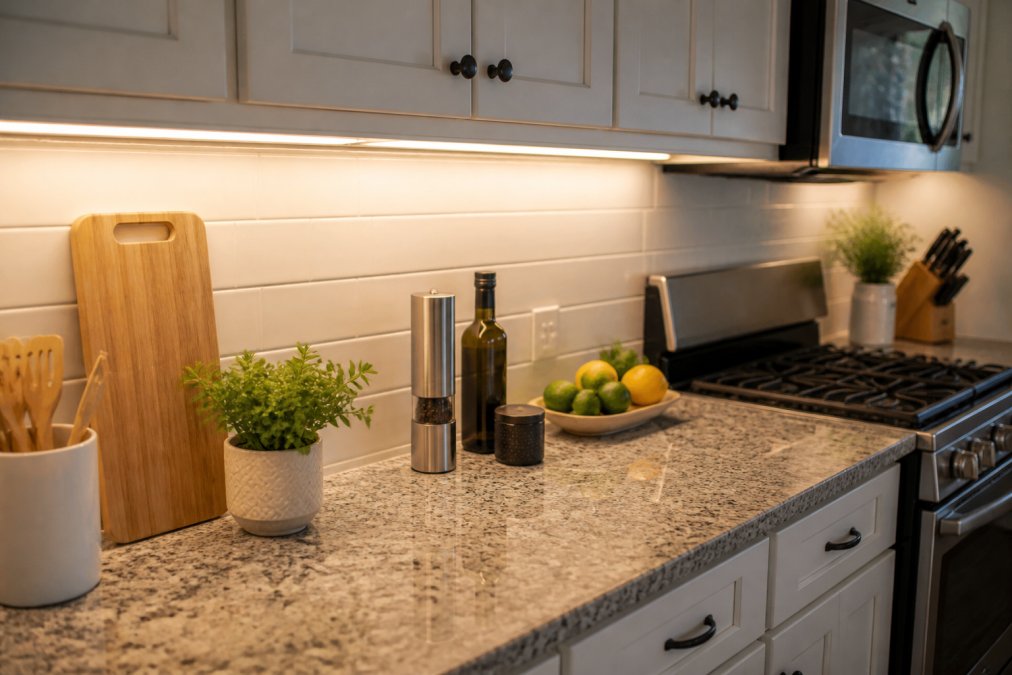
Poor lighting strains your eyes and slows work. Task lighting puts light exactly where you need it, reduces eye fatigue, and makes your kitchen feel larger and more functional.
Choosing the right approach matters. The decisions you make about kitchen cabinet lighting affect installation complexity, energy costs, and your renovation timeline.
Puck Lights vs. Linear LED Strips: Which Works Best
Puck lights and linear LED strips are the two main options for under-cabinet illumination, and they serve different purposes depending on your kitchen layout and aesthetic goals.
Puck lights are individual circular fixtures (2-3 inches diameter, spaced 12-18 inches apart) that create distinct pools of illumination. They work well for highlighting specific work zones.
Linear LED strips are continuous ribbons that provide uniform, seamless illumination across your entire countertop with a cleaner aesthetic.
Puck lights offer selective placement; linear strips provide comprehensive coverage. For Custom Order Inset cabinets, linear strips adapt to any length and pair well with custom colors for a cohesive, built-in appearance.
| Lighting Type | Coverage Pattern | Installation Complexity | Best For | Aesthetic |
|---|---|---|---|---|
| Puck Lights | Individual pools of light | Moderate | Targeted task areas | Visible fixtures |
| Linear LED Strips | Continuous, uniform light | Moderate to high | Full countertop coverage | Seamless, modern |
Best Color Temperature for Kitchen Task Lighting
Color temperature (measured in Kelvin) determines whether lighting feels warm or cool, but Color Rendering Index (CRI) and lumen output equally affect how well you can work.
Understanding Color Temperature
Warm white (2700K-3000K) is cozy but obscures food colors. Cool white (4000K-5000K) provides better color accuracy but can feel clinical.
The optimal range for under-cabinet task lighting is 3500K to 4000K, balancing visibility with warmth and residential comfort.
Why Color Rendering Index (CRI) Matters More Than You Think
CRI measures color accuracy on a scale of 0-100. Standard fluorescents score 70-80 CRI; quality LEDs achieve 90+ CRI. This difference directly impacts your ability to assess food doneness and identify spills.
Low-CRI lighting creates guesswork when checking food doneness. A 90+ CRI fixture reveals true colors, reducing mistakes and improving food safety.
Lumen Output and Beam Spread
For under-cabinet lighting, aim for 300-500 lumens per linear foot, depending on ambient light. Kitchens with large windows need less; those with limited natural light benefit from the higher end.
Beam spread determines coverage efficiency. Narrow spreads (30-45°) target specific zones; wide spreads (60-90°) cover broader surfaces. Linear strips offer 120° spreads; puck lights range from 30-90°.
Putting It Together
When selecting under-cabinet lighting, specify fixtures with 4000K color temperature, 90+ CRI, and 400-500 lumens per linear foot as your baseline. This combination ensures you can see true colors, work comfortably for hours, and maintain food safety standards. The investment in higher-CRI LEDs is modest but transforms how functional your kitchen actually is, not just how it looks. Optimizing your workspace requires a holistic approach where precise illumination works in tandem with other functional kitchen essentials to streamline every culinary task.
Hardwired vs Plug-In Cabinet Lighting: Comparing Installation and Performance
Your installation method determines both the complexity of setup and the long-term reliability of your lighting system.
Hardwired systems are connected directly to your home's electrical circuit. An electrician runs wiring behind or inside your cabinets, connecting the fixtures to a dedicated breaker. This approach requires professional installation but delivers permanent, reliable lighting. Hardwired fixtures have no visible cords and integrate seamlessly with your cabinetry.
Plug-in systems connect to standard wall outlets using a power cord. They're simple to install, just plug them in, and require no electrical work. The downside is that cords are visible and you're limited by outlet placement. Plug-in systems work well for renters or temporary setups but aren't ideal for permanent kitchen renovations.
Battery-operated lights are wireless and require no installation at all. They're useful for testing layouts before committing to hardwired or plug-in solutions. However, battery life is limited and ongoing maintenance becomes necessary.
Light Rail Molding Elegant Oak →
For most homeowners doing a full kitchen renovation, hardwired lighting makes sense. Yes, installation takes longer and costs more upfront. But you get a professional result, no visible cords, and fixtures that last for years. If you're working with RTA Wholesalers on custom inset cabinetry, hardwired lighting complements the built-in look perfectly. The investment in professional installation aligns with the quality of your cabinet investment.
Interior Cabinet Lighting for Glass-Front Doors
Glass-front cabinets display your dishware and decorative items, but they need proper lighting to look their best. Interior lighting, fixtures mounted inside the cabinet itself, highlights what's inside and creates visual interest.
The key consideration for interior cabinet lighting is intensity and placement. You want enough light to showcase items without creating glare on the glass. Mount fixtures toward the back or sides of the cabinet rather than directly above, where light would bounce off the glass surface.
LED puck lights work particularly well for interior cabinet lighting because you can position them precisely. A single light per shelf is often sufficient for standard 24-36 inch cabinets. For larger displays, two lights positioned symmetrically provide balanced illumination.
Color temperature matters here too. Neutral white (4000K) works best for interior cabinet lighting because it shows the true colors of your dishware and makes the display feel intentional rather than accidental. Warm white can work if you're highlighting warm-toned ceramics or wood items.
Under Cabinet LED Lighting Installation: A DIY-Friendly Approach
The decision between DIY and professional installation hinges on two factors: the type of lighting system and your local electrical code requirements. Understanding the legal and safety boundaries will save you time, money, and potential code violations.
When DIY Is Safe and Legal
Plug-in and battery-operated under-cabinet lighting require no electrical work and are universally DIY-friendly. These systems operate at standard household voltage (120V) and connect to existing outlets, so no permits or inspections are required. Installation is straightforward and takes 1-2 hours for a typical kitchen.
For plug-in LED strips:
- Measure the length of each cabinet run and purchase strips accordingly
- Clean the underside of the cabinet with rubbing alcohol to remove dust and grease
- Peel back the adhesive backing and press the strip firmly into place, starting at one end
- Run the power cord to a nearby outlet, using clips or cable channels to secure it neatly
- Test the lights and adjust positioning if needed
- Use light rail molding to conceal the fixture and wiring for a finished appearance
Light rail molding serves a practical purpose beyond aesthetics. It hides fixtures and wiring while adding a polished edge to your cabinet undersides. Choosing molding that matches your cabinet finish creates a seamless, custom appearance.
When You Must Hire a Licensed Electrician
Hardwired under-cabinet lighting, fixtures connected directly to your home's electrical circuit, requires a licensed electrician in most jurisdictions. Here's why: hardwired installations involve running wiring through walls, attics, or inside cabinets; connecting to a dedicated circuit breaker; and ensuring compliance with the National Electrical Code (NEC). These tasks fall outside the scope of homeowner electrical work in most states and municipalities.
Specifically, the NEC requires that any permanent lighting fixture be installed by a qualified electrician and inspected before the system is energized. Attempting hardwired installation without a license can void your homeowner's insurance, create fire hazards, and result in code violations that complicate future home sales or insurance claims.
Additionally, some jurisdictions require a permit for any new hardwired lighting, even in existing kitchens.
Low-Voltage Hardwired Systems: A Middle Ground
Professional Installation Timeline and Best Practices
Summary: DIY vs. Professional
- Plug-in or battery-operated systems: DIY-friendly, no permits required, 1-2 hours installation
- Hardwired systems: Requires licensed electrician, likely requires permit, 2-4 hours professional installation
- Low-voltage hardwired systems: Check local code; transformer connection may still require professional installation
Finishing Touches: Concealing Wiring and Hardware
The difference between a DIY lighting job and a professional-looking installation often comes down to how well you conceal wiring and fixtures.
Frequently Asked Questions
What is the best lighting for kitchen cabinets?
The best kitchen cabinet lighting combines task lighting (4000K-5000K color temperature) for work surfaces with ambient lighting for overall visibility. LED strips or puck lights mounted under wall cabinets eliminate countertop shadows and improve food prep safety. For glass-front cabinets, interior accent lighting at 3000K adds visual warmth while showcasing contents. Choose dimmable options to adjust brightness based on time of day and activity.
Should cabinet lighting be warm or cool white?
Use cool white (4000K-5000K) for task areas where you prep food and need accurate color rendering to see ingredient quality. Warm white (2700K-3000K) works better for ambient lighting and display cabinets, creating an inviting atmosphere. Many kitchens benefit from layering both: cool task lighting under work surfaces and warm accent lighting in glass-front display cabinets for a balanced, functional design.
How do I choose between LED strips and puck lights for my cabinets?
Linear LED strips provide continuous, even illumination across long countertops and work best for task lighting over prep areas. Puck lights (individual round fixtures) offer focused pools of light and suit accent lighting in glass cabinets or smaller under-cabinet spaces. Strips cost less per foot and create fewer dark spots, while pucks allow precise placement and easier individual replacement. Consider your cabinet layout and whether you prioritize uniform coverage or adjustable spotlighting.
Are smart lighting controls worth it for kitchen cabinetry?
Smart controls add convenience and energy savings if you adjust kitchen lighting frequently throughout the day. Voice activation and scheduling can automate lighting during meal prep or entertaining. However, basic dimmable LED fixtures deliver most functional benefits at lower cost. Smart systems work best in kitchens with multiple lighting zones or when integrated into a broader home automation setup.


