Addressing the Crucial Aspect of Kitchen Cabinet Installation: Enhancing the Toe Kick with an Exposed Plywood Edge

Addressing the Crucial Aspect of Kitchen Cabinet Installation: Enhancing the Toe Kick with an Exposed Plywood Edge
The meticulous planning of your cabinet installation is pivotal to achieving a flawless kitchen layout. A comprehensive plan must account for every exposed edge, ensuring that every detail contributes to a seamless finish. In this discussion, we will discuss a critical element of custom cabinet installation: the toe kick with an exposed plywood edge.
There are two essential components that constitute the toe kick:
1) The toe kick integrated into a finished cabinet. Typically, this piece measures 1/2" in thickness and is added during the cabinet assembly process. It extends 1/4" beyond both sides of the cabinet's plywood side.
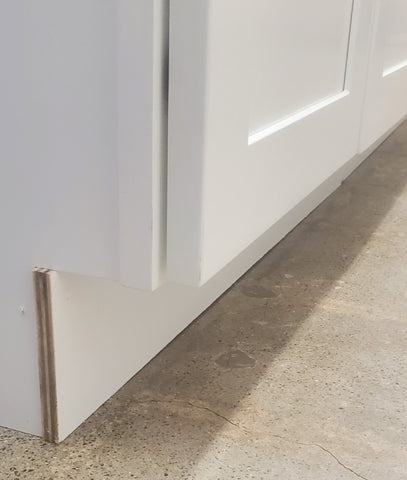
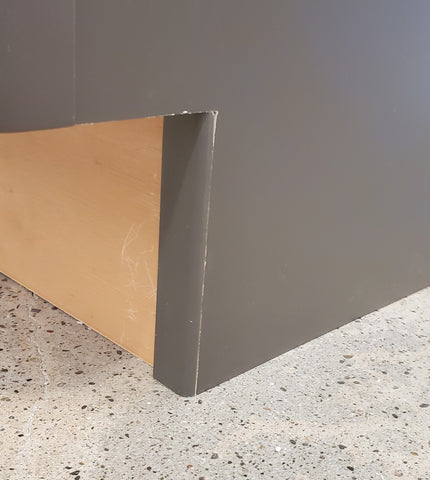
In the picture above you can see the raw edge of the cabinet plywood toe kick which is overhanging past the cabinet side by 1/4".
2) The toe kick skin, sold in 8-foot sections, is employed after the cabinets are installed to conceal the seams that occur at the junction of adjacent cabinets.
With your cabinets securely in place, it's time to focus on the installation of the toe kick skin. This piece is usually crafted from 1/4" thick plywood (actual 3/16") and exposes its edge on the visible sections of the cabinets. As you can see, it extends slightly beyond the cabinet's side.
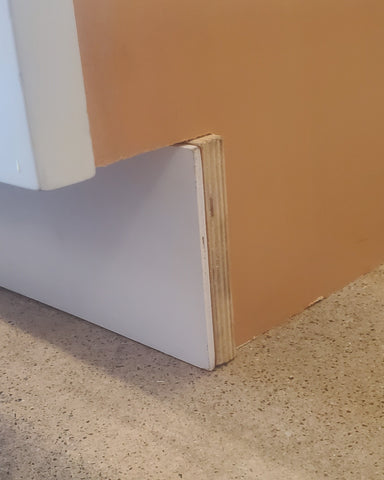
Installed on top of the plywood compounds the situation. Two pieces of plywood are now exposed.
The toe kick edge may come in its raw, unfinished state as shown above or may be painted to match the cabinet's aesthetic. When you have multiple cabinets side by side, it becomes necessary to employ a "Toe Kick Skin" that spans across each toe kick, effectively eliminating any visible seams between them to create a continuous, uninterrupted appearance.
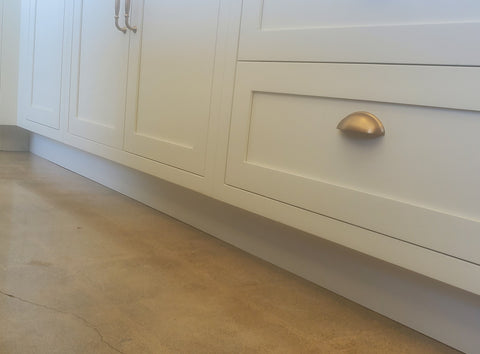
In the image above, a toe kick skin has been seamlessly applied to a cabinet's toe kick.
To achieve a flawless finish, attention must be paid to the plywood edge of the toe kick skin. Here's how you can eliminate the plywood edges of both the Toe Kick and Toe Kick Skin as well as the plywood edge of the side skin panel.
1) You can opt to paint the exposed edge or apply a thicker material like nail polish to mask the plywood texture. While this is a quick fix, it does not entirely eliminate the plywood edge's presence.
2) Alternatively, you can take a more comprehensive approach by following these steps:
A) Begin by cutting off the 1/4" overhang of the cabinet plywood.
B) Then, add a skin panel that covers the entire cabinet side, concealing the exposed toe kick cabinet plywood.
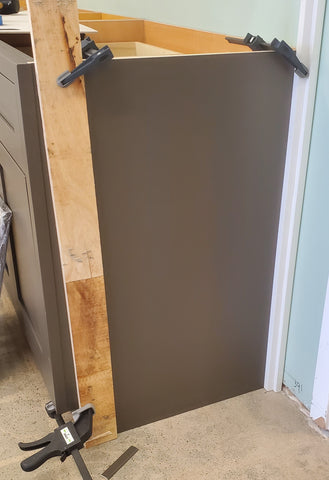
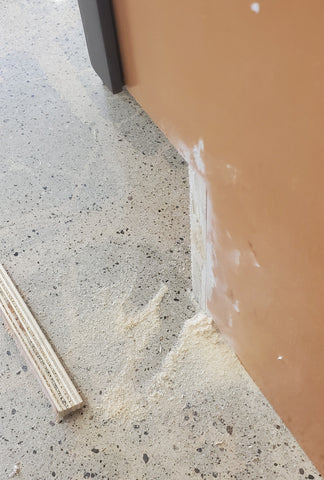
C) Integrate a 4-1/2" piece of scribe molding, a finely finished molding that will act as the seamless interface for the toe kick skin.
(Scribe placed to test for sizing. Properly trim and touch up to eliminate gapping)
D) Finally, install the Toe Kick Skin.
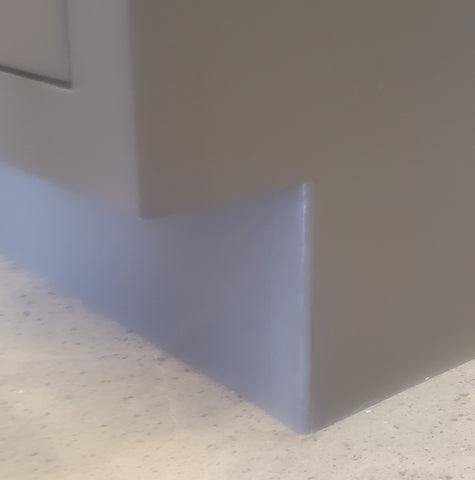
Upon completion of these steps, your installation will have successfully eradicated any unfinished details, resulting in a polished and refined appearance for your custom kitchen cabinet project.


