Kitchen Cabinet details - Under side finished with skin panel

How to finish the under side of your RTA kitchen cabinets with skin panels.
Cover all Kitchen Cabinet details for your kitchen remodel - Here's How to do it. An installation guide for Finishing the Underside of RTA Kitchen Cabinets with Skin Panels
As a novice homeowner embarking on a kitchen remodel, every detail matters, including the often-forgotten undersides of your cabinets. Your kitchen project, with all its time and money invested, deserves an exquisite finish from every angle. This guide is designed to help you, a beginner, through the process of beautifying the undersides of your RTA (Ready-to-Assemble) kitchen cabinets using skin panels. We'll make it easy for you to seamlessly integrate these panels into your kitchen's design.
Tools needed - Table saw, Tape Measure, Glue, Marker, Painters Tape & Really Good Cabinets
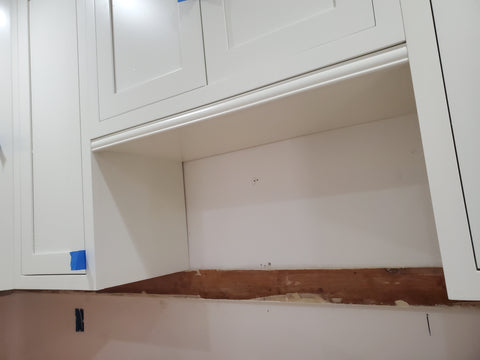
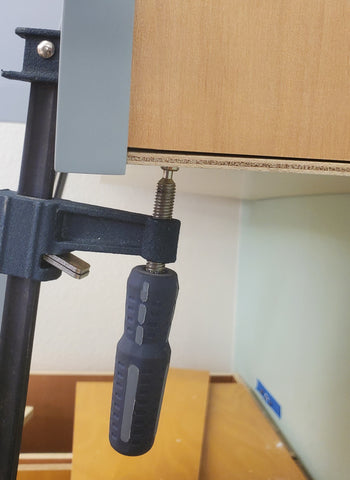
1. Assess Your Cabinet's Underside
Before diving into the installation, take a moment to look at the underside of your kitchen cabinets. Often, this area is neglected and may have a different color or a small cavity. It's essential to understand what the underside will look like when your project is complete.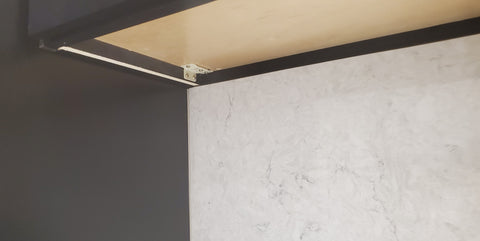
The underside of the cabinet may look like this image above.

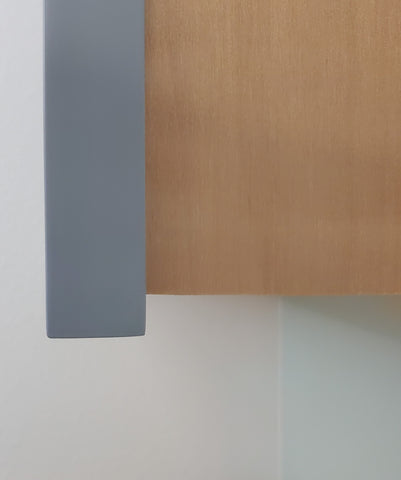
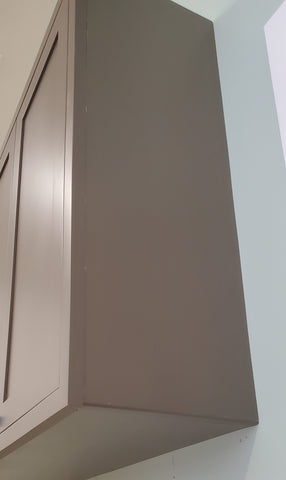
Simple modifications can have a completed finish look like this.
2. Preparing the Cabinet Side
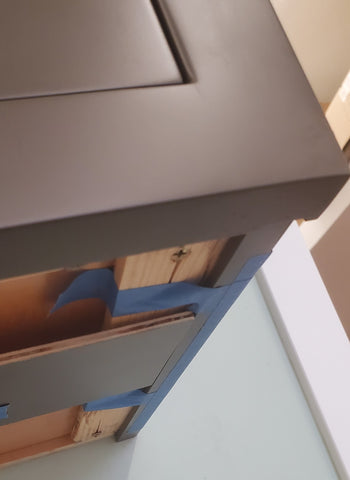
Flush cabinet side with cabinet face frame For this guide, let's assume your cabinet has a golden birch side. You'll apply a skin panel to match the paint color, ensuring it aligns flush with the bottom of the cabinet's face frame. To achieve this, you'll need to trim the plywood sides and back by 1/4".
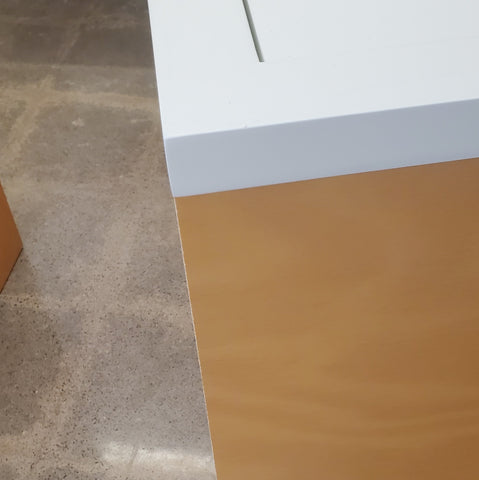
You will need to trim the plywood sides and back by 1/4" to place the skin panel.
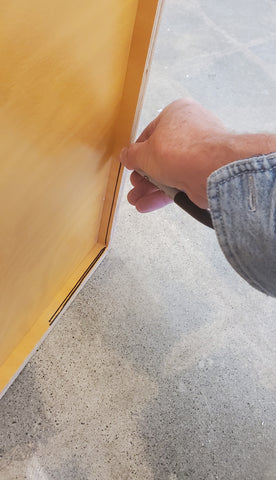
Here's a tip: As a beginner, it might be helpful to assemble the cabinet first, marking where the 1/4" needs to be trimmed.

Trim the cabinet sides and back 1/4". This 1/4" is slightly wider than the plywood skin panel.
The image below shows the cabinet side has been removed just 1/4" to allow the skin panel to be applied underneath and tucked behind the face frame.
3. Filling the Cavity
Many kitchen cabinets have a cavity underneath. To bridge this gap, install bottom spacers. These spacers will create a uniform surface for the skin panel installation.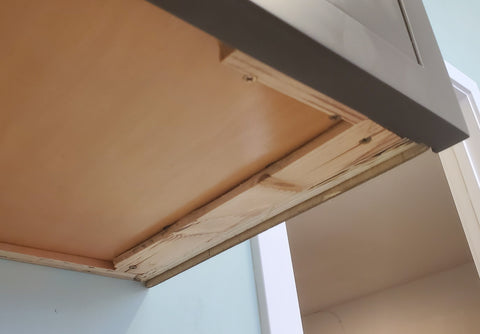
*: Add bottom spacers to fill the cavity underneath the cabinet.
4. Scribe Molding Installation
It is at this step when the side skin panel will be applied. The scribe molding needs to cover the bottom of the side skin panel. This eliminates a plywood edge.
Scribe molding is a crucial element in the cabinet's underside finish. It not only conceals any exposed plywood edges but also gives a polished appearance.
*: Carefully glue the scribe molding into place
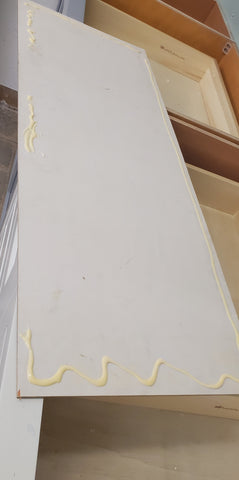
5. Prepare the Skin Panel
Get ready to install the skin panel, which will be the final touch to complete your cabinet's underside. It will cover the adjusted cabinet side and fill the space left by the spacers, giving it a seamless look.*Get ready to install the skin panel
6. Apply the Skin Panel
Now, with your cabinet side adjusted, the cavity filled, and the scribe molding in place, it's time to attach the skin panel to the cabinet's underside. The scribe molding will also cover the exposed plywood edge of the skin panel.* Carefully apply the skin panel to the underside of your custom kitchen cabinets.
7. Admire the Finished Result
Once the skin panel is in place, step back and take in the finished underside of your custom kitchen cabinets. You'll see how the side skin panel, with its plywood edge hidden by the scribe molding, complements the overall appearance. Your kitchen will look complete from every angle.* Enjoy your beautifully finished custom kitchen cabinets.
This installation guide ensures that every aspect of your kitchen, including the often-forgotten cabinet undersides, contributes to the overall aesthetic and functionality of your space. It's all in the details!
For more options on how to complete the underside of your kitchen cabinet, consider:
- Painting the underside to match your cabinets.
- Adding a Light Rail Molding and Skin Panel.