 833-377-8663

How to Measure for a Kitchen Island: 2026 Guide

Table of Contents
- Start With Clearance: Kitchen Island Clearance Requirements
-
How to Measure for a Kitchen Island in 6 Steps
- Step 1: Measure the Full Room at the Floor
- Step 2: Subtract Aisle Clearance on Every Side Facing Cabinets or Appliances
- Step 3: Check Appliance Door Swing Inside the Remaining Space
- Step 4: Confirm Landing Space Still Works
- Step 5: Mark the Leftover Rectangle With Tape
- Step 6: Walk the Perimeter and Adjust Before Ordering
- Mock Up the Footprint With Floor Tape
- Standard Kitchen Island Height and Depth
- Kitchen Island Seating Overhang Guidelines
- Island Shape, Traffic Flow, and Accessibility
- Where Measurement Mistakes Show Up: Cabinet Footprint and Island Skin Panels
- Conclusion
- Frequently Asked Questions
Last Updated: September 26, 2026
Start With Clearance: Kitchen Island Clearance Requirements
Learning how to measure for kitchen island space starts with clearance, not with the island itself. Walkway clearance is the distance between your island and the nearest cabinet, appliance, or wall, and it decides whether the room actually works. The National Kitchen & Bath Association (NKBA) publishes the guidelines most designers follow, and NKBA kitchen planning guidelines treat aisle width as the first thing to lock down. This guide from RTA Wholesalers walks through the full measuring process, from tape on the floor to final cabinet order.
Walkway and Aisle Width Minimums
The minimum aisle width is 36 inches for a one-cook kitchen. Bump it to 42 inches when two people cook at once. Go to 48 inches if the aisle sits in a main traffic path through the room.
Measure from the face of the base cabinets, not the wall behind them.
Appliance Swing, Landing Space, and the Work Triangle
Dishwasher doors, oven doors, and fridge doors all need room to open. A dishwasher door alone eats about 24 inches of aisle when it drops.
Landing space matters too. Leave at least 15 inches of counter next to the fridge and 24 inches beside the range.
The kitchen work triangle connects your sink, range, and fridge.
How to Measure for a Kitchen Island in 6 Steps
Here is the short answer: measure the room, subtract clearance on every side, and whatever rectangle remains is your maximum island footprint. Most kitchens end up with less room than the homeowner hoped. Follow these six steps in order, and run the math on paper before you ever pick up a tape measure.
Step 1: Measure the Full Room at the Floor
Measure the room's length and width at the floor, wall to wall, at the widest point. Do not measure at countertop height, and do not measure between cabinet faces yet. You want the raw shell dimension first. Write both numbers down and sketch a rough rectangle on graph paper.
Step 2: Subtract Aisle Clearance on Every Side Facing Cabinets or Appliances
Subtract 42 inches from each side of the island that faces base cabinets, the range, or the refrigerator. That 42-inch figure is the two-cook aisle width from the NKBA guidelines, and it is the number most designers default to when the kitchen has more than one user.
Step 3: Check Appliance Door Swing Inside the Remaining Space
A dishwasher door drops roughly 24 inches into the aisle when fully open. A wall oven door swings out about 20 to 24 inches depending on the model. A standard refrigerator door needs 90 degrees of swing plus a few inches of pull-out for drawers.
Step 4: Confirm Landing Space Still Works
Leave at least 15 inches of counter next to the refrigerator and 24 inches beside the range. If the island crowds those landing zones, prep work gets awkward fast. Landing space is measured from the appliance edge to the nearest obstruction, including the island.
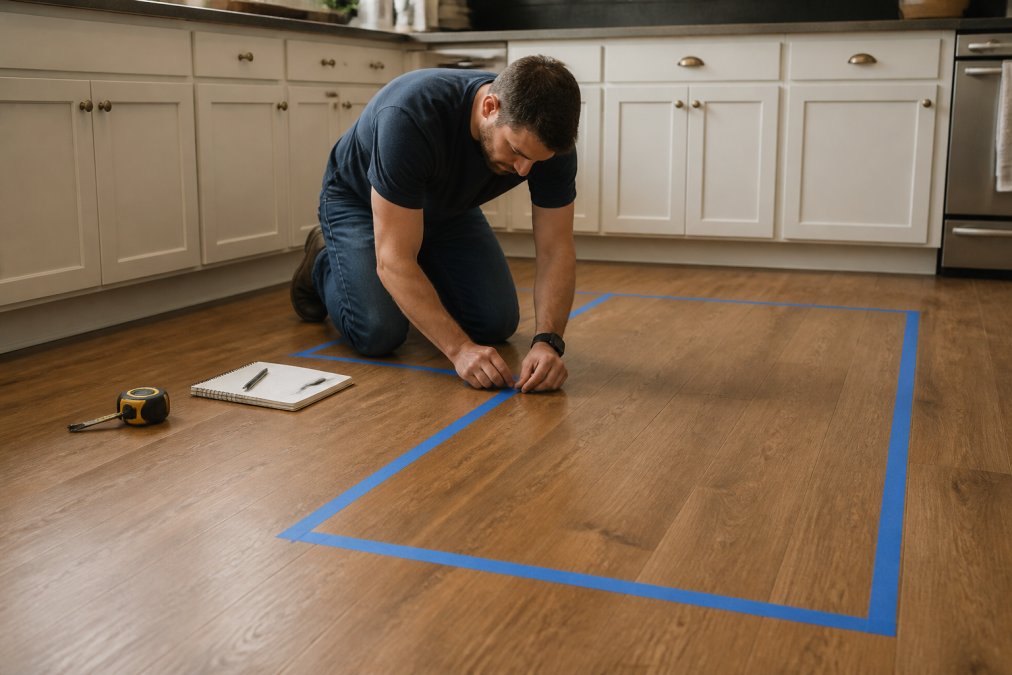
Step 5: Mark the Leftover Rectangle With Tape
Once the math clears, mark the rectangle on the floor with blue painter's tape. This is your maximum footprint, not your final island size. Most homeowners shrink it by 2 to 4 inches per side after living with the tape for a few days.
Step 6: Walk the Perimeter and Adjust Before Ordering
Walk the full perimeter of the taped rectangle. Open every drawer and appliance door. Carry a laundry basket or a bag of groceries through the aisle. If you bump the tape or have to turn sideways, the island is too big. Adjust the tape, not the clearance minimums.
Mock Up the Footprint With Floor Tape
Blue painter's tape is the cheapest design tool you own. Tape the outline, then live with it for a few days.
Standard Kitchen Island Height and Depth
The standard kitchen island height is 36 inches, matching standard base cabinet height. Depth runs 24 to 36 inches for a standard island, with 24 inches being the most common base depth. Anything past 40 inches deep starts to feel like a table, not a work surface.
Counter Height vs. Bar Height
Counter height sits at 36 inches. Bar height sits at 42 inches, which is 6 inches taller. That 6-inch step is what makes bar stools work at a raised section.
Kitchen Island Seating Overhang Guidelines
Kitchen island seating overhang guidelines are simple: 12 inches of overhang for counter height seating, 15 inches for bar height seating. Anything less than 12 inches leaves no knee space, and guests end up sitting sideways. For a 36-inch counter with stools, plan 12 inches of overhang plus 12 inches of clear knee space below.
Bar Stool Clearance and Seating Capacity
Allow 24 inches of width per stool at minimum. Give each person 30 inches if you want them comfortable.
Here is the seating math for a typical island:
| Island Length | Stools at 24" Each | Stools at 30" Each |
|---|---|---|
| 6 feet | 3 | 2 |
| 8 feet | 4 | 3 |
| 10 feet | 5 | 4 |
Island Shape, Traffic Flow, and Accessibility
Island shape changes how people move through the room, and it changes how much floor space the island actually consumes. A long rectangle pushes traffic to one side. An L-shaped or angled island can guide foot traffic around the work zone instead of through it.
How Shape Affects Floor Space Consumption
A rectangular island is the most space-efficient shape per square foot of work surface, but it forces all traffic to one side or the other. An L-shaped island wraps a corner and can absorb a turn in the traffic path, which often lets you keep a larger work surface in the same room.
Multi-Level Island Measurements
A split-level island has two counter surfaces at different heights, usually a 36-inch prep side and a 42-inch bar side. Measure each level on its own. The raised bar section does not count toward your work surface clearance, and it does not count toward the aisle clearance on the prep side either, because the bar overhang sits above the aisle, not in it.
Accessibility and ADA Compliance
The ADA Standards for Accessible Design call for 36-inch minimum clear width on accessible routes, and kitchen work surfaces need knee clearance for a seated user. If anyone in the home uses a wheelchair or a walker, plan a lower counter section with open space underneath.
Traffic Flow Check Before You Order
Tape the island outline, then walk the room's main traffic path three times: once empty-handed, once carrying a full stockpot, and once pushing a cart or stroller. If any of those trips forces you to turn sideways or step around the tape, the island is too big or the shape is wrong.
Where Measurement Mistakes Show Up: Cabinet Footprint and Island Skin Panels
Most measuring errors do not show up until the cabinets arrive. The cabinet footprint is the true outer edge of the cabinet boxes, and it is often wider than the drawing suggests. Add the countertop overhang, usually 1 to 1.5 inches past the cabinet edge, and your island grows again.
Conclusion
The hard part of island measuring is not the tape measure. It is catching every layer, from cabinet box to countertop edge to skin panel, before you order. Get the clearance right and the rest of the build falls into place.
Frequently Asked Questions
What is the minimum clearance required around a kitchen island?
NKBA guidelines call for at least 42 inches of walkway clearance around a kitchen island in a one-cook kitchen, and 48 inches when two or more people work in the space. Measure from the cabinet face, not the countertop edge, because the counter overhangs the base. If your kitchen island clearance requirements can't hit 42 inches on every side, shrink the island or drop it from the plan.
Is a 12 inch overhang on an island enough for seating?
Twelve inches works for light use, but it is tight. Kitchen island seating overhang guidelines recommend 12 inches of knee space at counter height (36 inches) and 15 inches at bar height (42 inches). For an island where people eat full meals, plan on 15 inches at counter height so knees clear the base cabinets and the seating stays comfortable.
How do I account for appliance door swings when measuring for an island?
Open every appliance and cabinet door that faces the island, then measure to the outermost point of the swing. A dishwasher door needs roughly 24 inches of clear floor in front of it, and a wall oven door swings out further. Add that distance to your walkway clearance so doors open without striking the island or trapping someone behind them.
Can a kitchen island be too large for the room?
Yes. Once you subtract 42 to 48 inches of clearance on every side from the room's dimensions, what remains is your maximum island footprint. A 10x10 kitchen, for example, leaves very little usable area after clearances, which is why many of these rooms work better with a peninsula than an island. Floor tape is the fastest way to see if a size feels wrong before you order cabinets.


