 833-377-8663

Optimizing Kitchen Storage With Cabinet Organizers

Table of Contents
- Start With a Cabinet Audit and Measurement Guide
- How to Organize Kitchen Cabinets by Zone
- Pull-Out Cabinet Organizers That Earn Their Space
- Organizing Pots and Pans Without the Pileup
- Under-Sink Cabinet Organization That Stays Dry
- Installation, Tools, and Renter-Friendly Options
- Frequently Asked Questions
Last Updated: October 4, 2026
Start With a Cabinet Audit and Measurement Guide
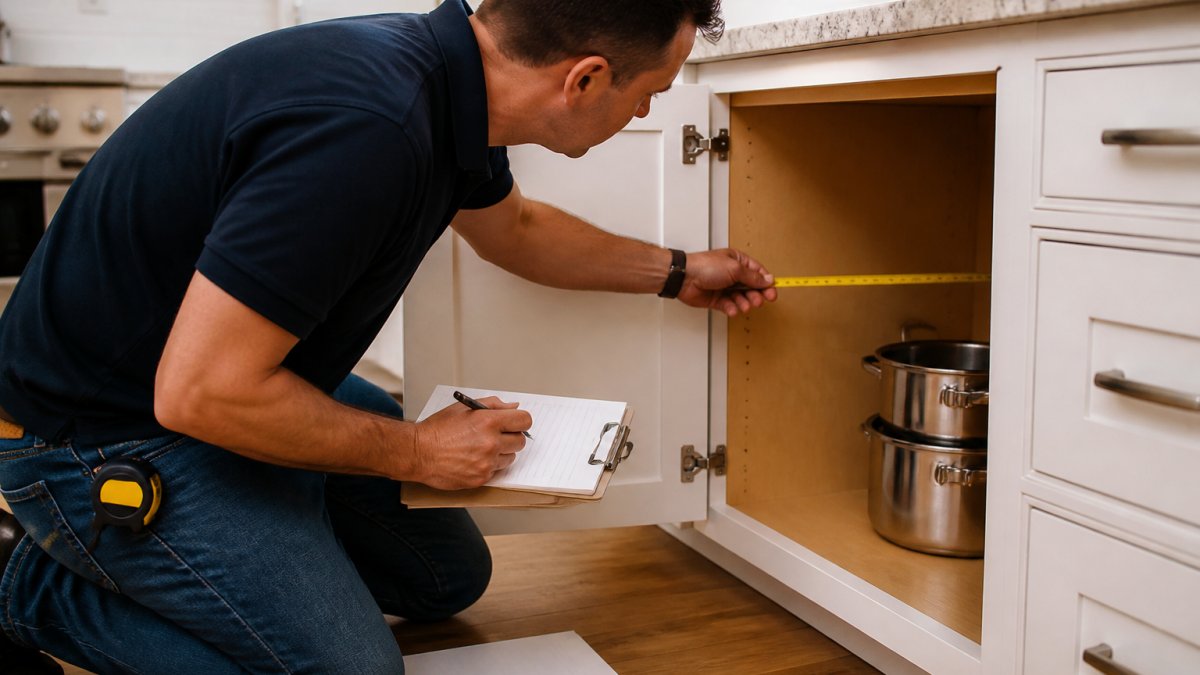
Optimizing kitchen storage with cabinet organizers starts with a tape measure, not a shopping cart, and that is exactly where good kitchen storage begins. Before you buy a single insert, measure what you actually have. Most DIY organizers fail because they were bought for the kitchen someone wished they had, not the one standing in front of them. At RTA Wholesalers, we see this constantly: homeowners order beautiful organizers, then discover their cabinets are 1/4 inch too narrow. A 20-minute audit prevents that.
Here's how to run a cabinet audit the right way.
What to Write Down for Every Cabinet
Grab a notepad and a tape measure. For each cabinet, record:
- Interior width (measure between the hinges, not the door)
- Interior depth (front edge to back panel)
- Interior height (shelf to shelf, and total)
- Door style (inset or overlay, since this changes usable space)
- Shelf type (fixed or adjustable)
- What currently lives there (and what should)
Measure every shelf opening separately. Cabinet boxes are rarely perfectly square, and a 1/8 inch difference can decide whether a pull-out drawer glides or scrapes.
How to Organize Kitchen Cabinets by Zone
Grouping by zone beats grouping by category every time. A zone is a storage neighborhood built around where you actually work: prep, cook, clean, store. When you organize by zone, you stop walking across the kitchen to grab a spatula.
What most guides skip is the step that makes zones actually work: assigning a reach band to each cabinet before you decide what lives there. Reach bands are based on how far a standing adult can comfortably extend, and they determine whether an item belongs high, middle, or low.
| Reach band | Height from floor | What belongs here |
|---|---|---|
| Prime | 24" to 48" | Daily items: plates, glasses, knives, cooking tools |
| Secondary | 48" to 66" | Weekly items: mixing bowls, baking dishes, serving pieces |
| Stretch | Above 66" | Seasonal or backup: holiday platters, extra storage containers |
| Bend | Below 24" | Heavy or bulky: Dutch ovens, stockpots, small appliances |
A common pattern is that homeowners load prime real estate with items they touch once a month, then wonder why the kitchen feels cramped. The fix is to move anything you use less than weekly out of the prime band and into secondary or stretch.
Match each zone to the cabinets nearest it, then apply the reach bands inside that zone:
| Zone | Location | What Goes There |
|---|---|---|
| Prep | Counter space beside sink | Cutting boards, knives, mixing bowls |
| Cook | Around the range | Pots, pans, spices, cooking tools |
| Clean | Under the sink | Cleaners, sponges, trash, dishwasher pods |
| Store | Away from work areas | Backup pantry items, platters, seasonal gear |
Once zones are set, grouping similar items inside each one becomes obvious. Baking sheets stack together. Spices cluster near the stove. The goal is a kitchen where your feet move less.
Sizing a Zone to What It Actually Holds
A zone only works if the cabinet can hold what you assign to it. Two quick capacity checks prevent most rework:
- Plate and bowl stacks: a standard 12-inch-deep wall cabinet holds roughly 8 to 10 dinner plates per shelf when stacked flat, fewer if you add a vertical divider.
- Spice collections: a 24-inch-wide base cabinet shelf holds about 40 to 50 standard jars in a single layer; a pull-out doubles that by using the full depth.
If a zone overflows on paper, it will overflow in the kitchen. Split it across two cabinets or move the overflow to the store zone before you shop for organizers.
Pull-Out Cabinet Organizers That Earn Their Space
Pull-out cabinet organizers are the highest-value upgrade in most kitchens because they convert dead depth into usable front-to-back access. A standard 24-inch deep base cabinet wastes its back half. You can't reach it, so you don't use it.
Two categories are worth the money:
- Full-extension pull-out shelves for pots, small appliances, and pantry goods
- Spice rack pull-outs for narrow 6, 9, or 12-inch gaps that would otherwise hold nothing
For narrow filler spaces, our Spice Rack Pull Out Base Cabinet in White Shaker turns a 9-inch dead zone into two full-depth shelves with soft-close glides. It's ready to assemble and finished on all exposed sides, so no extra panels are needed.
Organizer Selection by Cabinet Type and Dimensions
Match the organizer to the cabinet, not the other way around:
- Base cabinets (24" deep): pull-out shelves, deep drawer dividers, lid racks
- Wall cabinets (12" deep): stackable risers, shelf dividers, mug hooks
- Narrow gaps (6-12" wide): spice pull-outs, tray dividers, cutting board slots
- Corner cabinets: lazy Susans, blind-corner pull-outs
- Drawers: expandable utensil trays, adjustable dividers
Check the interior depth before ordering. A pull-out built for a 24-inch base cabinet will not fit a 12-inch wall unit. This is the single most common return reason we see.
Organizing Pots and Pans Without the Pileup
Organizing pots and pans works best when you stop stacking and start sliding. Stacks mean lifting three pans to reach the fourth. Pull-outs mean one motion.
6", 9" & 12" Wide Spice Rack Pull Out Base Cabinet Natural Color 17ROS →
But the section most guides skip is the one that matters most for heavy cookware: ergonomics and load. A cast-iron skillet or a 12-quart stockpot can weigh 10 to 15 pounds. Reaching for that weight at shoulder height or bending to drag it from the back of a deep cabinet is how kitchens cause strain injuries.
Apply three rules before you buy anything:
- Heavy items go low. Dutch ovens, stockpots, and cast iron belong in the bend band (below 24") or on a full-extension pull-out that brings the weight to you.
- Daily items go in the prime band. The pan you use every morning should sit between 24" and 48" with no lifting over your head.
- Lids get their own home. A dedicated lid rack or an adjustable divider frees more space than most people expect, and it stops the avalanche when you open the door.
Matching the Pull-Out to the Load
Not every pull-out is built for heavy cookware. Check two specs before ordering:
- Glide rating: look for full-extension slides rated for the weight you plan to store. Standard slides handle light pantry goods; heavy-duty slides are the ones rated for pots and small appliances.
- Shelf depth: a 24-inch-deep base cabinet needs a pull-out sized to that depth. A unit built for a 12-inch wall cabinet will not fit, and one that is too shallow leaves a gap where items fall behind the unit.
A common pattern is homeowners buying a lightweight pull-out for cast iron, then watching the shelf sag within a year. Match the hardware to the load, not to the price tag.
A Setup That Works for Most Kitchens
- Keep daily-use pans in a pull-out near the range, in the prime reach band.
- Store lids in a dedicated rack, not nested inside pots.
- Put heavy Dutch ovens on a low pull-out shelf, never overhead.
- Use vertical dividers for baking sheets and cutting boards.
- Reserve the top shelf for rarely used pieces.
Child Safety and Secure Storage
If there are young children in the home, treat the cook zone like the clean zone: secure it. Cabinet latches or magnetic locks on the pull-out that holds knives, heavy pans, or cleaning supplies prevent the most common kitchen injuries. Keep handles turned inward on the range, and store sharp tools in a locked or latched drawer rather than an open pull-out.
Under-Sink Cabinet Organization That Stays Dry
Under-sink cabinet organization fails for one reason: moisture. Organizers that ignore the plumbing and the damp will rust, warp, or grow mildew within a season.
Start with a clean, dry cabinet. Then:
- Add a waterproof shelf liner to protect the cabinet floor.
- Use a two-tier sliding unit to clear the drain pipe.
- Keep a caddy for cleaners so nothing tips.
- Mount a small rack on the door for sponges and brushes.
- Leave the disposal area open for airflow.
Avoid stacking paper goods directly under the pipes. One slow drip ruins the whole shelf.
Installation, Tools, and Renter-Friendly Options
Most cabinet organizers install in under an hour with basic tools. You'll want a screwdriver, a drill, a tape measure, and a level. That's it for the majority of pull-outs and inserts.
Renters have real options too:
- Tension-rod dividers need no drilling
- Adhesive shelf risers hold light items without screws
- Freestanding drawer trays lift out when you move
- Over-the-door racks add space with zero hardware
For permanent upgrades, pull-out shelves typically mount to the cabinet floor or side with a few screws. Measure twice, mark once, and pre-drill to avoid splitting the cabinet box.
If you're planning a full remodel rather than a quick fix, RTA Wholesalers offers inset and overlay cabinets in custom sizes and colors, plus a free kitchen design service that catches layout mistakes before you order. If you want a specific look, you can also explore a Custom Order Inset or Custom Color Inset to match your kitchen's palette, or go with Special Order Oak Inset Kitchen Cabinets when you want the warmth of oak.
Frequently Asked Questions
How do you measure cabinets before buying organizers?
Measure the interior width, depth, and height of each cabinet, not the door opening. For pull-out shelves, note that most units are built for 24-inch-deep cabinets, like the spice rack pull-out base cabinet available in 6, 9, and 12-inch widths. Check for door hinges, plumbing, and drawer glides that eat into usable space, and write every number down so you can match organizers to the exact opening.
What cabinet organizers are most useful in a kitchen?
Pull-out shelves, spice rack pull-outs, drawer dividers, and shelf risers cover most kitchens. Pull-out units bring items from the back of deep cabinets to the front, which matters most in base cabinets. Spice rack pull-outs fit narrow 6 to 12-inch gaps that would otherwise go unused. Add shelf dividers for baking pans and stackable risers for plates and bowls, and skip organizers that duplicate storage you already have.
How do you organize pots and pans in a kitchen cabinet?
Keep pots and pans in a lower cabinet near the stove. Stand skillets and saucepans on edge using dividers or a roll-out shelf so you grab handles instead of unstacking. Nest lids in a separate rack or a shallow drawer. If your cabinet is 24 inches deep, a roll-out shelf lets you pull the whole stack forward, so you stop kneeling and reaching into the dark back corner.
How do you organize a small kitchen with limited cabinet space?
Measure first, then use vertical space. Narrow pull-out base cabinets turn 6 to 12-inch gaps into working storage for spices, oils, and small bottles. Add wall-mounted racks or pegboards for utensils and mugs, and move rarely used appliances off the counter. Group items by task, not by type, so cooking tools, bakeware, and food storage each live in one zone instead of spreading across every cabinet.
A cluttered kitchen slows down every meal you cook. The fix isn't more cabinets; it's smarter ones. RTA Wholesalers helps you get there with ready-to-assemble cabinetry in custom sizes and colors, inset and overlay options, and a free design service that maps your storage before you buy. Get started with RTA Wholesalers and build a kitchen that works as hard as you do.


