 833-377-8663

How to Install Kitchen Cabinets Step by Step

Table of Contents
- Tools and Materials You'll Need for Cabinet Installation
- Measuring and Planning Your Cabinet Layout
- Locating and Marking Wall Studs
- Installing Wall Cabinets First
- How to Level Base Cabinets on Uneven Floors
- Installing Upper Cabinets Alone: Techniques and Tips
- How to Scribe Cabinets to Uneven Walls
- Securing Cabinets to Studs and Post-Installation Adjustments
Last Updated: August 20, 2026
Tools and Materials You'll Need for Cabinet Installation
Before you touch a single cabinet, gather the right equipment. Installing kitchen cabinets step by step requires precision tools and materials that make the difference between a professional-looking result and a frustrating afternoon of adjustments.
Start with a stud finder to locate wooden framing behind drywall, cabinets must be secured to studs for structural integrity. A laser level shows exactly where your cabinets sit relative to true horizontal and vertical planes, something a bubble level can't match consistently across longer spans.
You'll need shims: thin wooden wedges used to fill gaps and level cabinets on uneven floors or against out-of-plumb walls. A cabinet jack (sometimes called a cabinet lift) is a game-changer if you're working alone, raising wall cabinets to the correct height while you secure them.
For fastening, cabinet screws are non-negotiable, they prevent stripping and hold better than standard wood screws in cabinet material. You'll also want a power drill with a countersink bit for pilot holes. Additional essentials include a tape measure, pencil, carpenter's square, and a nailer strip (a temporary horizontal support that holds wall cabinets at the right height while you attach them).
RTA Wholesalers offers ready-to-assemble cabinets designed for straightforward installation, reducing the tools needed compared to building from scratch.
Measuring and Planning Your Cabinet Layout
The most common mistake is measuring once and assuming the result applies everywhere. Kitchens are rarely perfectly square or level.
Start by measuring the width of your kitchen at counter height (roughly 36 inches from the floor), again 12 inches up, and again at 24 inches. If these measurements differ, your walls aren't parallel. Measure the height from the floor to the bottom of your window sill or ceiling. Wall cabinets typically install 18 inches above the countertop, but architectural constraints may change this.
Mark the locations of electrical outlets and plumbing so you can cut openings in cabinet backs or plan filler strips around them. Use a laser level to establish a level line where your wall cabinets will mount, this becomes your reference point for the entire installation.
Plan your cabinet layout on paper first. Sketch the wall, mark stud locations, note where appliances go, and identify where you need filler strips. RTA Wholesalers offers Custom Order Inset and Custom Color Inset cabinetry, which means you can plan around your exact measurements rather than forcing awkward gaps.
If you're uncertain about your layout, RTA Wholesalers provides a free kitchen design service that catches mistakes before you order.
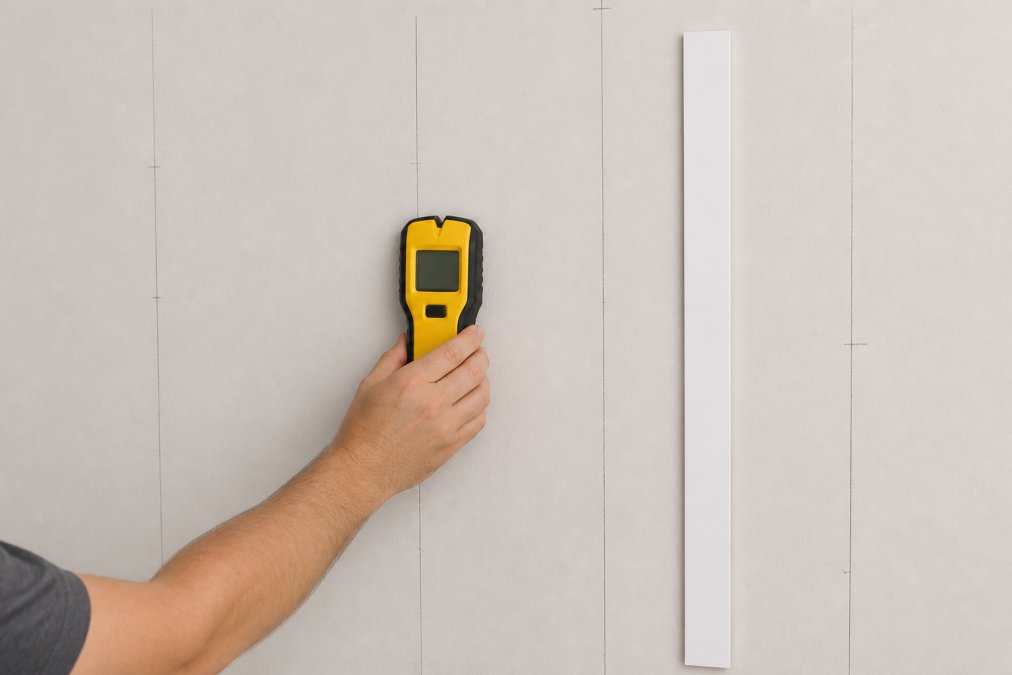
Locating and Marking Wall Studs
Studs are the wooden frame members behind drywall, typically 16 inches apart measured from center to center. You cannot skip this step, cabinet doors will sag and hinges will fail if cabinets aren't anchored to studs.
Use your stud finder to locate the first stud and mark it with a light pencil line. Move 16 inches to the right and test again, marking each stud with a vertical pencil line at the height where cabinet mounting holes will sit. Verify by tapping the wall with a hammer, a stud sounds solid; empty space sounds hollow.
Draw a level reference line at the height where cabinet mounting rails will sit using a laser level. Document stud locations on your sketch for consistency across multiple installation areas.
Installing Wall Cabinets First
Install wall cabinets before base cabinets. This sequence prevents base cabinet tops from interfering with wall cabinet installation and gives you a reference for base cabinet height.
Wall cabinets mount to a nailer strip, a temporary horizontal board fastened to studs at the correct height. For standard countertops, wall cabinets sit 18 inches above the countertop surface, placing the nailer strip at 54 inches from the floor. Attach the nailer strip to studs using 2.5-inch screws and verify it's perfectly horizontal with a laser level.
Lift the first wall cabinet onto the nailer strip. If working alone, a cabinet jack makes this manageable. Align the cabinet's mounting rail with the studs you marked, pre-drill holes through the rail into studs, then drive cabinet screws. Use at least two screws per stud contact point.
Check that the face frame is plumb and the top is level before moving to the next cabinet. Join adjacent cabinets by clamping them together and driving screws through the face frame from one cabinet into the other. Continue across the wall, checking level and plumb after each cabinet.
After all wall cabinets are secured to studs, remove the nailer strip and fill the screw holes with wooden dowels trimmed flush or wood filler.
How to Level Base Cabinets on Uneven Floors
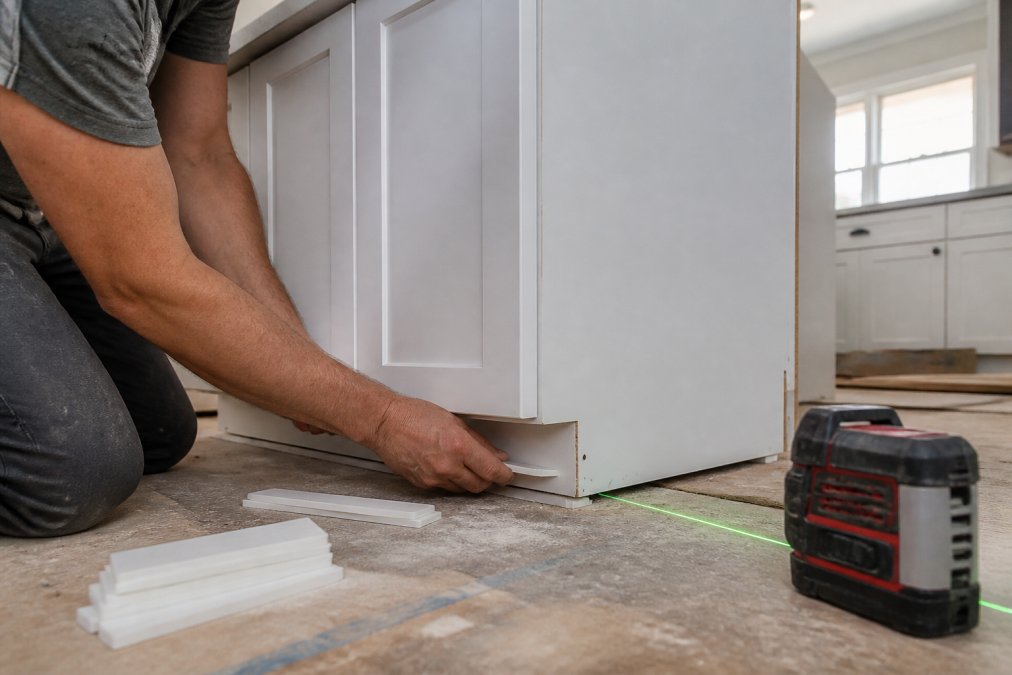
Kitchen floors are rarely perfectly level. Base cabinets must sit level regardless of the floor's slope using shims.
Place the first base cabinet in position and use a laser level to check if the floor is level underneath. Slip shims under the cabinet base until the top surface is level in both directions. Drive a screw through the shim into the cabinet base to hold it in place, then snap off excess shim flush with the cabinet edge. assemble flat pack furniture.
Secure the cabinet to studs using the same process as wall cabinets: pre-drill holes through the mounting rail into studs, then drive cabinet screws. Join the next cabinet to the first using face frame screws and check level again before securing.
Installing Upper Cabinets Alone: Techniques and Tips
A cabinet jack is the single best tool for solo installation, raising the cabinet to height and holding it steady while you work. Without one, build a temporary support from 2x4 lumber shaped like a T, with the horizontal arm padded to prevent marring the cabinet face.
Position the cabinet against the wall and align it with marked studs. If the wall is out of plumb, slip shims behind the cabinet mounting rail to bring it into plumb. Mark mounting hole locations through the cabinet's mounting rail onto the studs, remove the cabinet, pre-drill holes, then reinstall and drive cabinet screws.
Take your time with positioning before drilling the first hole. Join cabinets as you go to create a unified structure that's easier to adjust.
How to Scribe Cabinets to Uneven Walls
Scribing is the process of fitting a cabinet face to an uneven wall surface. Mark the wall's contour onto the cabinet edge using a scribe tool or a block of wood with a pencil, holding it perpendicular to the wall and running it along the surface.
Remove the cabinet and cut along the scribed line using a circular saw or hand saw, then sand the cut edge smooth. Reinstall the cabinet, it should now sit flush against the wall. Scribing is most important for the cabinet edge that faces the wall, especially if the gap is larger than ¼ inch and will be visible.
Securing Cabinets to Studs and Post-Installation Adjustments
Every cabinet must be anchored to at least two studs using cabinet screws. After all cabinets are installed and joined, check that doors hang straight and close smoothly, drawers slide without binding, and the face frame forms a continuous straight line with no steps or gaps.
If a door doesn't close smoothly, loosen the mounting screws slightly and use shims to adjust the cabinet position, then re-tighten. Hinge adjustment screws also allow fine-tuning of door position after installation.
Check that the toe-kick is securely fastened using finish nails or screws. Your cabinets may shift slightly as the structure settles, check level and plumb again after one week and one month.
RTA Wholesalers cabinets are designed for straightforward installation and adjustment. Our inset cabinets offer top quality in custom sizes and custom colors. If you have questions about your specific cabinet configuration or run into unexpected challenges, the free design service can help troubleshoot.
Kitchen cabinet installation is a learnable skill that rewards careful measurement and methodical work. The process isn't complicated, it's about following a logical sequence, checking your work at each step, and making small adjustments rather than forcing cabinets into place. Whether you're installing a single cabinet or remodeling an entire kitchen, the fundamentals remain the same: locate studs, establish level and plumb references, secure cabinets to the frame, and adjust hardware until everything operates smoothly. RTA Wholesalers offers inset cabinet options in custom sizes and colors, designed to make the installation process more straightforward. With quality ready-to-assemble components and access to free design guidance, you have the tools to achieve a professional result.
Frequently Asked Questions
Should you install upper or lower cabinets first?
Install wall cabinets first. This prevents you from damaging them while maneuvering base cabinets into position. Wall cabinets are harder to reposition once base cabinets are in place, and working from top to bottom reduces the risk of scratching the cabinet box or damaging hinges and drawer slides.
What are common mistakes when hanging cabinets?
The most frequent errors include failing to locate studs before fastening, skipping the leveling step, and not using shims to compensate for uneven walls or floors. Many installers also forget to pre-drill pilot holes, which can split cabinet frames, and they neglect to align the face frame before tightening all fasteners. Not measuring twice or marking the stud locations clearly leads to misalignment.
How do you level kitchen cabinets on an uneven floor?
Use a laser level or spirit level to identify high and low spots. Place shims under the base cabinet at stud locations to raise it until level. Check both front-to-back and side-to-side. Tap shims gently with a hammer until the cabinet sits flush and level, then secure the cabinet to the studs with cabinet screws. This prevents doors from swinging open and ensures drawers operate smoothly.
Can one person install upper kitchen cabinets alone?
Yes, but it requires proper support. Use a cabinet jack or temporary ledger board to hold the weight while you fasten the cabinet to the wall studs. A cabinet jack lifts and holds the cabinet at the correct height, freeing your hands to drive fasteners. Alternatively, recruit a helper to support the cabinet while you secure it, this is faster and reduces fatigue on larger installations.


