 833-377-8663

7 Essential Kitchen Remodel Contractor Checklist Items

Table of Contents
- 1. Verify Contractor License and Insurance Before Hiring
- 2. Define Your Project Scope and Goals in Writing
- 3. Ask the Right Questions to Kitchen Remodeling Contractors
- 4. Establish a Kitchen Remodel Payment Schedule Template
- 5. Understand Best Practices for Kitchen Remodel Change Orders
- 6. Review the Contractor Agreement and Lien Waivers
- 7. Plan Your Timeline and Identify Contractor Red Flags
- Conduct a Final Walkthrough and Punch List
Last Updated: August 30, 2026
1. Verify Contractor License and Insurance Before Hiring
The first step in any kitchen remodel contractor checklist is confirming that your contractor holds valid credentials. A licensed contractor has demonstrated competency to local authorities and carries insurance to protect both of you. Without this verification, you're exposed to liability if something goes wrong on your property.

Start by asking your contractor for their license number and insurance certificate. Call your state's licensing board to confirm the license is active and in good standing. Check that their general liability insurance and workers' compensation coverage are current. Request proof of both, a reputable contractor will hand this over without hesitation.
Many homeowners assume a contractor's word is enough. It isn't. This single verification step protects you legally and ensures you're working with someone accountable to their licensing board. If a dispute arises later, you have recourse through the licensing authority.
2. Define Your Project Scope and Goals in Writing
A written scope of work is your contract's backbone. It details exactly what work will be done, what materials will be used, and what the finished kitchen will look like. Without this, you and your contractor may have completely different expectations about the final product.
Your scope should answer these questions: Are you replacing cabinets, countertops, appliances, flooring, or all of the above? What cabinet style and finish do you want? Are you moving plumbing or electrical lines? Will you keep the existing footprint or reconfigure the layout?
The more specific you are, the better. Instead of "new cabinets," write "custom color inset cabinets in 36-inch base units and 30-inch wall units with soft-close hinges." Instead of "updated countertops," specify the material, color, edge profile, and backsplash details.
Establish Your Budget and Contingency Fund
Your kitchen remodel budget sets the financial boundaries for the entire project. A realistic budget prevents scope creep and keeps you from running out of money mid-renovation.
Start by researching typical remodel costs in your area. Kitchen renovations range widely depending on scope and materials. Once you have a baseline, add a contingency fund of at least 15-20% for unexpected issues. During demolition, contractors often discover hidden problems like water damage, outdated wiring, or structural issues that require additional work.
A contingency fund isn't optional, it's insurance. Many homeowners who run out of money during a remodel do so because they didn't budget for surprises. Your contractor should help you identify potential cost drivers: custom cabinetry, high-end appliances, structural changes, and permit fees all add up quickly.
Select Materials, Finishes, and Appliances Early
Material selection affects both cost and timeline. Ordering custom cabinets, special finishes, or imported appliances can add weeks to your project. The earlier you decide, the sooner your contractor can place orders and keep the project on schedule.
For cabinetry, decide whether you want stock, semi-custom, or fully custom options. RTA Wholesalers offers custom color inset cabinets available in custom sizes at wholesale pricing, with assembled cabinets typically ready in just 5 weeks. You'll also choose your wood species, stain colors, or paint finish from options like Sherwin Williams colors.
For countertops, select your material (quartz, granite, laminate, butcher block) and color early. For appliances, decide on your brand, style, and features before the contractor starts work. Last-minute changes to these selections often delay installation and increase costs.
Document all material selections in writing with your contractor. Include product names, colors, finishes, and specifications. This prevents misunderstandings and ensures everyone is ordering the correct items.
3. Ask the Right Questions to Kitchen Remodeling Contractors
The questions you ask during contractor interviews reveal whether they understand your project and can execute it properly. These questions to ask kitchen remodeling contractors should cover experience, timeline, communication, and problem-solving.
Ask about their experience with projects similar to yours. How many kitchen remodels have they completed? Can they provide references from recent clients? Ask to see photos of completed work. A contractor with strong kitchen remodel experience will have a portfolio to show.
Ask about their subcontractors. Will they handle electrical and plumbing work themselves, or hire specialists? How do they vet subcontractors? Reliable contractors work with trusted subs and take responsibility for their work.
Ask how they handle change orders and unexpected issues. What's their process if something goes wrong? How do they communicate problems to homeowners? A contractor who has a clear process for handling surprises is more prepared than one who hasn't thought about it.
Ask about their payment schedule and timeline expectations. When do they expect to start and finish? What milestones trigger payments? A contractor who can articulate a clear timeline and payment structure is organized and professional.
4. Establish a Kitchen Remodel Payment Schedule Template
Your payment schedule protects both you and your contractor. It ties payments to completed work, ensuring progress before money changes hands. A typical kitchen remodel payment schedule template follows this pattern: initial deposit, progress payments tied to milestones, and final payment upon completion.
Many contractors request a deposit of 25-50% upfront to secure materials and schedule (aga.org). This is standard, but verify that the deposit isn't excessive. Progress payments typically occur as major phases finish: after framing and rough-ins, after cabinetry installation, after finishing work.
Never pay the full balance before the final walkthrough. Hold back at least 5-10% as a final payment contingent on satisfactory completion (aia.org). This gives you use to address punch list items before releasing final funds.
Document your payment schedule in the contractor agreement. Include specific dollar amounts, due dates tied to milestones, and what work must be completed before each payment. This prevents disputes and keeps the project moving smoothly.
5. Understand Best Practices for Kitchen Remodel Change Orders
Change orders are requests to modify the original scope of work. They're inevitable in remodels because hidden problems emerge during demolition, or you decide you want something different than originally planned. hire a luxury contractor.
Best practices for kitchen remodel change orders start with understanding what triggers one. A change order is needed whenever the scope, materials, timeline, or cost changes from the original contract. This includes upgrades, downgrades, design changes, or work discovered during demolition.
Your contractor should provide a written change order that details the change, the cost impact, and the timeline impact. Never approve a change order verbally, get it in writing. Review it carefully before signing. If the cost seems high, ask your contractor to break down the labor and material costs.
Establish a process for approving change orders before work starts. Will you approve changes up to a certain dollar amount without discussion, or do you want to review every change? How quickly does your contractor need approval to keep the project on schedule? A clear process prevents delays and frustration.
Track all change orders and their cumulative cost. It's easy to lose track of costs when changes happen incrementally. Keep a running total and compare it to your budget and contingency fund. If changes are eating into your contingency, you may need to pause and reassess priorities.
6. Review the Contractor Agreement and Lien Waivers
Your contractor agreement is your legal protection. It documents the scope of work, payment terms, timeline, and what happens if something goes wrong. Never start work without a signed agreement in place.
Key elements of a contractor agreement include a detailed scope of work, payment schedule, timeline with start and completion dates, warranty terms, and dispute resolution procedures. The agreement should specify what happens if the contractor doesn't finish on time or if work quality is unsatisfactory.
Lien waivers are documents that contractors and subcontractors sign to confirm they've been paid for their work. Before you pay the contractor's final invoice, request lien waivers from the contractor and all subcontractors. This prevents them from placing a lien on your home if they claim non-payment.
Your contractor should provide a final lien waiver before you release final payment. This confirms that all workers and suppliers have been paid and have no claim against your property. If your contractor refuses to provide lien waivers, that's a red flag, it may indicate they haven't paid their subs or suppliers.
Have an attorney review your contractor agreement before signing if you're uncomfortable with legal language. The cost of a brief legal review is small compared to the protection it provides.
7. Plan Your Timeline and Identify Contractor Red Flags
A realistic timeline keeps your remodel on track and minimizes disruption. Most kitchen remodels take 6-12 weeks from start to finish, depending on complexity (nahb.org). Custom cabinetry, structural changes, and permit delays can extend that timeline.
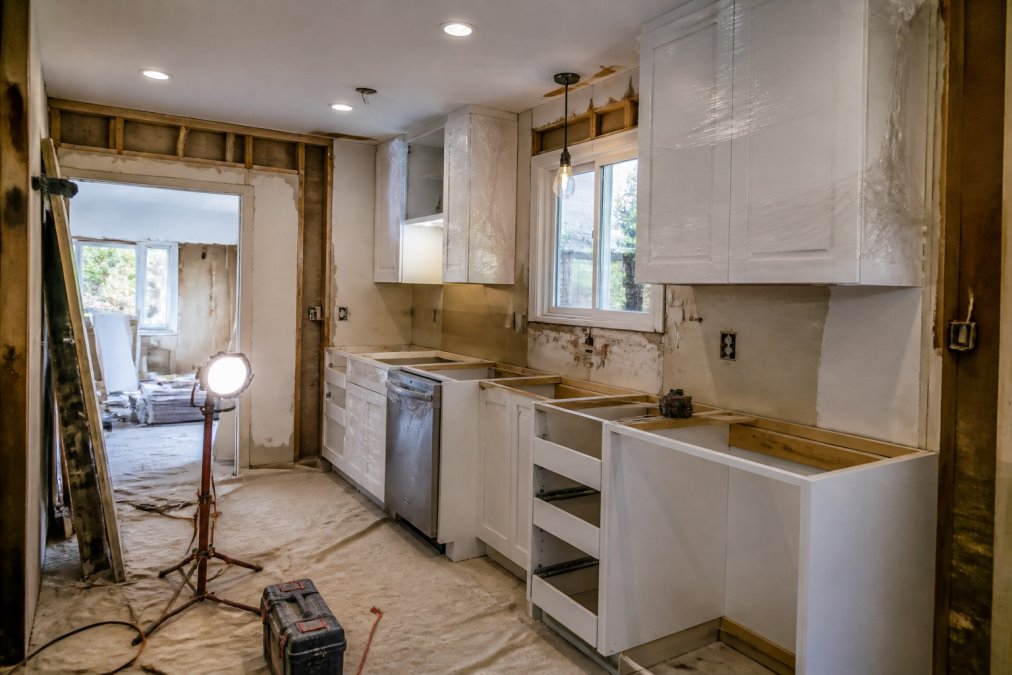
Your contractor should provide a detailed timeline that breaks the project into phases: demolition, rough-ins (electrical, plumbing, HVAC), cabinetry installation, countertop installation, flooring, painting, and final finishing. Each phase should have target dates and milestones.
Discuss what happens if the timeline slips. Will your contractor work weekends or add crew to catch up? What's their policy on delays caused by weather, permit issues, or material delays? Understanding their approach to timeline management prevents surprises.
Prepare for a Temporary Kitchen Setup
During your remodel, your kitchen will be unusable for days or weeks. Plan ahead for how you'll handle meals, dishes, and food storage during this time.
Set up a temporary kitchen in another part of your home. A folding table, portable cooktop, cooler, and paper plates can get you through the renovation. Stock up on easy foods that don't require cooking: sandwiches, salads, takeout. Many homeowners eat out more during a remodel than they'd like, budget for that.
Discuss with your contractor how they'll manage dust and debris. Will they seal off the kitchen to contain mess? How often will they clean? A professional contractor takes steps to minimize disruption to the rest of your home.
Watch for Warning Signs in Contractor Behavior
Certain contractor behaviors signal problems ahead. A contractor who avoids putting things in writing, who pressures you to decide quickly, or who quotes significantly lower than other contractors may be cutting corners.
Red flags include: refusing to provide references, unwilling to sign a contract, demanding full payment upfront, no license or insurance, poor communication, and showing up to meetings unprepared or late. A contractor who exhibits these behaviors is likely to cause problems during your remodel.
Trust your instincts. If a contractor makes you uncomfortable, move on. You'll be working with this person for weeks. A contractor who is professional, communicative, and organized from the first meeting is more likely to deliver a successful remodel.
Conduct a Final Walkthrough and Punch List
Before you pay the final invoice, conduct a thorough final walkthrough with your contractor. Inspect every cabinet, appliance, countertop, and fixture. Test all electrical outlets, light switches, and plumbing fixtures. Open and close cabinet doors and drawers to ensure they operate smoothly.
Create a punch list of any items that aren't finished or don't meet your expectations. This might include touch-up painting, caulking gaps, adjusting cabinet doors, or replacing a damaged tile. Document everything in writing with photos if needed.
Your contractor should complete all punch list items before you release final payment. If they're unwilling to address punch list items, that's a problem. The final walkthrough is your last opportunity to ensure the work meets your expectations.
Once you're satisfied that all work is complete and meets your standards, release final payment and request the final lien waiver. Keep copies of all contracts, change orders, and lien waivers for your records. You'll need these for warranty claims or if issues arise later.
Planning a kitchen remodel requires careful contractor selection and clear communication from start to finish. By following this kitchen remodel contractor checklist, you protect your investment and set the stage for a successful renovation. RTA Wholesalers supports this process with custom color inset cabinetry available in custom sizes at wholesale pricing, plus a free kitchen design service to help ensure your project is planned perfectly. When you're ready to select your cabinetry, our team can guide you through options and specifications that fit your timeline and budget.
Frequently Asked Questions
Q: What should I include in my kitchen remodeling checklist?
A: Your kitchen remodel contractor checklist must cover seven essentials: verifying licenses and insurance, defining scope and budget, asking contractor questions, establishing payment schedules with milestones, understanding change order procedures, reviewing contracts and lien waivers, and planning timelines. Each item protects your investment and prevents costly delays. Start with licensing verification, then move through material selection, contractor vetting, and payment terms before signing any agreement.
Q: How do I verify a kitchen contractor's license and insurance?
A: Request your contractor's license number and verify it directly with your state's licensing board or contractor registry. Ask for proof of general liability insurance and workers' compensation coverage. Contact the insurance provider to confirm policies are active and have adequate limits (typically $1 million general liability minimum). Request a Certificate of Insurance naming you as additional insured. Never start work without documented proof, this protects you from liability if someone is injured on site.
Q: What is a standard kitchen remodel payment schedule template?
A: A standard kitchen remodel payment schedule typically follows this structure: 25-30% deposit upon signing the contract, 25-30% when materials arrive or work begins, 25-30% at mid-project completion (framing, electrical, plumbing rough-in), and final 10-20% upon project completion and final walkthrough. Never pay the full amount upfront. Use a kitchen remodel payment schedule template that ties payments to completion milestones, not just time. This ensures the contractor stays motivated and you have recourse if work quality drops.
Q: What are best practices for kitchen remodel change orders?
A: Best practices for kitchen remodel change orders include: require all changes in writing with detailed descriptions, pricing, and timeline impact before work starts; establish a change order limit (e.g., no single change exceeds $500 without approval); require contractor to explain why the change is necessary; get written quotes for materials and labor; document approval signatures from both parties; and maintain a running log of all changes. This prevents scope creep and unexpected costs. Many contractors use change orders to inflate final bills, so review each one carefully.
Q: What red flags should I watch for in a kitchen contractor?
A: Red flags include: demanding full payment upfront, refusing to provide references or license information, lacking written estimates or contracts, offering prices significantly below market rates, poor communication or slow response times, no insurance or bonding, unwillingness to discuss timelines or change orders, and paying workers in cash only. Contractors who pressure you to decide quickly, avoid written agreements, or seem disorganized are high-risk. Trust your instincts, legitimate contractors welcome scrutiny and documentation.


